17
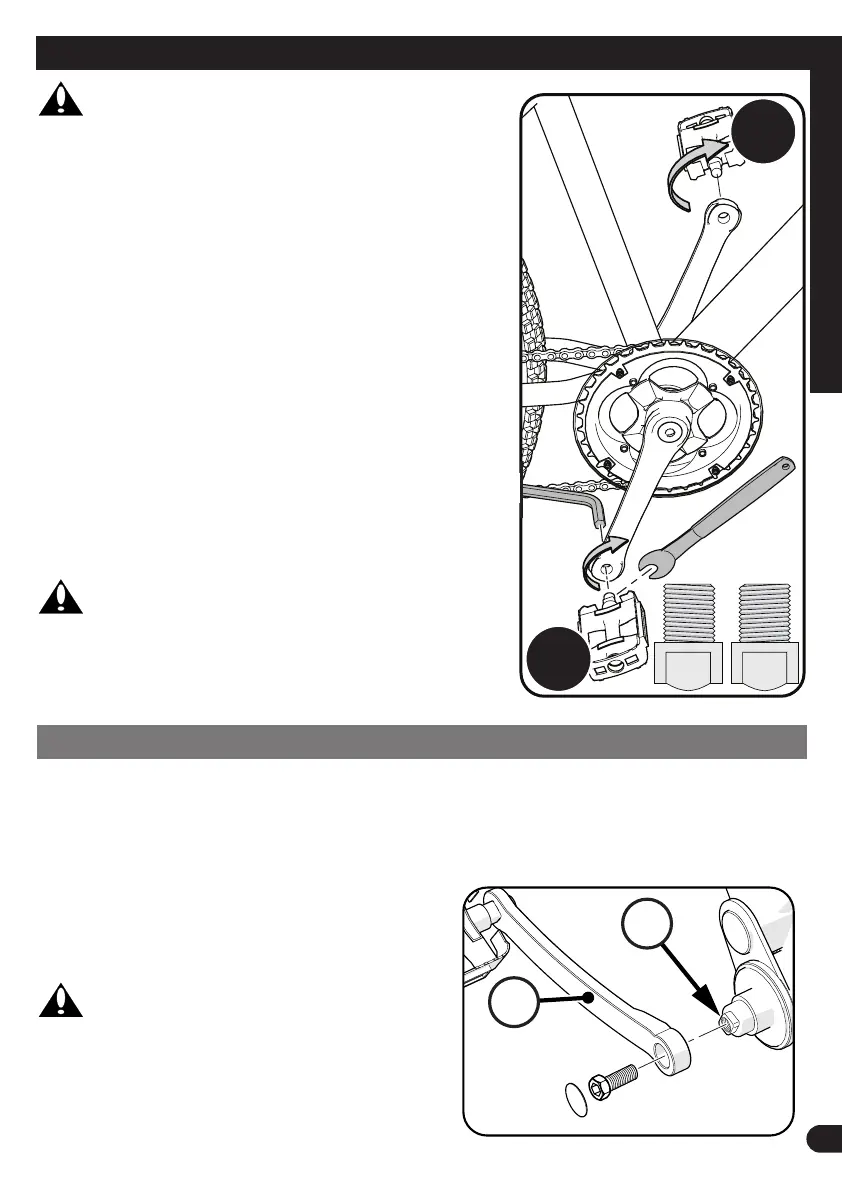
Pedal Installation
CAUTION: There is a RIGHT pedal marked
R
and
a LEFT pedal marked
L
.
NOTE: A Pedal Wrench is preferred for attaching Pedals.
A thin open-end
wrench can also be used.
• The pedal marked
R
has right-hand threads. Tighten
it in a clockwise direction.
• The pedal marked
L
has left-hand threads. Tighten
it in a counterclockwise direction (anti-clockwise).
• Turn the right pedal marked
R
into the right side of
the crank arm, and the left pedal marked
L
into the
left side of the crank arm.
Tighten the pedals:
• Make sure the threads of each pedal are fully into the
crank arm.
WARNING: Ensure pedals are secure in
crank arms so they will not loosen. Periodically check
tightness.
L
R
L R
Three-Piece Cranks (various models)
Maintenance: Both Crank Arms
A
were tightened to the spindle
B
at the factory. After
riding the bicycle the rst few times, make sure the crank arms have not loosened. If either
crank arm has loosened during this “break-in” period, re-tighten or have it tightened by a
bicycle service shop.
Frequently check the tightness of the crank arms.
If loose, tighten or have them tightened by a
bicycle service shop.
WARNING: If you ride the bicycle
with a loose crank arm, the crank arm may fall o .
The spindle may also damage the crank arm.
A
B