Underwater Gear
6.5
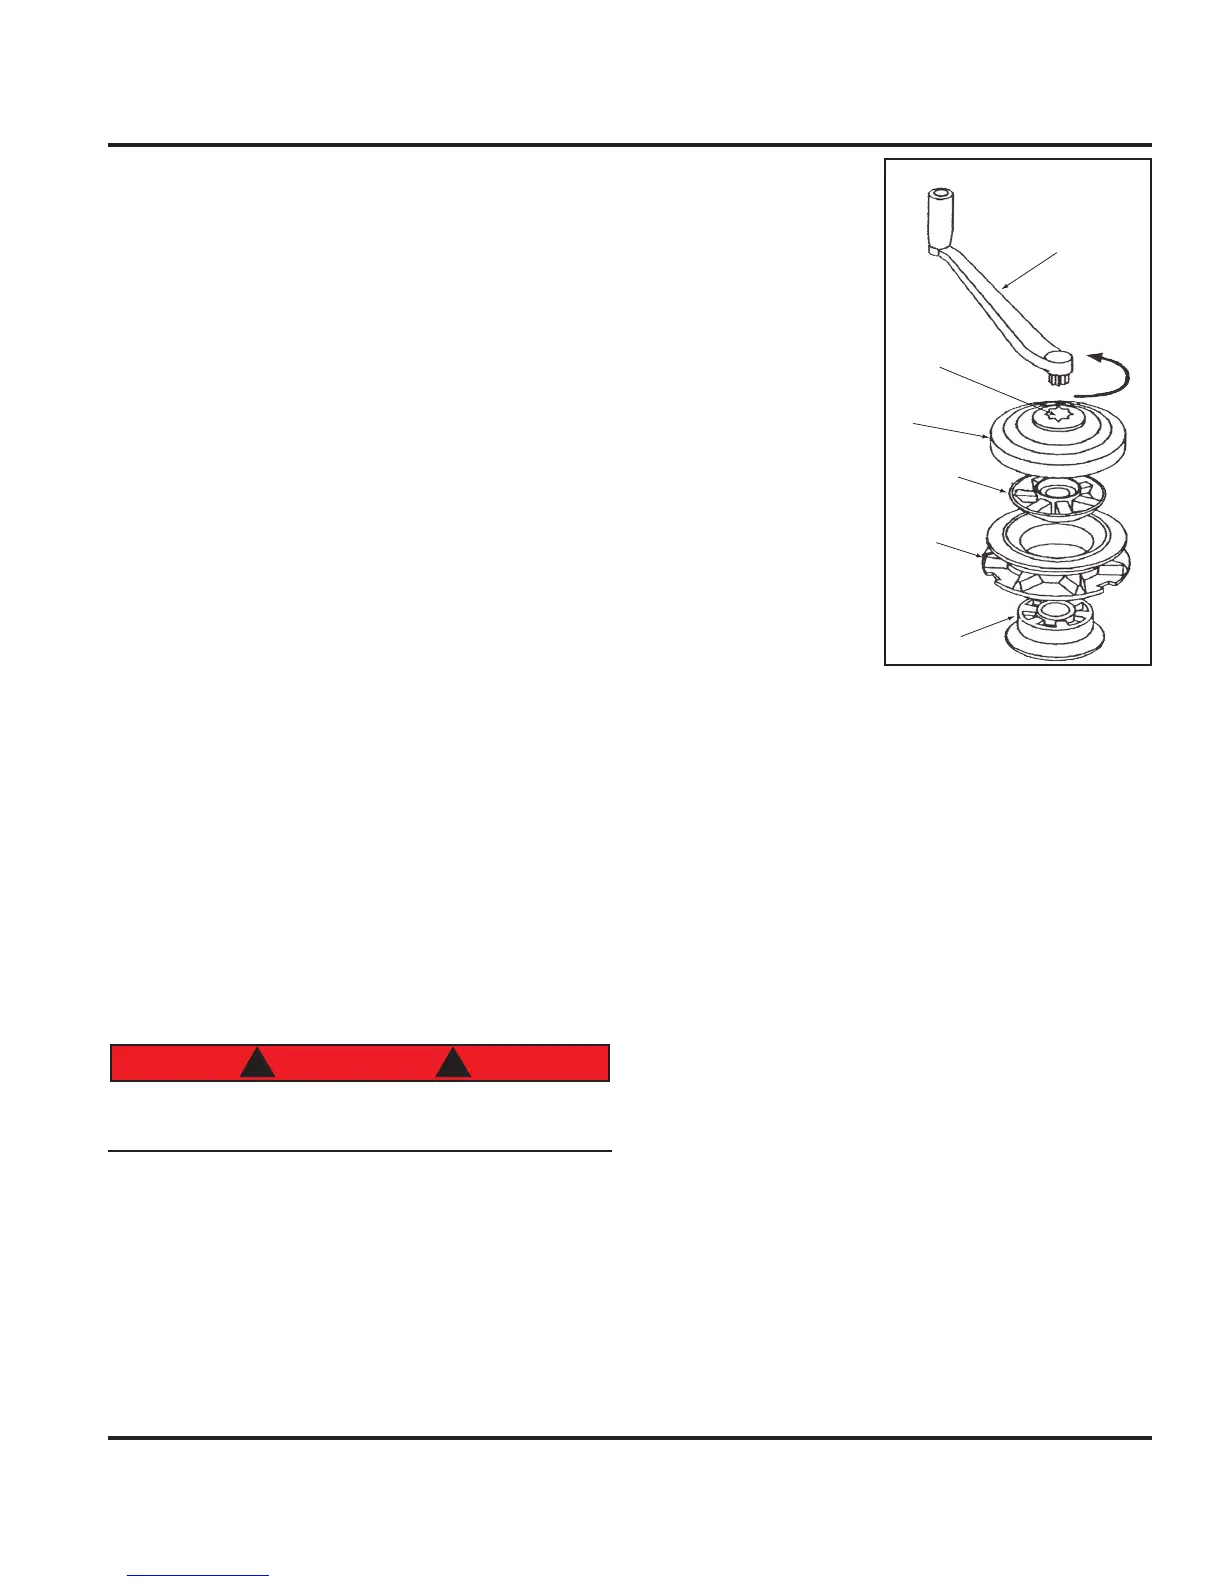
To tighten the clutch:
With the anchor in the stowed position, tighten the
windlass clutch by inserting the emergency handle in
the clutch nut. (See fig 6.7) and turn clockwise.
To Operate Manually:
Make sure that the safety hook is removed from the
anchor chain.
Insert the emergency handle into the clutch nut.
Turn handle clockwise to retrieve anchor.
To operate from the bow:
Switch the power on at the controls
Remove the safety hook
Lift the protective cap from the foot switch and
depress the up or down switch for the
desired result.
To operate from the helm:
Make sure that the safety hook is removed from the
anchor chain
Turn the windlass switch on
Push the bottom of the windlass control switch (locat-
ed on the helm) to raise the anchor. Push the top of the
switch to lower the anchor.
Maintenance:
Make sure that the power is off before performing
any maintenance or work on the windlass.
Periodically check the motor and control box electrical
connections, remove any residue and cover connections
with a small coating of grease.
It is recommended that you, once a year, disassemble
the windlass and remove residue buildup. To perform
this maintenance follow all safety procedures and com-
plete the following:
•
•
•
•
•
•
•
•
•
Using the emergency
handle, unscrew the nut
by turning the handle
counterclockwise.
Remove the drum,
upper cone, chain wheel,
and lower cone.
Wash down with water
to remove any residue
Coat surfaces with a
light film of lubricant
Reassemble the unit
and tighten the clutch by
turning the handle clock-
wise.
Note: Refer to your Owner’s / Operator’s Manual in your own-
er’s kit for detailed information about your windlass.
6.4.2 Anchor
Your Hunter is equipped with a Danforth type anchor
well and drain and a Danforth type anchor as standard
equipment. The anchor is selected to suit the size and
weight of your boat under normal anchoring condi-
tions, and is most effective in muddy or sandy bottoms.
Check out the Getting underway Chapter in this manual,
chapter 12 for more information about anchoring your boat.
Fig. 6.8 will show you the details of the windlass and
anchoring system in illustrated detail, showing the plan
view.
•
•
•
•
•
•
•
•
•
Emergency Handle
Clutch Nut
Drum
Upper Cone
Chain Pulley
Lower Cone
Windlass Profile Illustration
Fig. 6.7