MINI-CLIK
®
RAIN SENSOR
INSTALLATION CARD
Introduction
In most installations, the Mini-Clik acts as a switch that breaks the circuit to
an irrigation system's solenoid valves in response to rain. This allows the
timer to advance as scheduled, but keeps the valves from opening the
water ow. Once the Mini-Clik has dried suciently, the switch closes again
to allow normal operation.
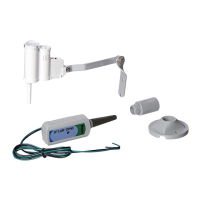
The Mini-Clik has 25' (8 m) of cable attached to it. The cable terminates
with blue leads. These leads will be wired to the SEN terminals or SEN and
SEN COM terminals of the controller. The order in which they are wired
does not matter (Figure 1).
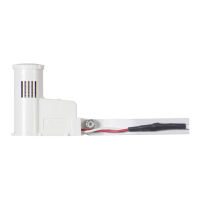
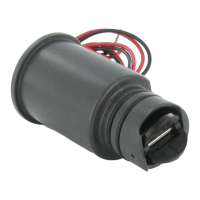
For the conduit model, Mini-Clik-C: This rain sensor unit is the same as the
standard model, except there is no aluminum mounting bracket and a ⁄"
threaded cap that allows for electrical conduit to totally enclose the wires
has been added. Unless local code states otherwise, plumbing-grade PVC
pipe can be used, as well as electrical-grade conduit.
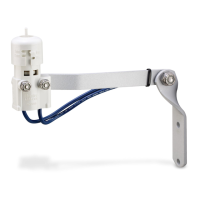
Mounting
Standard Model
Using the screws provided, mount the
Mini-Clik on any surface where it will be
exposed to unobstructed rainfall, but not in
the path of sprinkler spray. The switch-housing
portion must be upright (Figure 2), but the
swivel bracket can be moved for mounting on
any angled surface. Loosen the locknut and
screw before swiveling the bracket, and then
re-tighten.
For model Mini-Clik-C: The conduit acts as the
mounting support for the unit. Therefore, place
and mount the conduit to allow for the desired
sensor location as described in the main
instructions for the standard model. Be sure to
support the conduit suciently along its various lengths.
Helpful Hints for Mounting
A. When looking for a suitable location (such as on the side of a building
or post), the closer the Mini-Clik is to the controller, the shorter the
wire run will be. This will minimize the chance for wire breaks.
B. The ideal location for mounting is not always the most practical
location. In the case where a compromise must exist (such as a low
location on a side wall rather than a preferred higher location), note
that the Mini-Clik will still work because it will always receive some
rainfall — it just will not be as accurate in its gauging as it could be.
C. As described in the “Operation” section of this manual, “reset
rate” refers to the amount of time it takes the Mini-Clik to dry
out suciently for the sprinkler system to be allowed to come
back on. The mounting location will aect this rate and must
be taken into consideration should extreme conditions exist.
For example, mounting the Mini-Clik on a very sunny, southern end
of a building may cause the Mini-Clik to dry out sooner than desired.
Similarly, mounting on the northern end of a building with constant
shade may keep the Mini-Clik from drying soon enough.
Once the Mini-Clik is mounted, run the wire to the controller. Fasten it
every few feet with wire clips or staples for best results. If an extension
to the wire provided is needed, use the following table to determine the
minimum wire gauge needed:
If the extension needed is:
use:
Wiring to Your Irrigation System
IMPORTANT: The standard model Mini-Clik is sold and designed for
hooking up to 24-volt irrigation controllers only. For wiring to 110- or
220-volt irrigation controllers, consult your distributor or the
factory. All wiring must conform to National Electrical Code or
applicable local codes.
For model Mini-Clik-C: WARNING! This unit is designed to be installed
in conjunction with 24 VAC circuits only. Do not use with 110 or 220 VAC
circuits.
Other Controllers
The two most common situations are shown below. For non-standard
wiring situations, consult your distributor or request our non-standard
wiring information packet.
X-CORE
®
PRO-C
®
HCC
HC
PRO-HC
ACC2
Figure 1
Figure 2
ACCI-CORE
®
SEN
SEN-1
SEN COM
S1 S1
SEN
SEN
+
–
SEN1
SEN1
SEN
SEN
ICC2
24V
24V
SENSOR 1
COMMON
SEN C
SEN 1
+ SEN1 SEN1
–
0–100' (15–30 m)
18 AWG (1 mm)
>100' (>30 m)
16 AWG (1.3 mm)