INSTALLATION
9
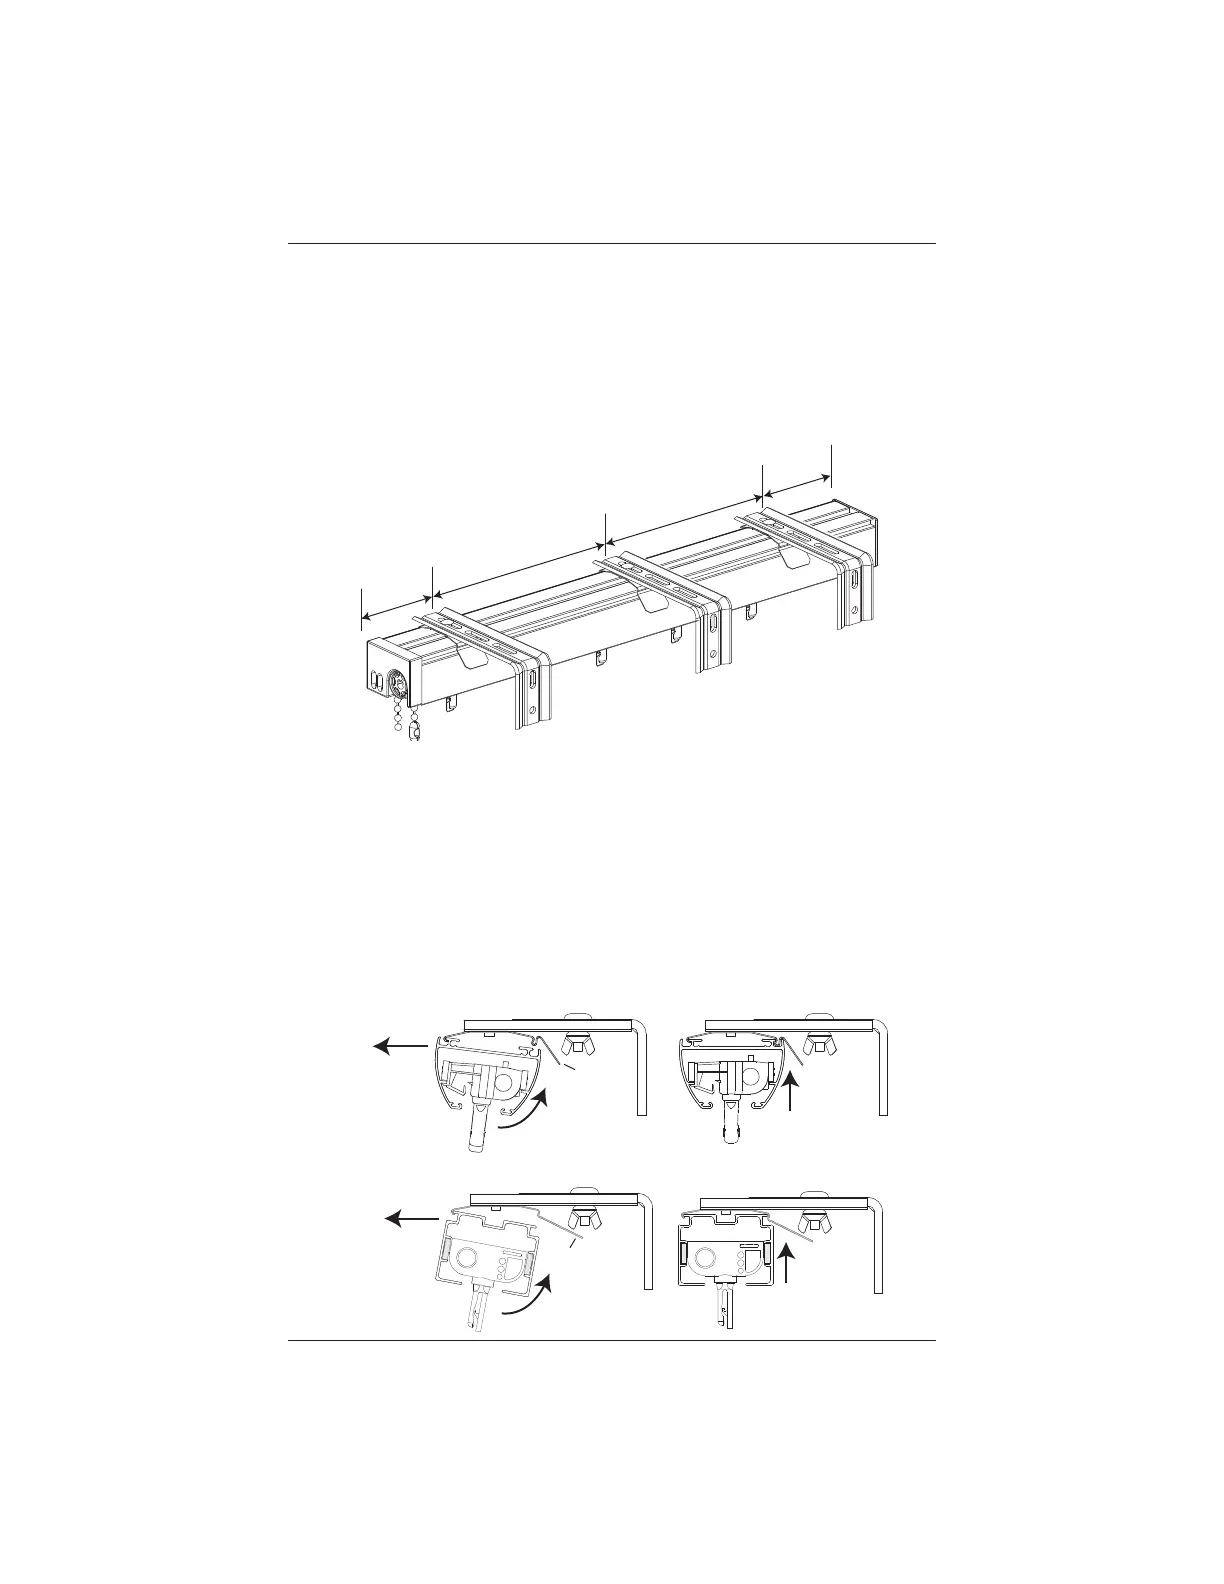
Mount the Installation Brackets — Outside Mount
■ Mark 2" – 4" in from each jamb.
➤ If more than two “L” installation brackets came with your order, space additional
bracket(s) evenly in 24" – 30" intervals between the end brackets and mark their
location. Mount into wood whenever possible.
➤ Adjust mounting clips to allow
1
/
2
" clearance between the vane and the wall (i.e. 2
1
/
4
"
for 3
1
/
2
" vane).
■ Drill the screw holes using a
3
∕
32
" drill bit.
IMPORTANT: Use drywall anchors when mounting into drywall. Drywall anchors are not
provided.
■ Attach the brackets using the screws provided.
■ Center headrail underneath mounting clips.
■ Tilt the headrail and insert it into the front edge of the mounting clip. Pull and roll the
headrail up toward the rear of the blind and snap into place.
2 – 4"
2 – 4"
30" Maximum
30" Maximum
Tilt and
Pull Forward
Tilt and
Pull Forward
Roll Back
Roll Back
Rear
Tab
Paramount
®
Headrail
PermaTrak
®
and PermAlign
®
Headrail
Push Up
Push Up
Rear
Tab