EasyManuals Logo

Huvitz HLM-1 Service Manual

Huvitz HLM-1
52 pages
To Next Page IconTo Next Page
To Previous Page IconTo Previous Page
Page #22 background imageLoading...
Page #22 background image
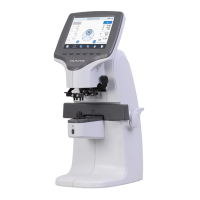
Auto Lensmeter HLM-1
21
No
Component
Removal method
1
B6_COVER-HANDLE-CAP
- First, extract [1] and remove 3 screws on [3].
- Next, extract [4], remove 4 screws on [14] [15] and 6
screws on bottom. Separate [14] [15].
- Disconnect all Cables on Main Board.
- Next, remove 3 screws and separate [9].
- Next, extract [13], remove 3 serews and separate [12].
- Next, remove 4 screws and separate [11].
- Be careful that you never scratch on the surface of
'Cover' while assembling or disassembling.
- Assembly is the reverse procedure of disassembly
2
MACHINE-SCREW-PHW-M3-L6
3
B6_COVER-PD-BAR-HANDLE
4
B6_CHART-BOLT-CAP
5
SEMS SCREW (3*10)
6
ROUND HEAD TAPPING SCREW
Type-2 (3.0*8)
7
MSHH-WITH-FLANGE-M3-5
8
WRENCH BOLT (3*10)
9
B6_LCD-ASSY
10
B6_FRAME-ASSY
11
B6_BACK-BONE-ASSY
12
B6_UNDER-COVER-ASSY
13
B6_BONE-TOP-COVER
14
B6_SIDE-COVER-L-ASSY
15
B6_SIDE-COVER-R

Other manuals for Huvitz HLM-1

Questions and Answers:

Question and Answer IconNeed help?

Do you have a question about the Huvitz HLM-1 and is the answer not in the manual?

Huvitz HLM-1 Specifications

General IconGeneral
BrandHuvitz
ModelHLM-1
CategoryMeasuring Instruments
LanguageEnglish

Related product manuals