Your micRO75 has some simple plumbing that consists of quick connect push in
fittings and food grade tubing.
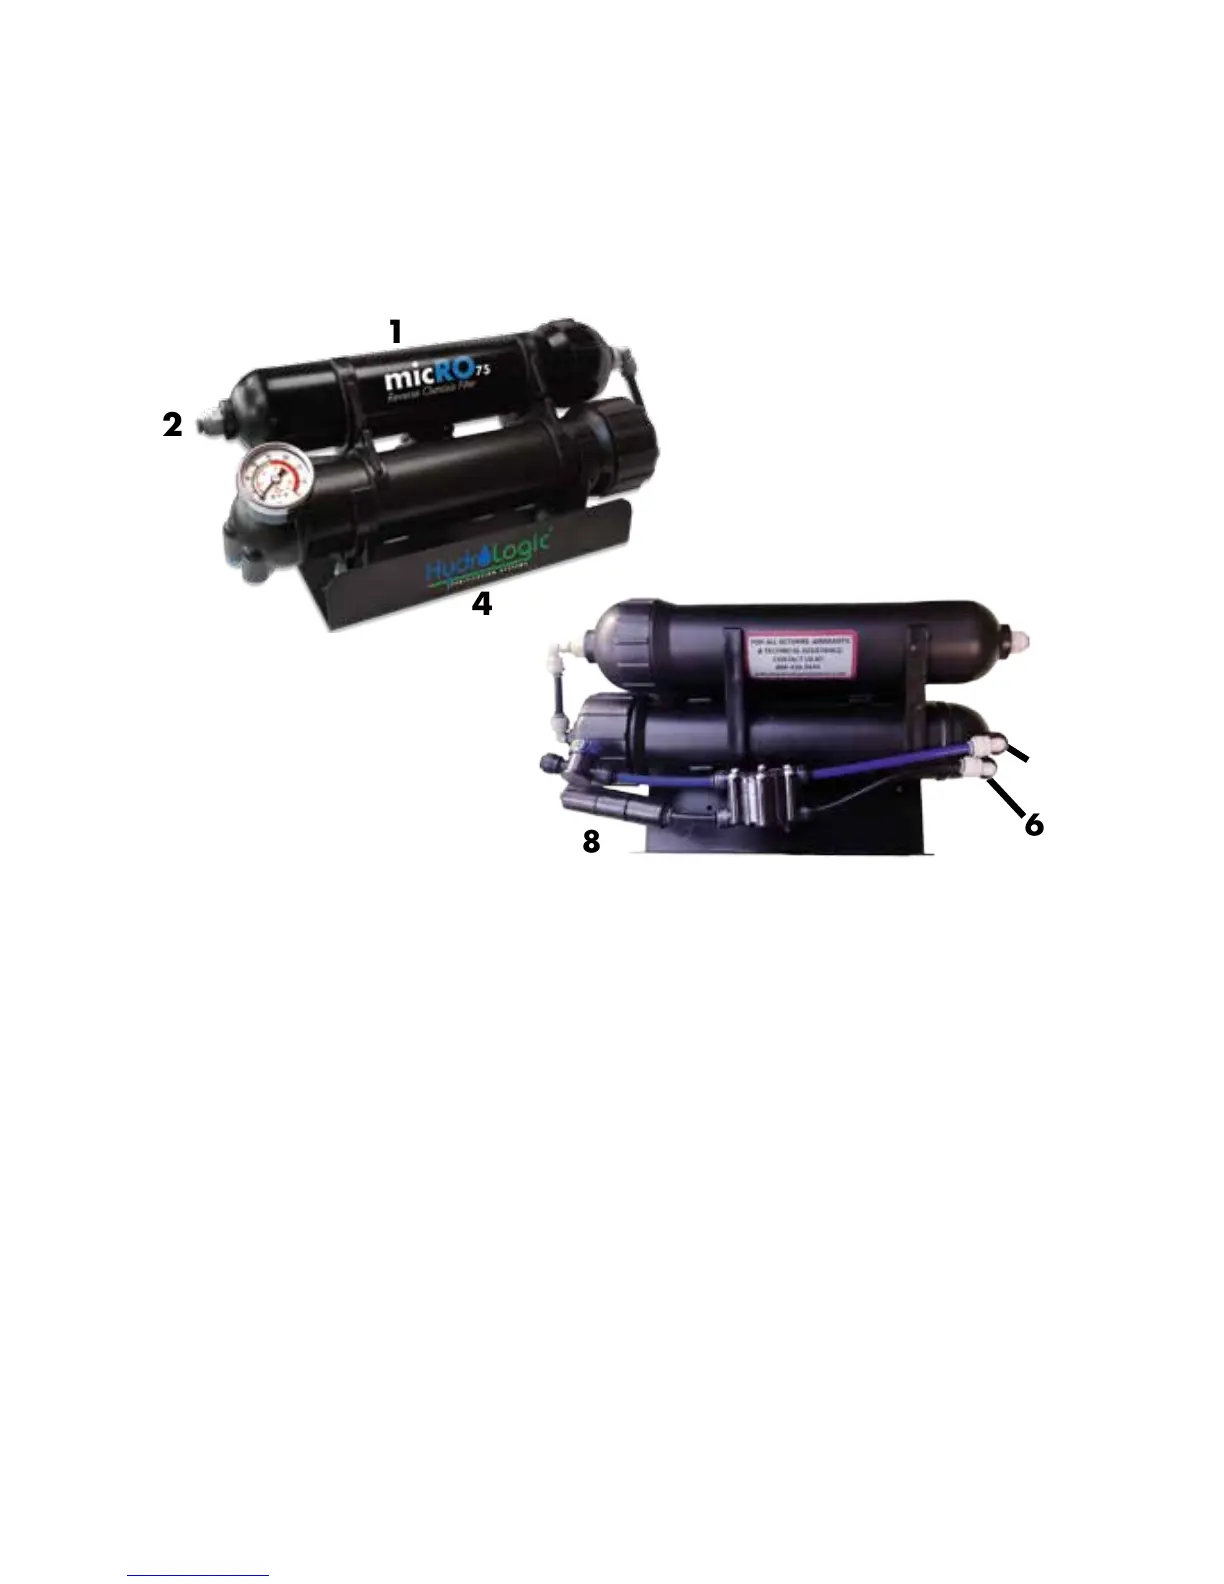
Insert tubing into proper fittings. The White inlet tubing (with garden hose con-
nector) goes into the right side of the top canister (#2, above). The Blue tubing
goes into the Product Water fitting, immediately after the shut off valve. The Black
Drain tubing fits in the waste water line, immediately after the flow restrictor.
Note: The 1/4” Inline Shut-Off Valve can be installed anywhere on the Blue RO
tubing. This allows you to shut down the entire system, including the drain line.
Make sure you make a clean, square cut in the tubing. Use sharp scissors or a
blade.
Thread the garden hose connector onto an appropriate source (40 psi, minimum).
Your dealer has options that allow connections to your other existing plumbing.
Flush the system for 30-45 minutes to remove the food grade preservative that
the membrane comes shipped with. You are now ready to use your system.
1
3
9
2
4
5. Blue product water line
6. Black waste water line
7. Automatic shutoff valve
8. Flow-restrictor
9. 1/4” inline shut-off valve
1. Carbon/KDF Pre-filter housing
2. Tap water inlet
3. RO membrane housing
4. Wall/floor mount bracket
micRO75
®
Setup:
3
5
6
7
8