SOLUTION: Turn Auto-Off-On switch to OFF.
III. PROBLEM: Controller does not turn ON in manual mode.
CAUSE: No power to controller.
SOLUTION: Be sure that controller is properly wired as per Electrical Circuit and
connection Diagram.
SOLUTION: Check circuit breaker.
IV. PROBLEM: Controller fails to operate properly in automatic (AUTO) mode.
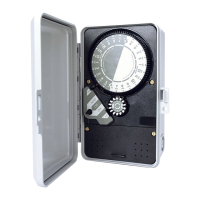
CAUSE: Daywheel not properly programmed.
SOLUTION: Check setting and Operation Instructions for programming day wheel.
CAUSE: Auto-Off-On knob not set properly.
SOLUTION: Turn Auto-Off-On knob to Auto position.
CAUSE: Switch needs adjustment.
SOLUTION: Remove controller face from enclosure after disconnecting power to
unit. The switch adjustment Screw is located on the switch cover. A clicking of the
switch should be heard when the switch Arm is slowly pulled back at the halfway
point between the edge of the time dial and the far edge of the timing pin. With a
small screwdriver tighten the screw clockwise to cause the switch to Activate
sooner. If switch is activating sooner than desired, turn adjustment screw
counterclockwise slightly.
CAUSE: Switch contacts or relay worn out.
SOLUTION: Replace switch or relay (see parts list), ensuring controller is properly
rewired. (Note: A nut driver tool is available to assist in removing black retainer
nuts.)
Should the above troubleshooting tips fail to correct the problem you may be
having, please consult your local K-Rain distributor for service or replacement.
INSTALLATION INSTRUCTIONS
Models 2510, 2514, and 2520
Rainswitch Ready Controllers
Features:
z
Prewired for easy connection of "Rainswitch."
z
Allows for manual override of Rainswitch from controller face.
z
Can be used with most brands of normally closed Rainswitchs.*
Pa
e 7 of 9