INTEGRAL SIDESHIFT CARRIAGE
Remove
1.
Lower carriage completely. Remove forks. See
Fork Replacement for removal procedures.
2.
Remove four capscrews and load backrest from
carriage. See Figure 9.
WARNING
Before disconnecting the hydraulic hoses, relieve
the pressure in the hydraulic system. Serious in-
jury can occur if pressure is not relieved from hy-
draulic system prior to disconnecting hydraulic
hoses.
3.
Relieve hydraulic pressure to the sideshift cyl-
inder by moving sideshift lever in both direc-
tions several times.
WARNING
Always wear the proper protective equipment in-
cluding eye protection and petroleum-resistant
gloves when handling hydraulic oil. Thoroughly
wash oil from exposed areas of skin as soon as
possible.
The hydraulic oil is hot at normal operating tem-
peratures. Be careful when draining the oil.
WARNING
Never check for leaks by putting hands on hy-
draulic lines or components under pressure. Hy-
draulic oil under pressure can be injected into the
skin.
NOTE: Tag hydraulic lines and fittings prior to dis-
connecting to aid in connecting during installation.
4.
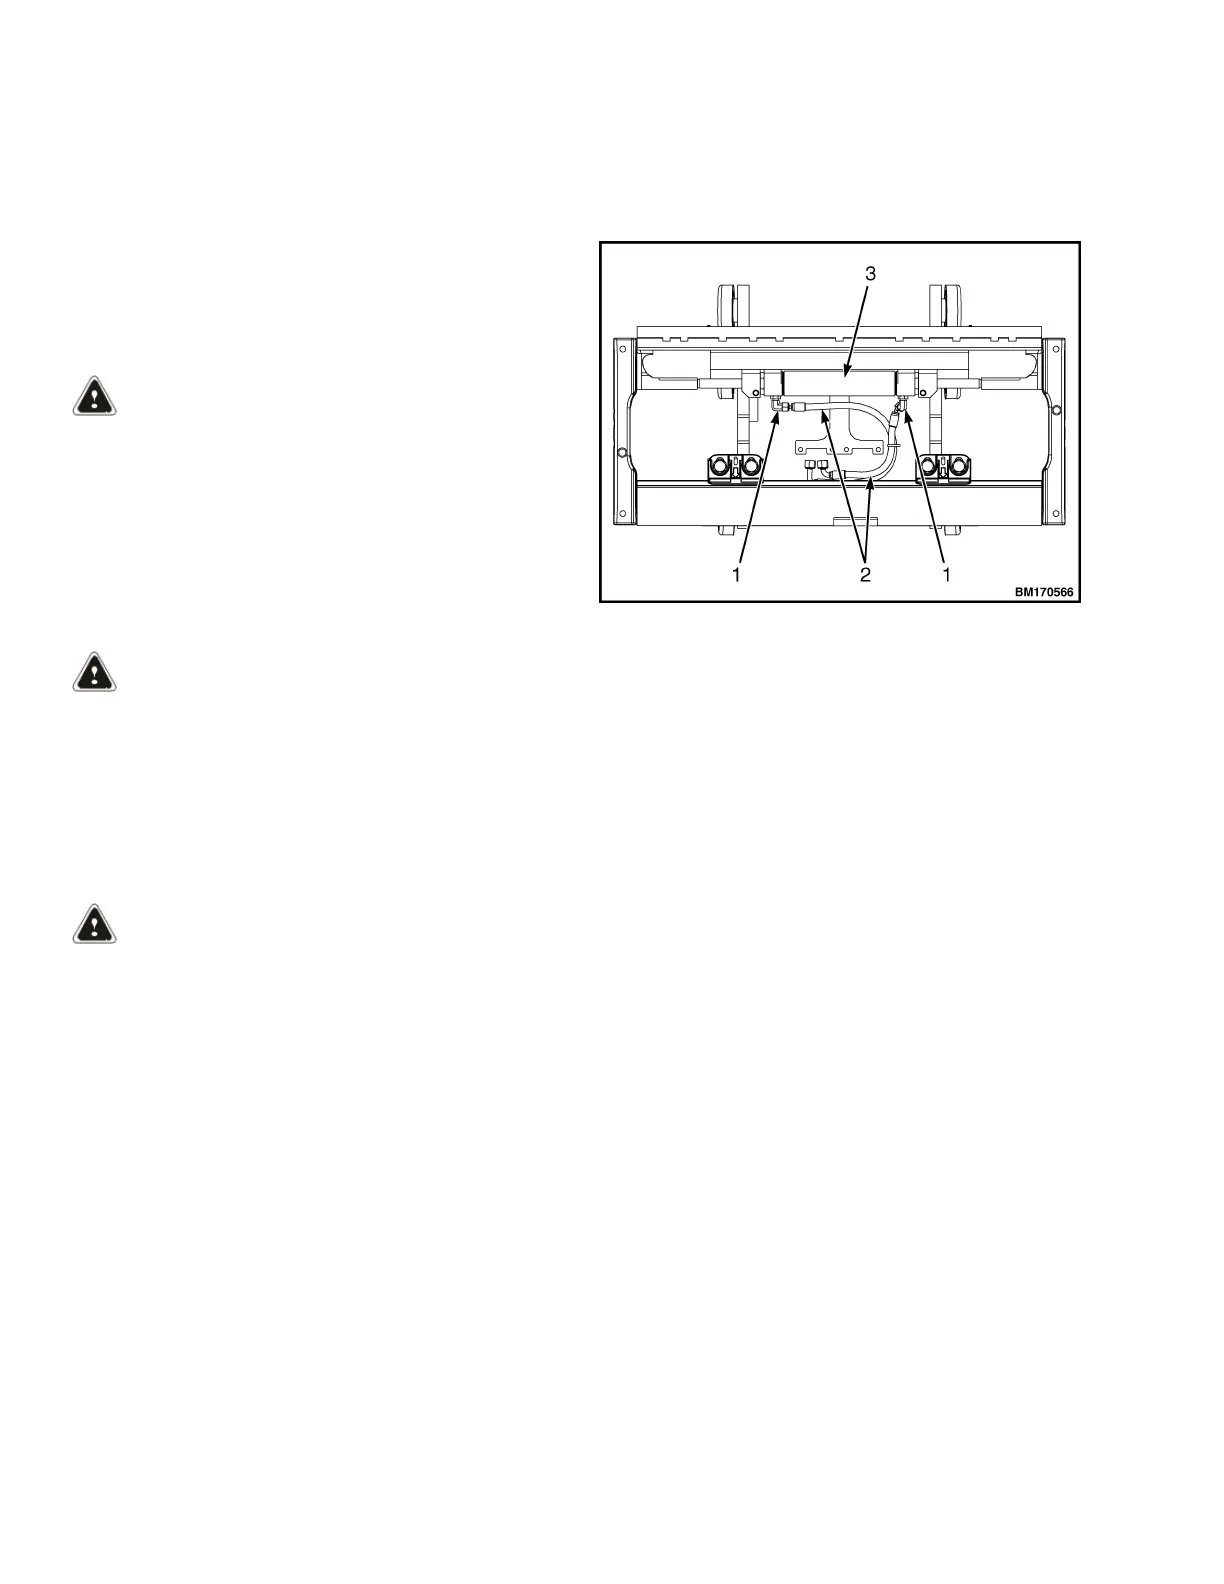
Disconnect hydraulic hoses from sideshift cylin-
der. Put caps and plugs on open lines and cylin-
der ports. See Figure 11.
1. HOSE FITTINGS
2. HOSES
3. INTEGRAL SIDESHIFT CYLINDER
Figure 11. Integral Sideshift Carriage Hydraulic
Hose Connections
5.
Remove lower mounting hooks by removing
four capscrews securing hooks. See Figure 12.
6.
Remove integral sideshift cylinder from car-
riage. See the Cylinder Repair manual listed
in the General section of this manual for proce-
dures.
7.
Insert a M12 x 1.75 lifting eye in hole on top of
outer frame. Use a crane with a capacity of at
least 78 kg (172 lb) to lift outer frame away
from inner frame. Lay outer frame flat on a pal-
let or work bench. See Figure 13.
Carriages Repair, Two-Stage LFL Mast 4000 SRM 1999
14
 Loading...