3
Installation Guide
Proper installation can ensure optimum performance and
reliability of the repeater. Therefore, be sure to read the
following instructions before installation.
Installation Requirements
Installation Environment
The repeater must be installed in a dry and well-
ventilated place with ambient temperature of
-3
0℃
~+60
℃
and relative humidity of less than 95%.
Installation Location
The repeater can be installed in a rack, bracket, cabinet
or on a desk.
Installation Tools
Tools required for installing the repeater include a cross
head screwdriver, a torx screwdriver and a spanner.
Note: Please refer to Safety Information
Booklet for more information.
Before Installation
Voltage Check
Please check whether the voltage of DC power or battery
meets the repeater specications.
Product Check
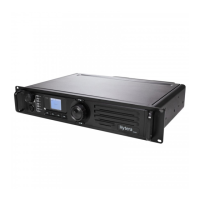
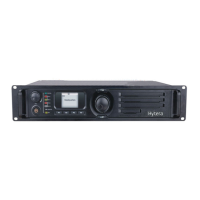
Please check whether the repeater works properly by
observing the 8 LEDs located in the front panel.
Parameter Conguration
When the repeater proves to work normally, configure
appropriate parameters according to your actual
requirements. And then you can proceed with on-site
installation.
Installation Steps
Install the repeater as follows:
1. Install the repeater at a proper location;
2. Attach all necessary accessories;
3. Ground the repeater through the Ground Screw
located on the rear panel.
Installing the Duplexer
If the repeater needs to work with a duplexer, you should
implement the following operations before installation.
1. Loosen the three screws on the bracket with a cross
head screwdriver. See the gure below.
2. Install the duplexer onto the bracket.
Be sure to observe the specications of two antenna
connectors on the duplexer, to determine which
one should be connected to the transmitter. The
connector connecting the transmitter should be
close to the PA module to reduce RF loss, as shown
below:
3. Loosen the screw at the back of the top cover, and
then pull the top cover to remove it.
4. Loosen the 6 screws locking the PA heat sink,
remove all power, data and RF cables from the PA,
and nally remove the PA heat sink. See the gure
below.
5. Connect the RF cable. See the gure below.
6. Install the duplexer to the repeater.
After the duplexer is mounted properly, fasten it with
the 2 screws inside the housing and on the side
respectively.
7. Then attach the PA heat sink and connect all cables.
8. Close the repeater cover.
RF Cable
Data Cable
Power Cord