LITHIUM SERIES® II ELECTRIC TORQUE TOOL USER INTERFACE GUIDE
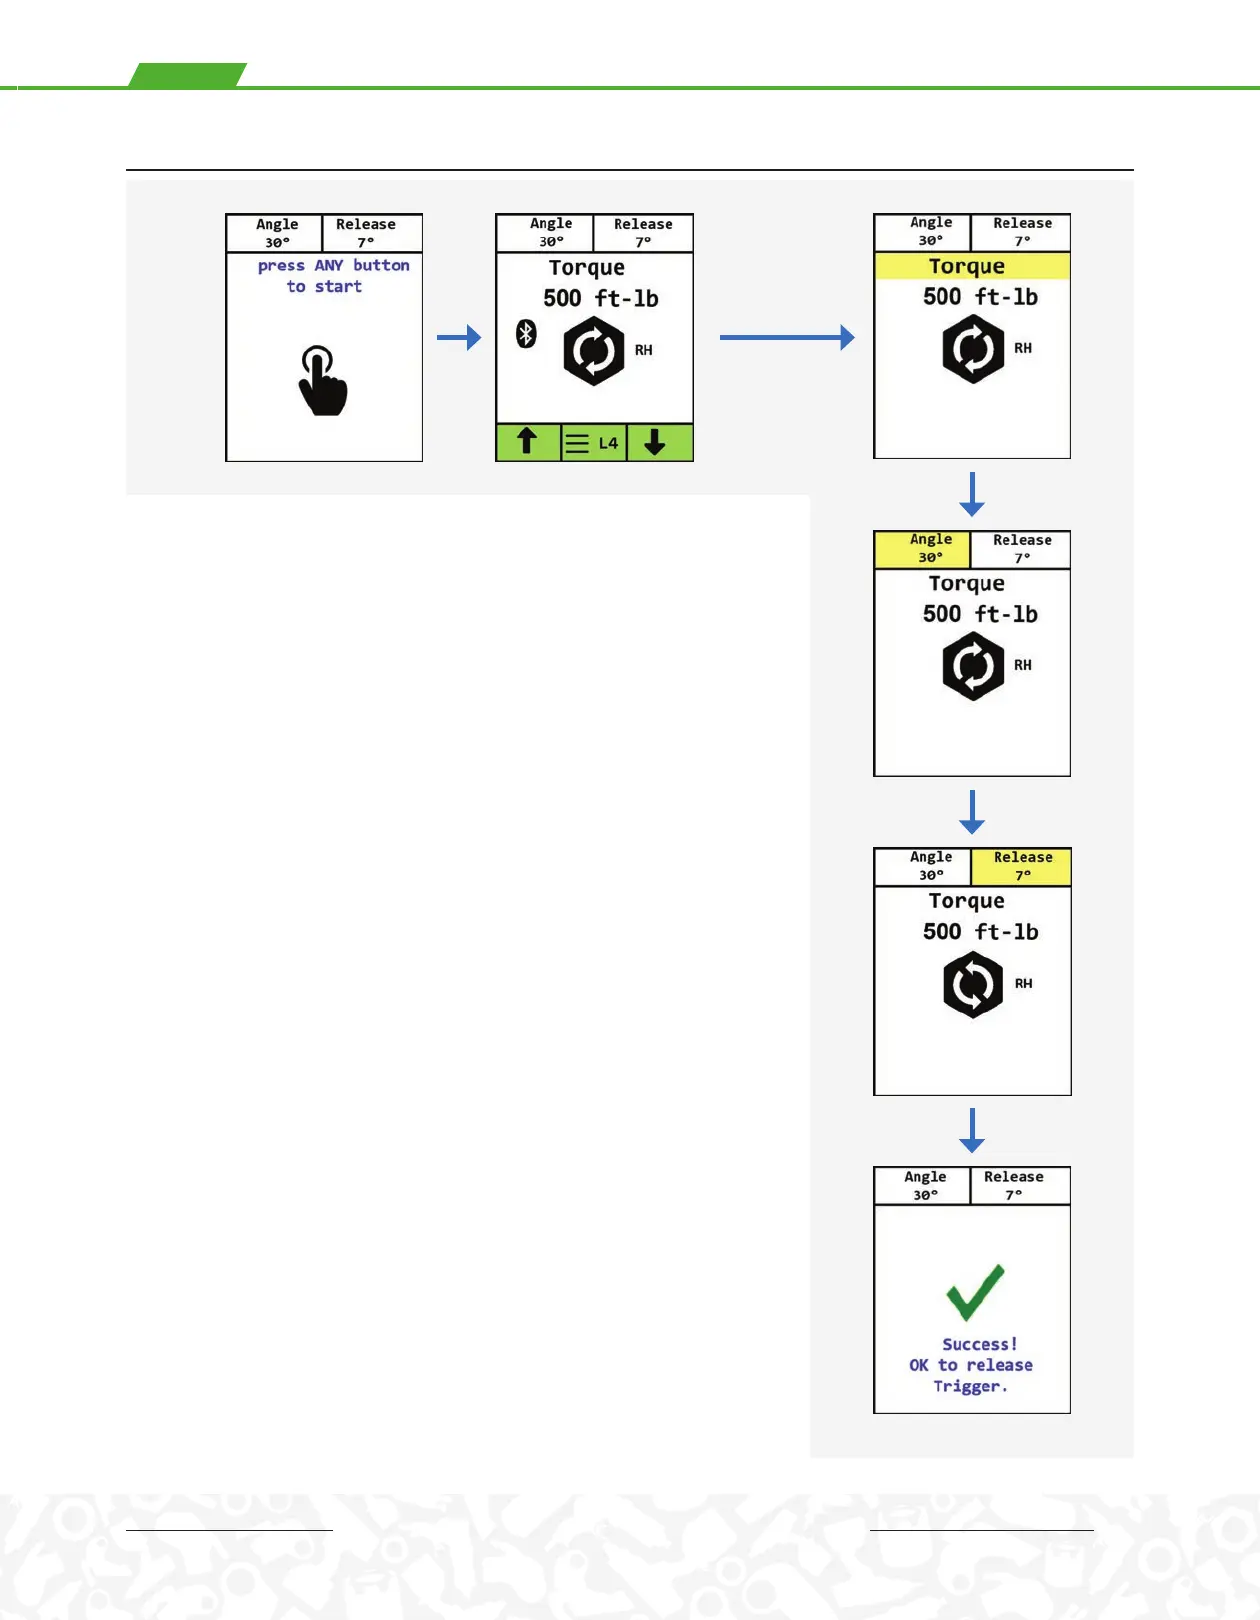
• Pull and Hold the Trigger – If tool is set to RH or LH Fastener, a message
instructs the user to press any button to start, in order to ensure that hands
are kept clear of the reaction arm.
• Continue Holding Trigger - The tool will apply torque to the nut until
reaching the specified value and then stop. During Torque application the
Torque Function is highlighted yellow. Continue holding trigger if applying
Angle or Release.
• Hold for Angle - Continue holding the trigger if a non-zero Angle has been
specified; the tool will restart (after specified time delay, if set) and then stop
again after rotating the nut through the specified Angle.
• Hold for Release - Continue holding the trigger if a non-zero Release has
been specified; the tool will restart (after specified time delay, if set) and then
stop again after completing the Release angle to allow the tool to be released
from the nut.
NOTE: If torque has been applied without a release angle and the tool locks
onto the nut, loosen the nut, set a release angle and try tightening again.
• Monitor Screen & Status LED - The status light is amber during operation. If
the operation is successful the status light will turn green. If unsuccessful the
status light will turn red. The final screen displayed will have a green check
mark. If unsuccessful the final screen will have a red X.
• Release Trigger - Release the trigger after the tool has completed all
specified operations (Torque, Angle & Release), the tool stops for the last
time and the BEEPER sounds (if activated); then remove the tool socket/drive
from the nut.
TIGHTENING WITH TORQUE
(CONT’D.)(CONT’D.)
 Loading...