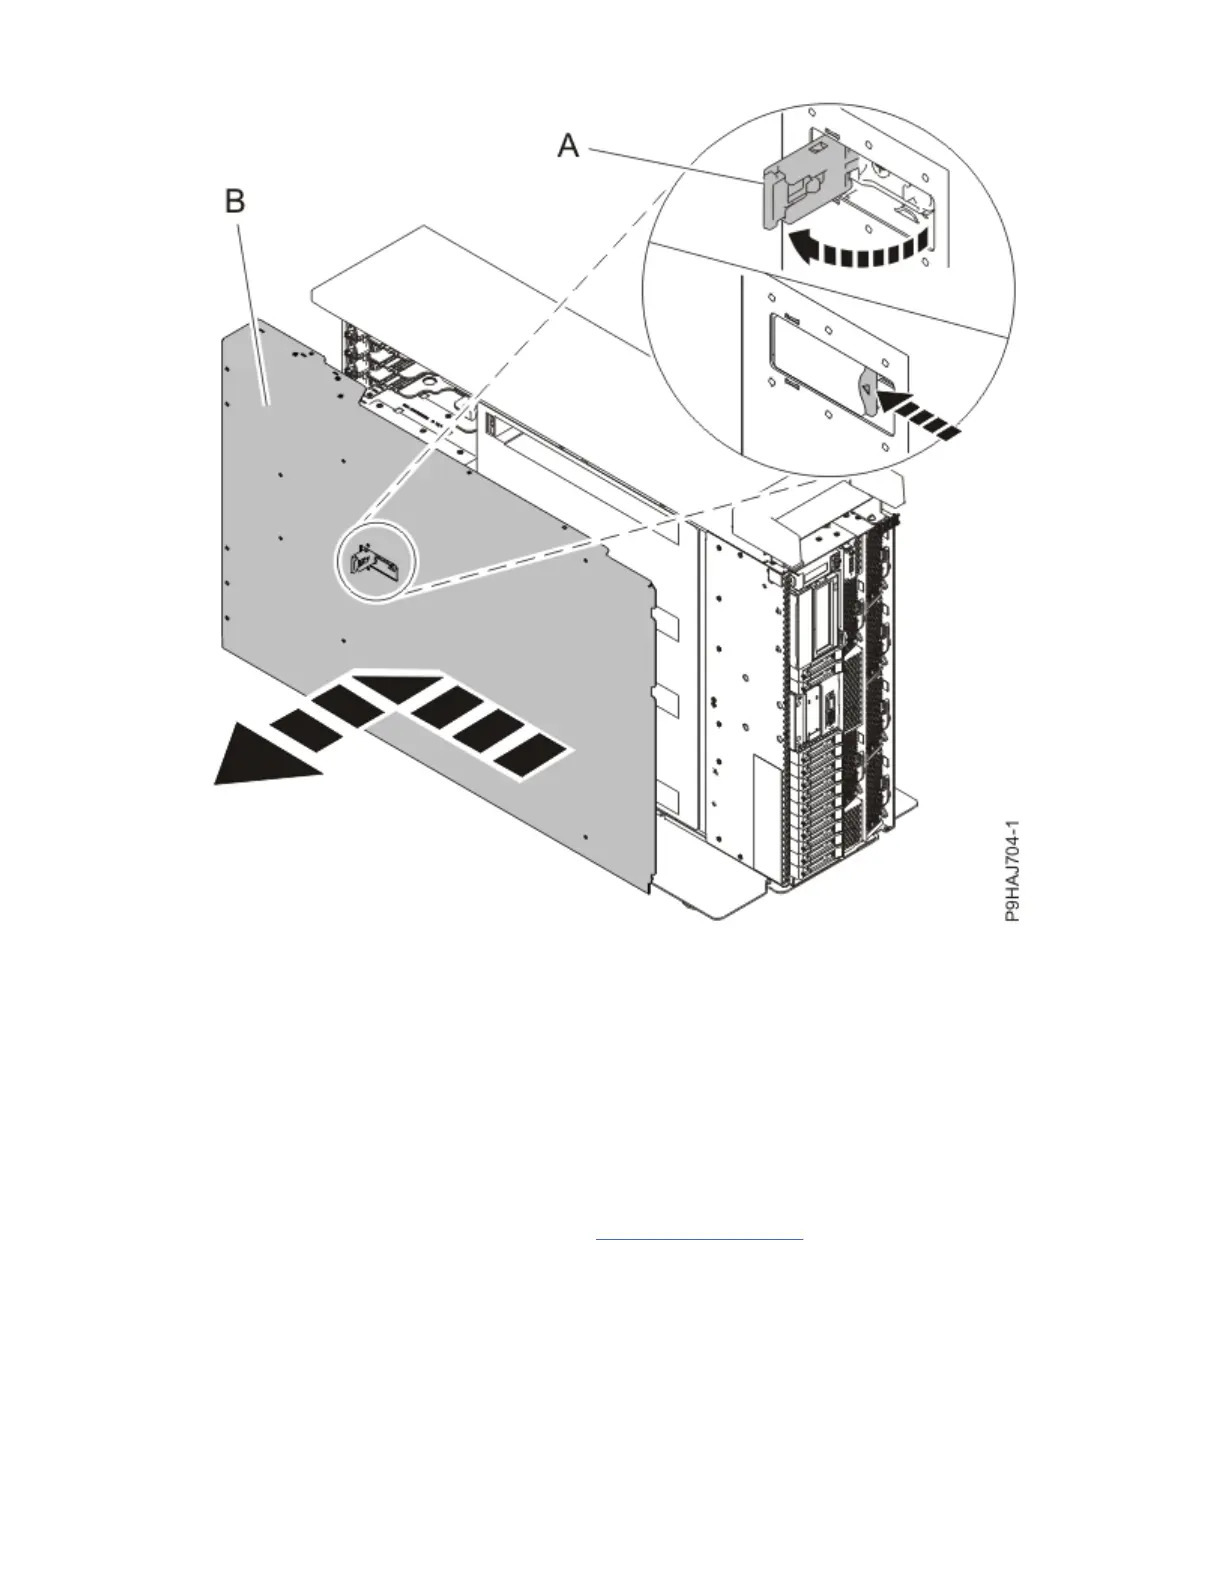
Figure 39. Removing the service access cover
Removing the 12-drive expanded function disk drive backplane from the 9009-41A,
9009-41G, 9009-42A, 9009-42G, or 9223-42H system
To remove the 12-drive expanded function disk drive backplane from the system, complete the steps in
this procedure.
Procedure
1. Ensure that you have the electrostatic discharge (ESD) wrist strap on and that the ESD clip is plugged
into a ground jack or connected to an unpainted metal surface. If not, do so now.
2. Remove the air baffle. For instructions, see Removing the air baffle
(www.ibm.com/support/
knowledgecenter/POWER9/p9haj/p9haj_914_924_airbaffleremove.htm).
3. If the system has an RDX drive, complete the following steps to partially remove the RDX docking
station:
a) For a stand-alone system, open the front door.
Insert the front door key into the lock as shown in the following gure. Twist the key to the left
(counterclockwise) to unlock the door. Horizontal is locked; vertical is unlocked. Open the front
door.
Drive backplanes for the 9009-41A, 9009-41G, 9009-42A, 9009-42G, or 9223-42H
45