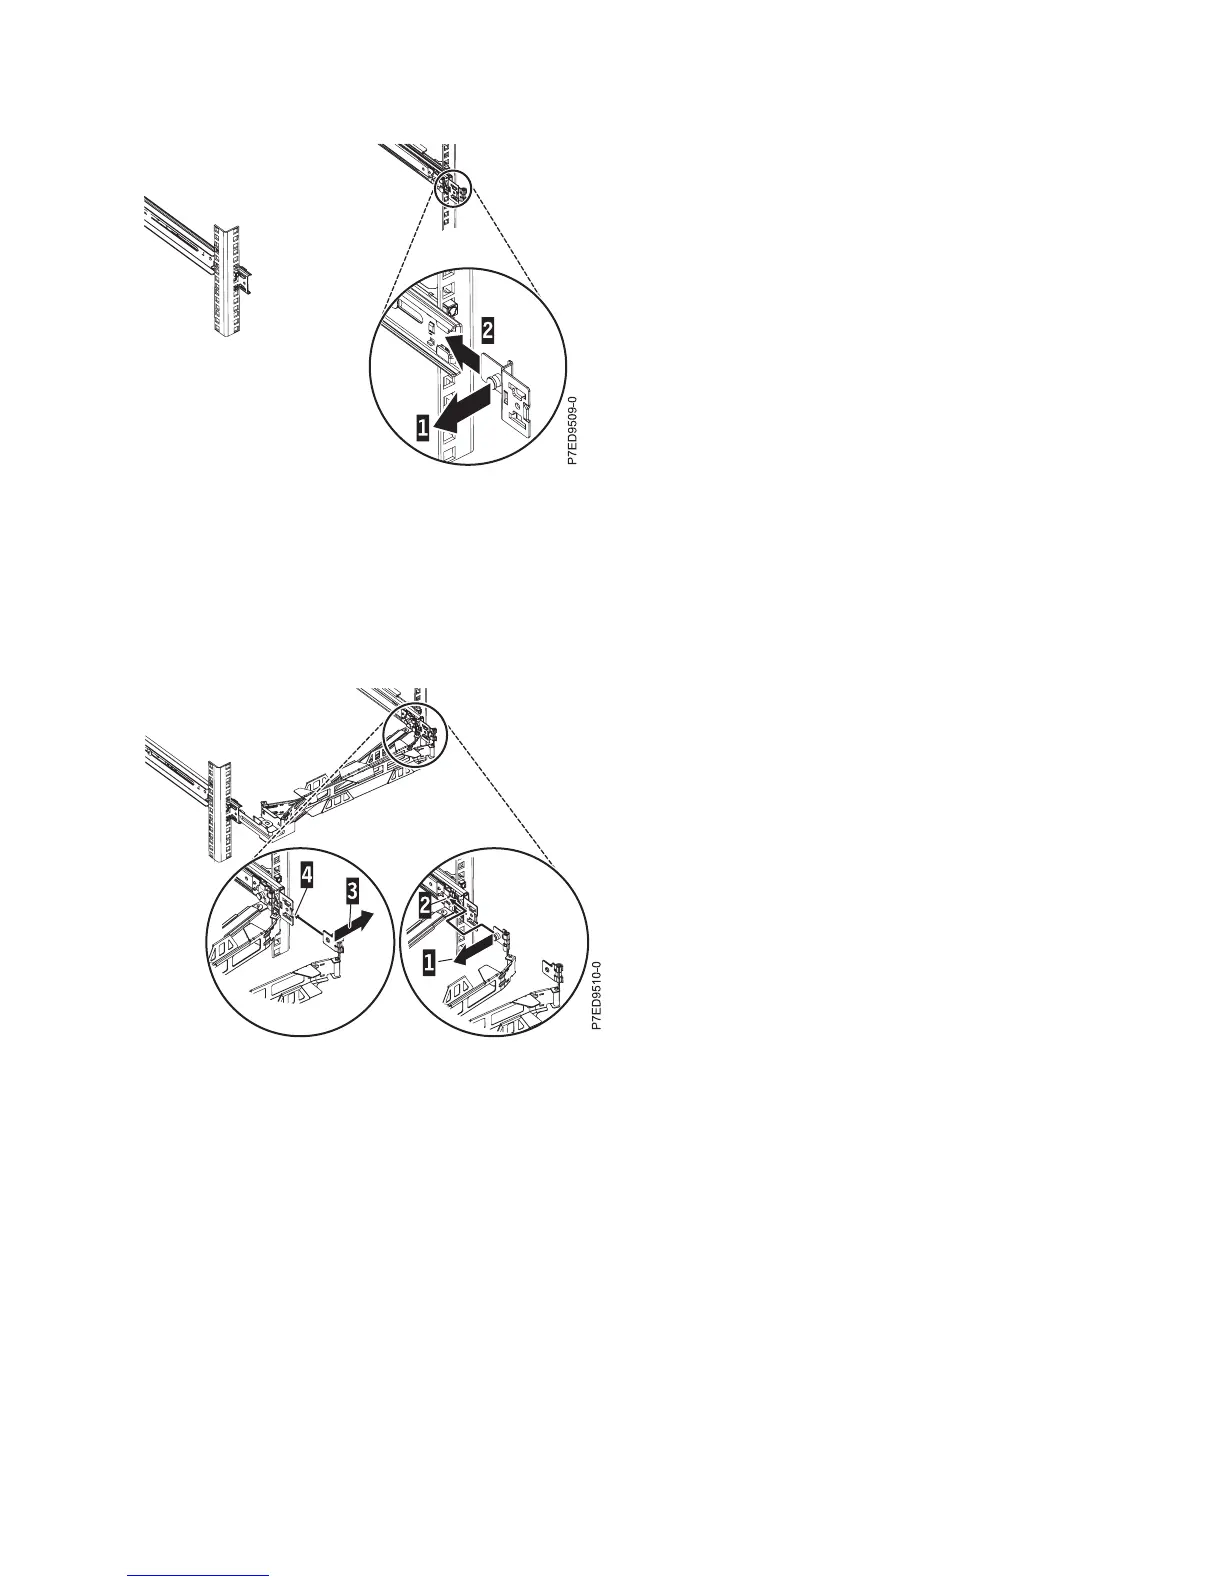
5. Place the cable-management arm on the support arm. Pull out the cable-management arm pin (1), and
then slide the cable-management arm tab (2) into the slot on the inside of the right slide rail. Push the
tab until it snaps into place. Pull out the other cable-management arm pin (3), and then slide that
cable management arm tab into the mounting bracket slot (4) on the outside of the right slide rail.
Push the tab until it snaps into place.
6. Route the power cords and other cables (including keyboard, monitor, and mouse cables, if required)
on the cable-management arm (1). Attach all cables to the rear of the server except for the power cord.
Secure the cord and cables with cable ties or hook-and-loop fasteners.
Note: Allow slack in all cables to avoid tension in the cables as the cable-management arm moves.
Figure 13. Mounting bracket pin extended and mounting bracket installed into slide rail
Figure 14. Cable-management arm connection
Installing the server into a rack 19
 Loading...