Attention: Simple-swap hard disk drives are not hot-swappable. Disconnect all
power from the server before you remove or install a simple-swap hard disk drive.
Note: If you installed a ServeRAID adapter in the server, connect the other end of
the SATA signal cable to the connector on the ServeRAID adapter.
To install a simple-swap SATA hard disk drive, complete the following steps.
1. Read the safety information that begins on page vii and “Installation guidelines”
on page 163.
2. Turn off the server and peripheral devices and disconnect all external cables
and power cords.
3. Remove the bezel (see “Removing the bezel” on page 169).
4. Touch the static-protective package that contains the drive to any unpainted
metal surface on the server; then, remove the drive from the package and place
it on a static-protective surface.
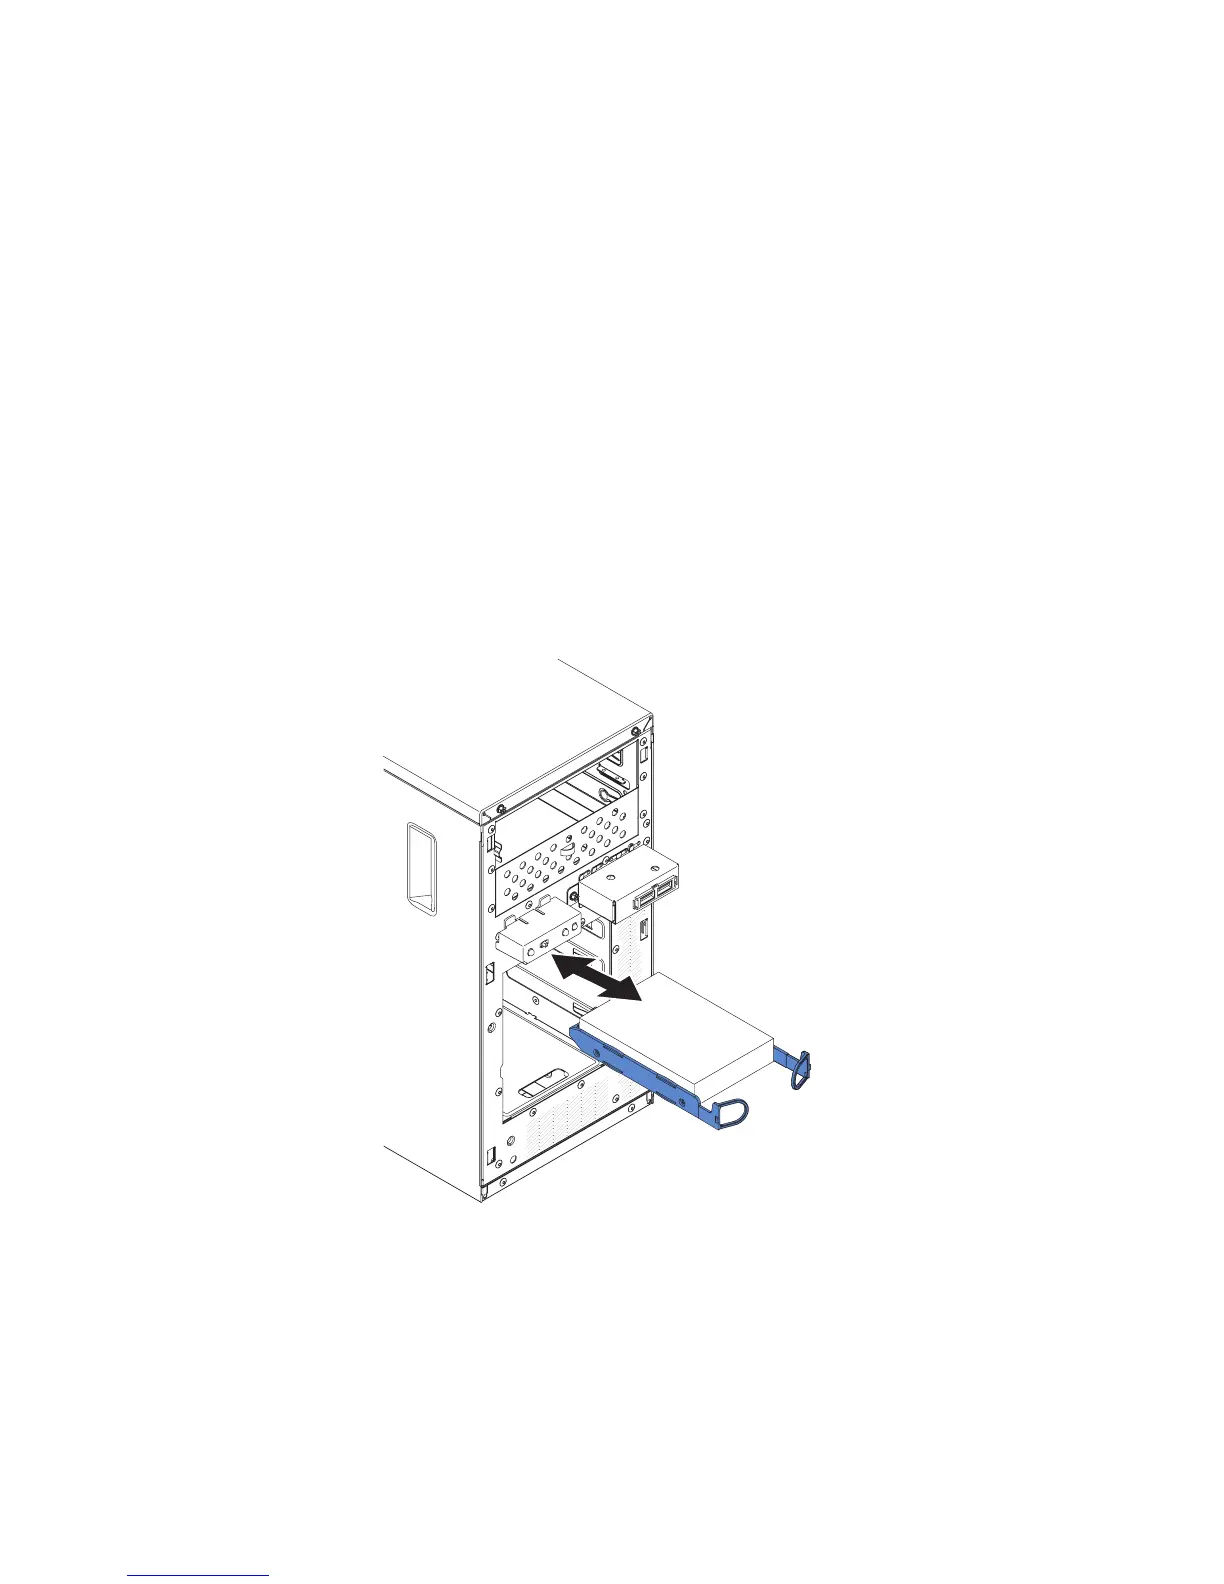
5. Align the drive assembly with the guide rails in the bay (the connector end of
the drive goes in first).
6. Pull the round blue loops of the drive assembly toward each other; then,
carefully slide the drive assembly into the drive bay until it stops, and release
the loops.
Note: Do not release the loops on the drive assembly until it is completely
seated.
7. If you have another drive to install or remove, do so now.
8. Install bezel (see “Installing the bezel” on page 171).
9. Reconnect the external cables and power cords; then, turn on the attached
devices and turn on the server.
Chapter 5. Removing and replacing server components 197

 Loading...


