2001 NEW2001 NEW
6
3
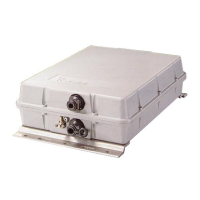
INSTALLATIONS
Waterproofing the antenna connection ■
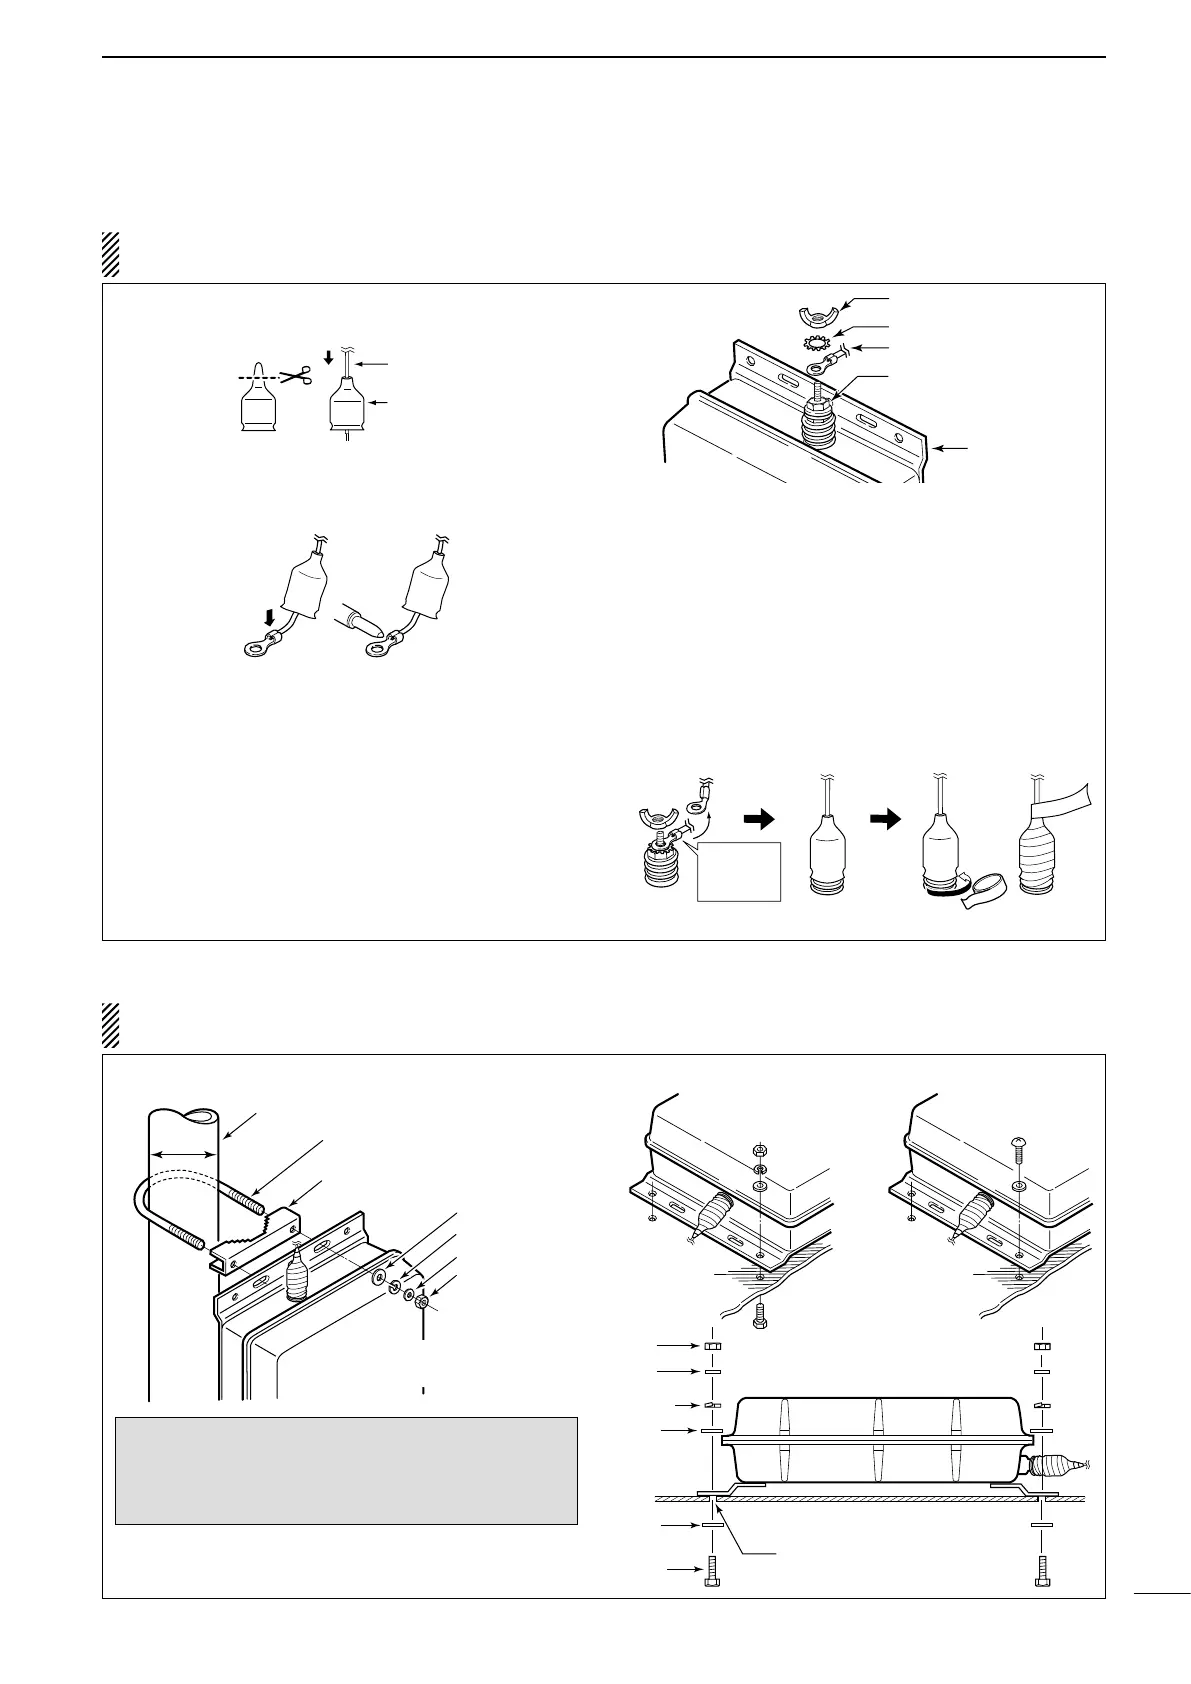
q Cut off just the top of the weatherproof cap, and
pass the antenna wire through the cap.
Antenna wire
Weatherproof cap
w Insert the antenna wire into the opening of the
crimp-on wire terminal.
•Crimporsoldertheantennawire.
e Put the crimp-on wire terminal, star washer, and
wing nut on the base nut, in that order, then,
tighten the wing nut.
•Makesurethebasenutistightenedrmly,beforeyou
tighten the wing nut. (See the Fig.1 to the right.)
•Carefullybendthewireterminalup,afteryoutighten
the wing nut. (See the Fig.2 to the right.)
Fig.1
Wing nut
Crimp-on wire terminal
Star washer
Base nut
Antenna tuner
r Place the weatherproof cap over as much of the
insulator as possible.
•Howfardownitwillgodependsontheheightofthe
wing nut.
t
Start wrapping the rubber vulcanizing tape at the bot-
tom of the insulator, then the weatherproof cap and
finally the antenna wire to prevent water seeping.
•Wrapelectricaltape*overtherubbervulcanizingtape
to secure waterproofing.
* The electrical tape is not supplied with the AT-141.
Fig.2
Insulator
e
t
r
Rubber
vulcanizing tape
Bend this part
up, AFTER
you tighten
the wing nut.
CAUTION: If you skip the following steps, moisture will get
into the connector, and this could damage the antenna tuner.
Mounting ■
Mounting on a Mast/Metal pole D
Using U-bolts
U-bolt
U-bolt plate
Flat washer (L)
Spring washer
Nut
Mast/
Metal pole
32–60 mm
Flat washer (S)
NEVER install the antenna
tuner upside down.
Mounting on a flat surface D
Using self-tapping
screws
Using nuts and bolts
Nut
Spring
washer
Flat
washer (L)
Flat
washer (L)
Hex head
bolt
Drill a hole here
Diameter:7–8 mm;
9
⁄
32
–
5
⁄
16
inches
Flat
washer (S)
R WARNING! Mount the AT-141 securely with
the supplied nuts and bolts. Otherwise, vibrations
and shocks due to waves could loosen the antenna
tuner making it fall, causing personal injury.
CAUTION: Mount the AT-141 in a horizontal position
or in a vertical position with the antenna terminal up.

 Loading...