EasyManuals Logo

Icom IC-705 Installation

Icom IC-705
8 pages
To Next Page IconTo Next Page
To Previous Page IconTo Previous Page
Page #4 background imageLoading...
Page #4 background image
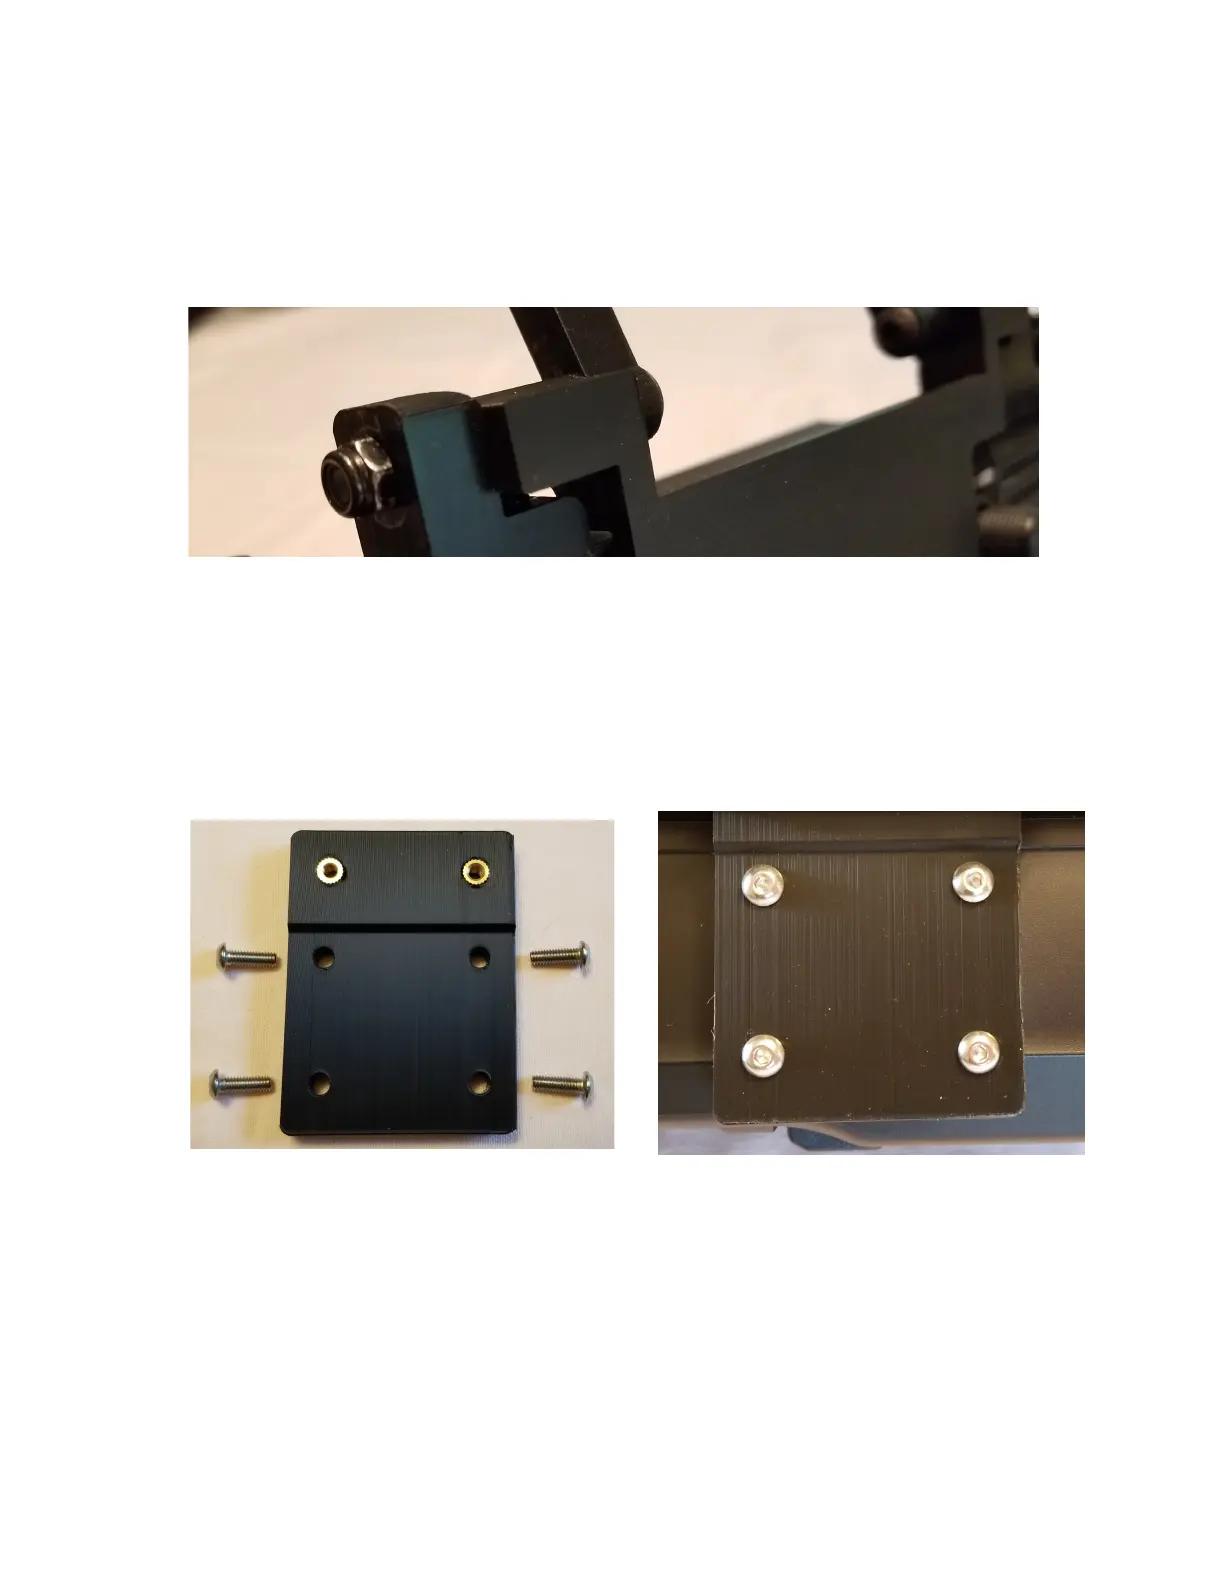
5. Now thread a nylon insert nut onto the protruding screw on each side, and tighten each with a
hex key while holding the nut with an adjustable wrench or socket. The degree of tightness will
affect the ease of motion of the handle and the screen cover. The nuts should be tight enough
that the handle and cover will hold the position you leave them in, but no so tight that they bind
or are difficult to move.
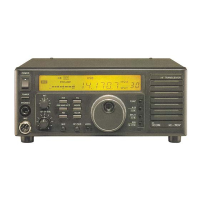
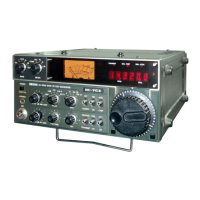
6. Attach the bottom bracket to the radio using 4 M4 x 16mm stainless button head screws. The
front of the bracket is jogged a bit to accommodate the bezel of the radio. When installed
correctly you should see the bright brass inserts facing you. Tighten these screws firmly, but do
not use excessive force.

Other manuals for Icom IC-705

Questions and Answers:

Question and Answer IconNeed help?

Do you have a question about the Icom IC-705 and is the answer not in the manual?

Icom IC-705 Specifications

General IconGeneral
BluetoothYes
WLANYes
SD Card SlotYes
Antenna ConnectorBNC
Frequency Range0.030–199.999 MHz
ModesSSB, CW, AM, FM
Receiver TypeSuperheterodyne
GPSBuilt-in
BatteryLithium-ion
WeightApprox. 1.1 kg
TypePortable
Power Supply13.8 V DC
Waterproof StandardIP54
Operating Temperature Range-10°C to +60°C
Display4.3 inch color TFT touch screen LCD

Related product manuals