TRANSMITTER ADJUSTMENTS (continued)
IDLING
CURRENT
(for drive
amplifiers)
(for final
amplifiers)
SWR
DETECTION
ADJUSTMENT
ADJUSTMENT ADJUSTMENT CONDITION
MEASUREMENT
VALUE
POINT
UNIT LOCATION UNIT ADJUST
1
2
3
4
5
1
2
3
• Display frequency: 14.10000 MHz
• Mode : USB
• [Q2 MIC GAIN] : 1 (minimum)
• turn R162, R174, R175, R214,
R231 (on the PA unit) to maximum
counterclockwise position.
• Disconnect the plug from J571 on
the PA unit.
• Transmitting
• Display frequency: 145.10000 MHz
• Mode : USB
• [Q2 MIC GAIN] : 1 (minimum)
• Transmitting
• Display frequency: 14.10000 MHz
• Mode : USB
• [Q2 MIC GAIN] : 1 (minimum)
• Transmitting
• Transmitting
• Display frequency: 145.10000 MHz
• Mode : USB
• [Q2 MIC GAIN] : 1 (minimum)
• Transmitting
• Display frequency: 14.10000 MHz
• Mode : USB
• Ground CP1071 on the MAIN board.
• Connect an audio generator to
[MIC] connector and set as:
1.5 kHz/30 mV
• Transmitting
• Transmitting
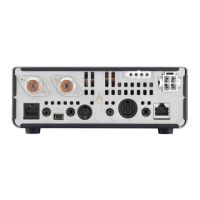
PA
Rear
Panel
FILTER
Connect a DC
ammeter between
the DC power supply
and transceiver’s DC
power socket (P601
on the PA unit).
Connect an RF
power meter to
[ANT1] connector.
Connect a digital
multimeter to check
point W16.
0.5 A increase from that
R162 is in maximum
counterclockwise posi-
tion.
1.0 A increase from
step 1.
1.0 A increase from that
R174 is in maximum
counterclockwise posi-
tion.
1.0 A increase from
step 3.
2.0 A increase from
step 4.
100 W
Minimum voltage
PA
Quick
set
mode
FILTER
R162
R214
R174
R175
R231
Q2 MIC
GAIN
C58
After remove the jumper wire from CP1071 on the MAIN board.
 Loading...