4-4
ADJUSTMENT ITEM TRANSCEIVER'S CONDITION OPERATION
ADJUST
POINT
VALUE
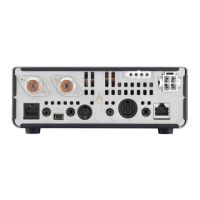
ID ADJUSTMENT 1 • Display: "ID SET HF" • Connect the 50
Ω
dummy load to
[ANT1].
– Push [SET].
2 • Display: "HFID1V" • Push [SET]. (Automatically starts
to transmit.)
Push [SET] again.
(A beep sounds, and
then beeps sound 3
sec. later. Then next
adjustment item is
selected.)
3 • Display: "HFID2V"
• Transmit continues
– Push [SET].
(A beep sounds,
transmission stops,
and then beeps sound
3 sec. later. Then next
adjustment item is
selected.)
4 • Display: "DID SET" Push [SET].
(Then the next
adjustment item
is selected, and
automatically starts to
transmit.)
5 • Display: "DIDV" Push [SET].
(A beep sounds,
transmission stops,
and then beeps sound
3 sec. later. Then next
adjustment item is
selected.)
6 • Display: "ID SET V/UHF" Push [SET].
(Then the next
adjustment item
is selected, and
automatically starts to
transmit.)
7 • Display: "VUIDV" Push [SET].
(A beep sounds,
transmission stops,
and then beeps sound
3 sec. later.
ID-APC OPERATING
POINT ADJUSTMENT
1 • Display: "ID-APC HF" –
Push [MIC/RF PWR] to return to the main adjustment menu.
VD ADJUSTMENT Push [NR] to enter the REF adjustment menu.
VD-APC ADJUSTMENT 1 – • Connect the 50
Ω
dummy load to
[ANT1].
– Push [NB].
2 • Display: "VD-APC"
[MAIN DIAL]
Push [SET].
3 • Display: "VD-APC START 11.8V" 11.9 V
Push [SET].
4 • Display: "VD-APC 75% 11.0V" 11.1 V
Push [SET].
The REF adjustment menu is displayed.
Push [MIC/RF PWR] to return to the main adjustment menu.
4-4 ID ADJUSTMENTS (continued)
1) Set or modify the adjustment value as specifi ed by rotating [MAIN DIAL].
2) Push [SET] to store the value.
 Loading...