3-2
2. REMOVING THE MAIN UNIT
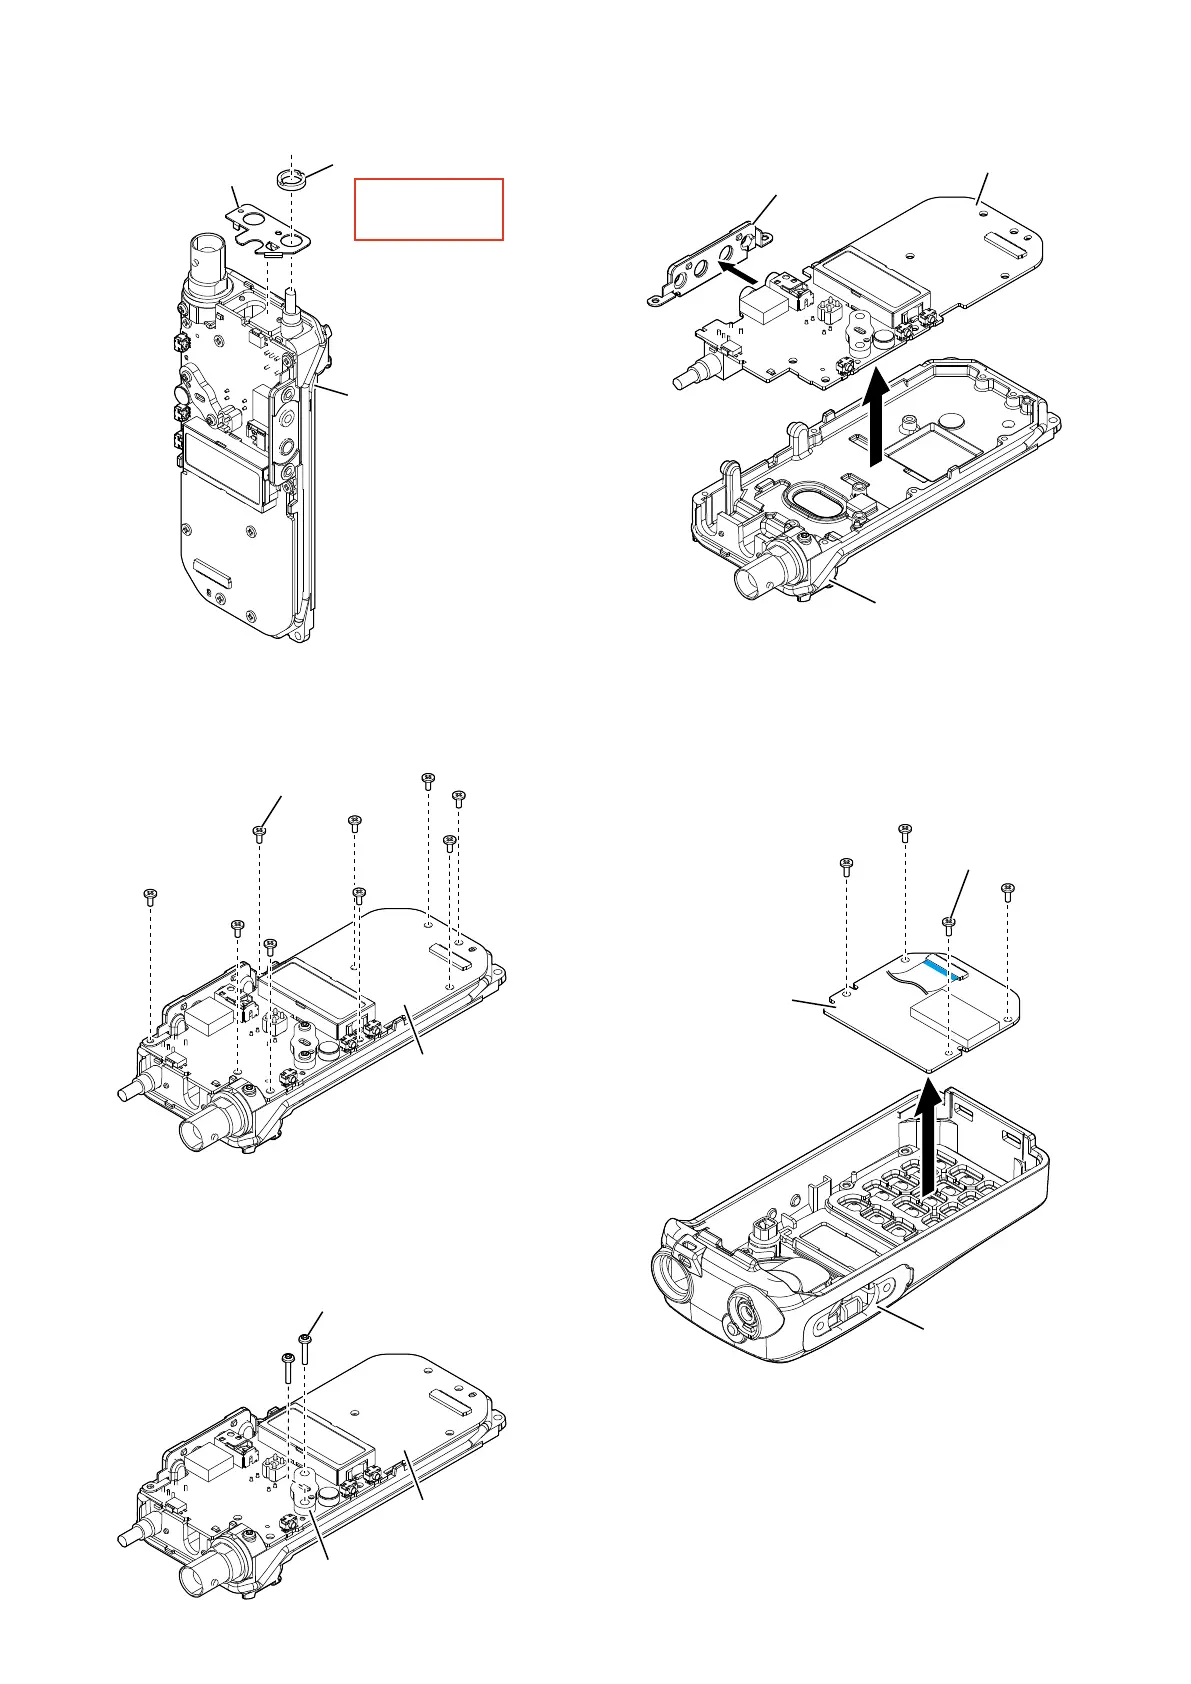
1) Remove the volume nut from the top of the chassis, and
then remove the top plate.
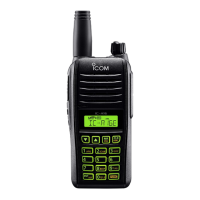
4) Remove the side plate from the MAIN UNIT, and then
remove the MAIN UNIT from the chassis.
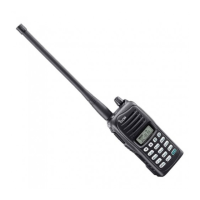
2) Remove the 9 screws from the MAIN UNIT.
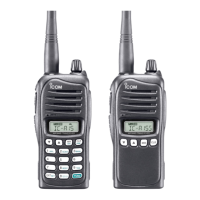
3) Remove the 2 screws from the heatsink of MAIN UNIT.
Chassis
MAIN UNIT
Side plate
3. REMOVING THE FRONT UNIT
1) Remove the 4 screws, and then remove the FRONT
UNIT from the front panel.
Screws ×4
Front panel
FRONT UNIT
Chassis
Volume nut
Top plate
Remove with;
“ICOM Driver (AG)”
(8960000561)
MAIN UNIT
Screws ×9
MAIN UNIT
Heatsink
Screws ×2