EasyManua.ls Logo

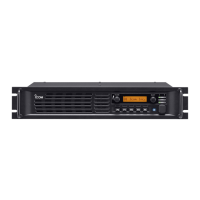
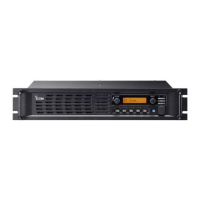
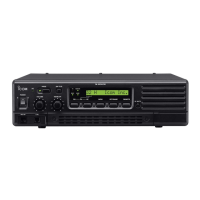
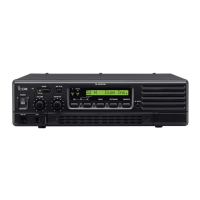
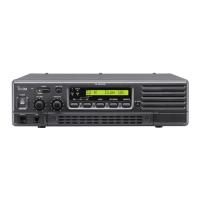
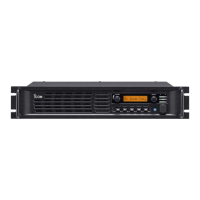
Icom iC-FR5000 - Service Manual

Icom iC-FR5000
44 pages
Print Icon
To Next Page IconTo Next Page
Loading...
S-14425XZ-C1
Jun. 2008
VHF FM REPEATER

Other manuals for Icom iC-FR5000

Questions and Answers

  • J
    Jenna JamesAug 1, 2025
    What to do if my Icom Repeater does not turn on?
    • M
      Melanie WoodsAug 1, 2025
      If your Icom Repeater doesn't power on when you push the power button, it could be due to a few reasons. First, ensure that the power supply itself is turned on. Next, check the DC power cable to make sure it's properly connected. Lastly, inspect the fuse; if it's blown, identify the cause and replace it with a spare.
  • S
    Sandra TurnerAug 10, 2025
    Why is there no sound coming from my Icom iC-FR5000 speaker?
    • T
      Terry LewisAug 10, 2025
      If you can't hear any sound from the speaker of your Icom Repeater, there are several potential causes: * The volume level might be too low. Rotate the volume control clockwise to increase it. * The squelch might be closed. If in base operating mode, rotate the select dial counterclockwise to open the squelch. * The audio mute function could be activated. Push the monitor button (if assigned) to deactivate it. * A selective call or squelch function, like a 5-tone call or tone squelch, may be active. Turn off these functions. * The front speaker may be turned off. Use the optional CS-FR5000(dPMR) cloning software to turn the front speaker on. Consult your dealer for details.
  • M
    Matthew LambAug 20, 2025
    How to fix low output power on Icom iC-FR5000?
    • M
      Mrs. April CarsonAug 20, 2025
      If you're experiencing low output power on your Icom Repeater, first check if the output power is set to low. If so, push the high/low button (if assigned) to select the high power setting. Alternatively, the power amplifier protection circuit might be activated. If this is the case, allow the repeater to cool down or stop accessing it until it cools down.

Summary

INTRODUCTION

CAUTION

Provides critical safety warnings regarding power supply, liquid exposure, and signal application.

SECTION 1 SPECIFICATIONS

SECTION 2 INSIDE VIEWS

MAIN UNIT (TOP VIEW)

Identifies components on the top side of the MAIN UNIT PCB.

MAIN UNIT (BOTTOM VIEW)

Identifies components on the bottom side of the MAIN UNIT PCB.

SECTION 3 DISASSEMBLY INSTRUCTION

Removing the front panel

Step-by-step guide to detach the front panel from the repeater unit.

Removing the MAIN UNIT assembly

Procedure for removing the main unit assembly from the chassis.

Removing the MAIN UNIT

Instructions for removing the cover of the main unit.

SECTION 4 OPTIONAL UNIT INSTALLATION

SECTION 5 CIRCUIT DESCRIPTION

5-1 RECEIVER CIRCUITS

Detailed description of the receiver's RF, IF, and AF circuits.

5-2 TRANSMITTER CIRCUITS

Detailed description of the transmitter's modulation, signaling, YGR/PA, and APC circuits.

5-3 FREQUENCY SYNTHESIZER CIRCUITS

Explanation of the RX and TX PLL circuits and VCOs.

5-4 OTHER CIRCUITS

Description of power supply, compander, and LED circuits.

5-5 CPU (M: IC20) PORT ALLOCATION

Details the pin assignments and functions of the main CPU (IC20).

SECTION 6 ADJUSTMENT PROCEDURE

6-1 PREPARATION

Lists required equipment and preparation steps for adjustments.

ADJUSTMENT CHANNEL LISTS

Lists channels for adjustment and their required parameters.

WHOLE PROCEDURE OF THE ADJUSTMENT

Provides an overview of the adjustment process using software and PC.

ADJUST UTILITY WINDOW

Details the parameters and values within the adjustment utility software.

6-2 FREQUENCY ADJUSTMENT

Procedure for adjusting the repeater's frequency settings.

6-3 TRANSMIT ADJUSTMENT

Steps for adjusting transmit output power and modulation.

6-4 RECEIVE ADJUSTMENT

Procedure for adjusting receiver sensitivity and other receive parameters.

SECTION 7 PARTS LIST

[FRONT UNIT]

List of replacement parts for the front unit of the repeater.

[MAIN UNIT]

List of replacement parts for the main unit of the repeater.

[CONNECT UNIT]

List of replacement parts for the connect unit of the repeater.

SECTION 8 MECHANICAL PARTS

[CHASSIS PARTS]

List of mechanical parts related to the repeater's chassis.

[FRONT UNIT]

List of mechanical parts specific to the front unit.

[MAIN UNIT]

List of mechanical parts for the main unit.

[CONNECT UNIT]

List of mechanical parts for the connector unit.

[ACCESSORIES]

List of included accessories.

SECTION 9 BOARD LAYOUTS

MAIN UNIT (TOP VIEW)

Top view layout of the MAIN UNIT circuit board.

FRONT UNIT (TOP VIEW)

Top view layout of the FRONT UNIT circuit board.

CONNECT UNIT (TOP VIEW)

Top view layout of the CONNECT UNIT circuit board.

FRONT UNIT (BOTTOM VIEW)

Bottom view layout of the FRONT UNIT circuit board.

MAIN UNIT (BOTTOM VIEW)

Bottom view layout of the MAIN UNIT circuit board.

SECTION 10 BLOCK DIAGRAM

System Block Diagram Overview

Overall system architecture showing major functional units like Main, Front, and Connect units.

Main Unit Internal Blocks

Diagram showing internal functional blocks of the Main Unit like CPU, DSP, IF IC, VCOs, and Final Amp.

Front Unit Block Diagram

Block diagram of the Front Unit, including CPU, LCD, and LEDs.

Connect Unit Block Diagram

Block diagram of the Connect Unit and its interface signals.

SECTION 11 VOLTAGE DIAGRAM

FRONT UNIT

Voltage diagram detailing power supply and voltage lines for the Front Unit.

MAIN UNIT (1;3)

Voltage diagram for the first part of the Main Unit, showing power distribution.

MAIN UNIT (2;3)

Voltage diagram for the second part of the Main Unit, detailing power distribution.

MAIN UNIT (3;3)

Voltage diagram for the third part of the Main Unit, covering CPU and other components.

ACCESSORY CONNECTOR (CONNECT UNIT) INFORMATION

Details the pin functions and specifications of the accessory connector.

Icom iC-FR5000 Specifications

General IconGeneral
BrandIcom
ModeliC-FR5000
CategoryRepeater
LanguageEnglish

Related product manuals