10
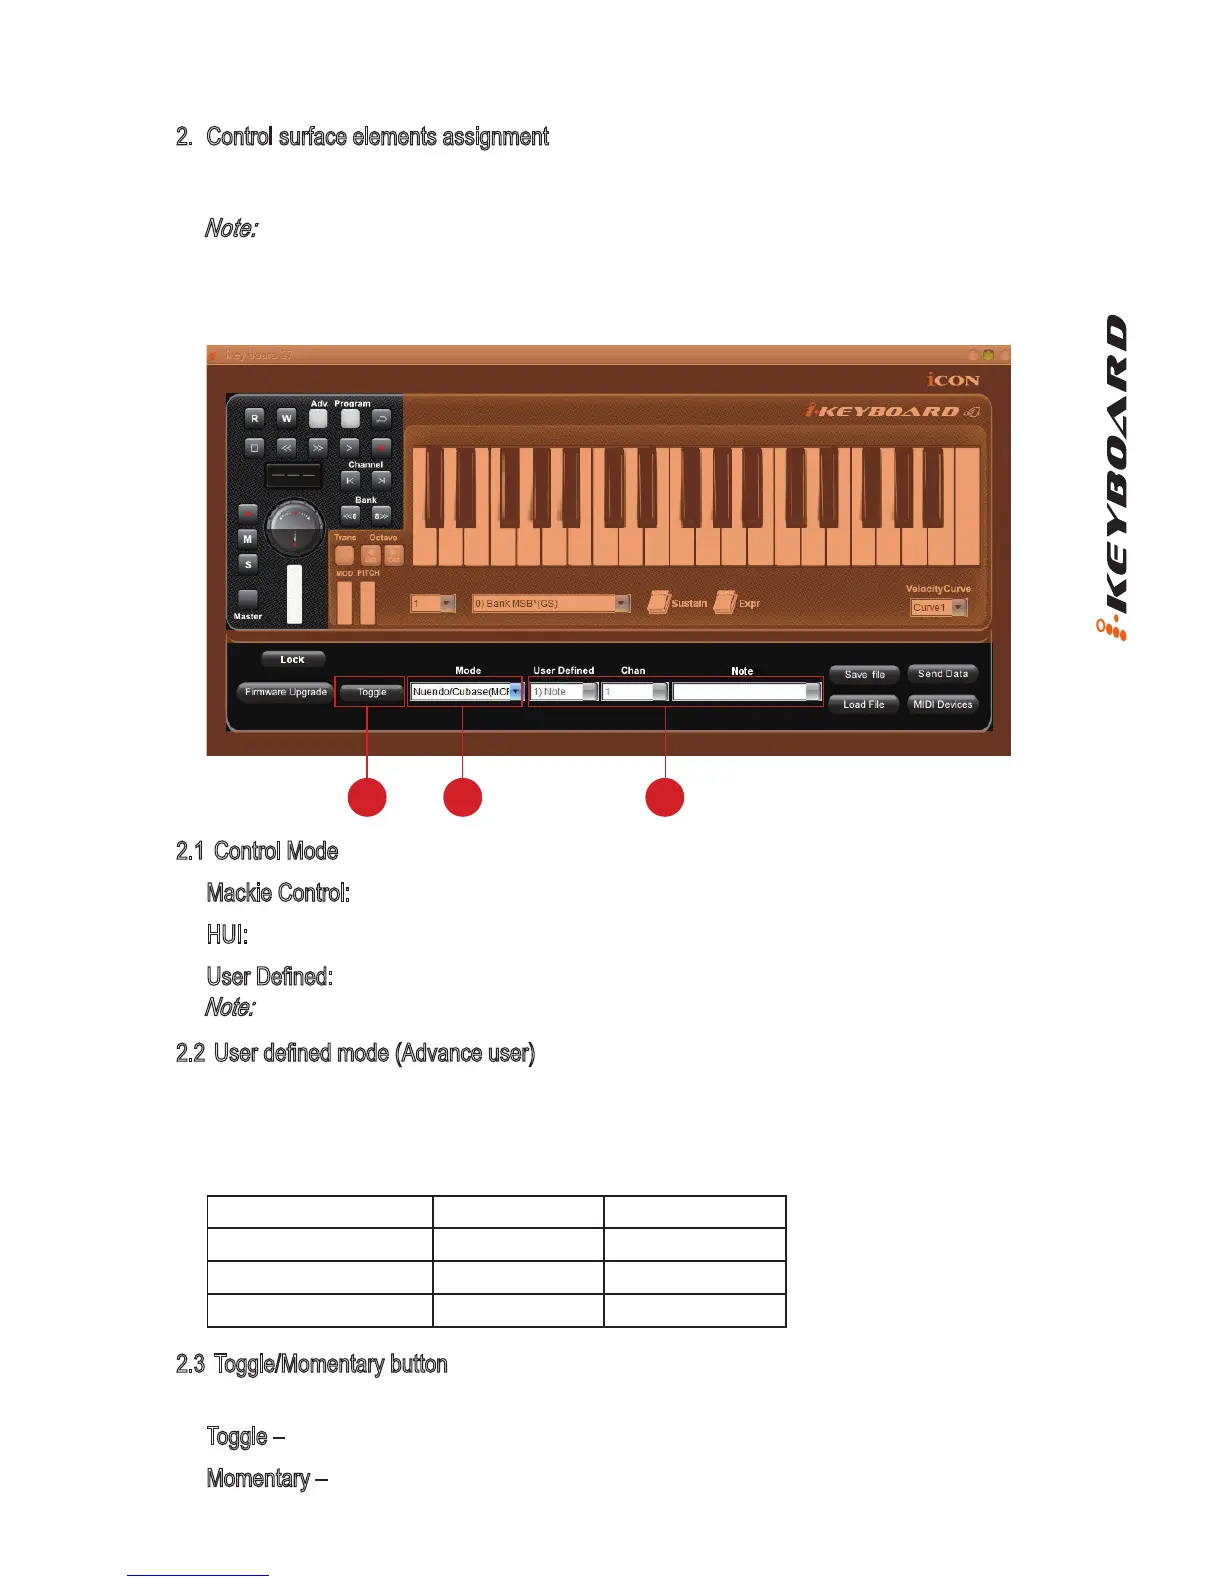
2. Control surface elements assignment
These elements include all the buttons, the knob and the touch pad. These elements are
assigned by the lower four drop down menus and the “Toggle/Momentary” button.
Note:
iKeyboard has built-in Mackie Control protocols & HUI for different DAW such as
Cubase
TM
, Samplitude
TM
, Abelton Live
TM
, Logic Pro
TM
and ProTool
TM
By selecting the correct
DAW and Mackie control (HUI) protocol, iKeyboard has automatically mapped the major
functions and work seamlessly with that DAW.
2.1 Control Mode
Mackie Control: Select “Mackie Control” for Mackie control protocol
HUI: Select “HUI” for HUI control protocol
User Dened: Set your own midi settings for all the controllers.
Note:
In “Mackie Control” mode, settings are xed and not changeable
2.2 User dened mode (Advance user)
If you would like to assign your own midi mapping, select “User Dened” mode at the control
mode drop down menu. To assign a control, select it by clicking it and assign a different midi
message by the three drop down menus. The table below shows the different types of midi
messages and their changeable parameters.
MIDI Message Type Channel Parameters
Note 0 to 16 -1(C) to 9(G)
CC 0 to 16 0 to 127
Program 0 to 16 0 to 127
2.3 Toggle/Momentary button
Assignable to all the buttons for the control surface.
Toggle – Midi message will be send and activate once
Momentary – Midi message will stay active.
2.3 2.1 2.2
Diagram 11
 Loading...