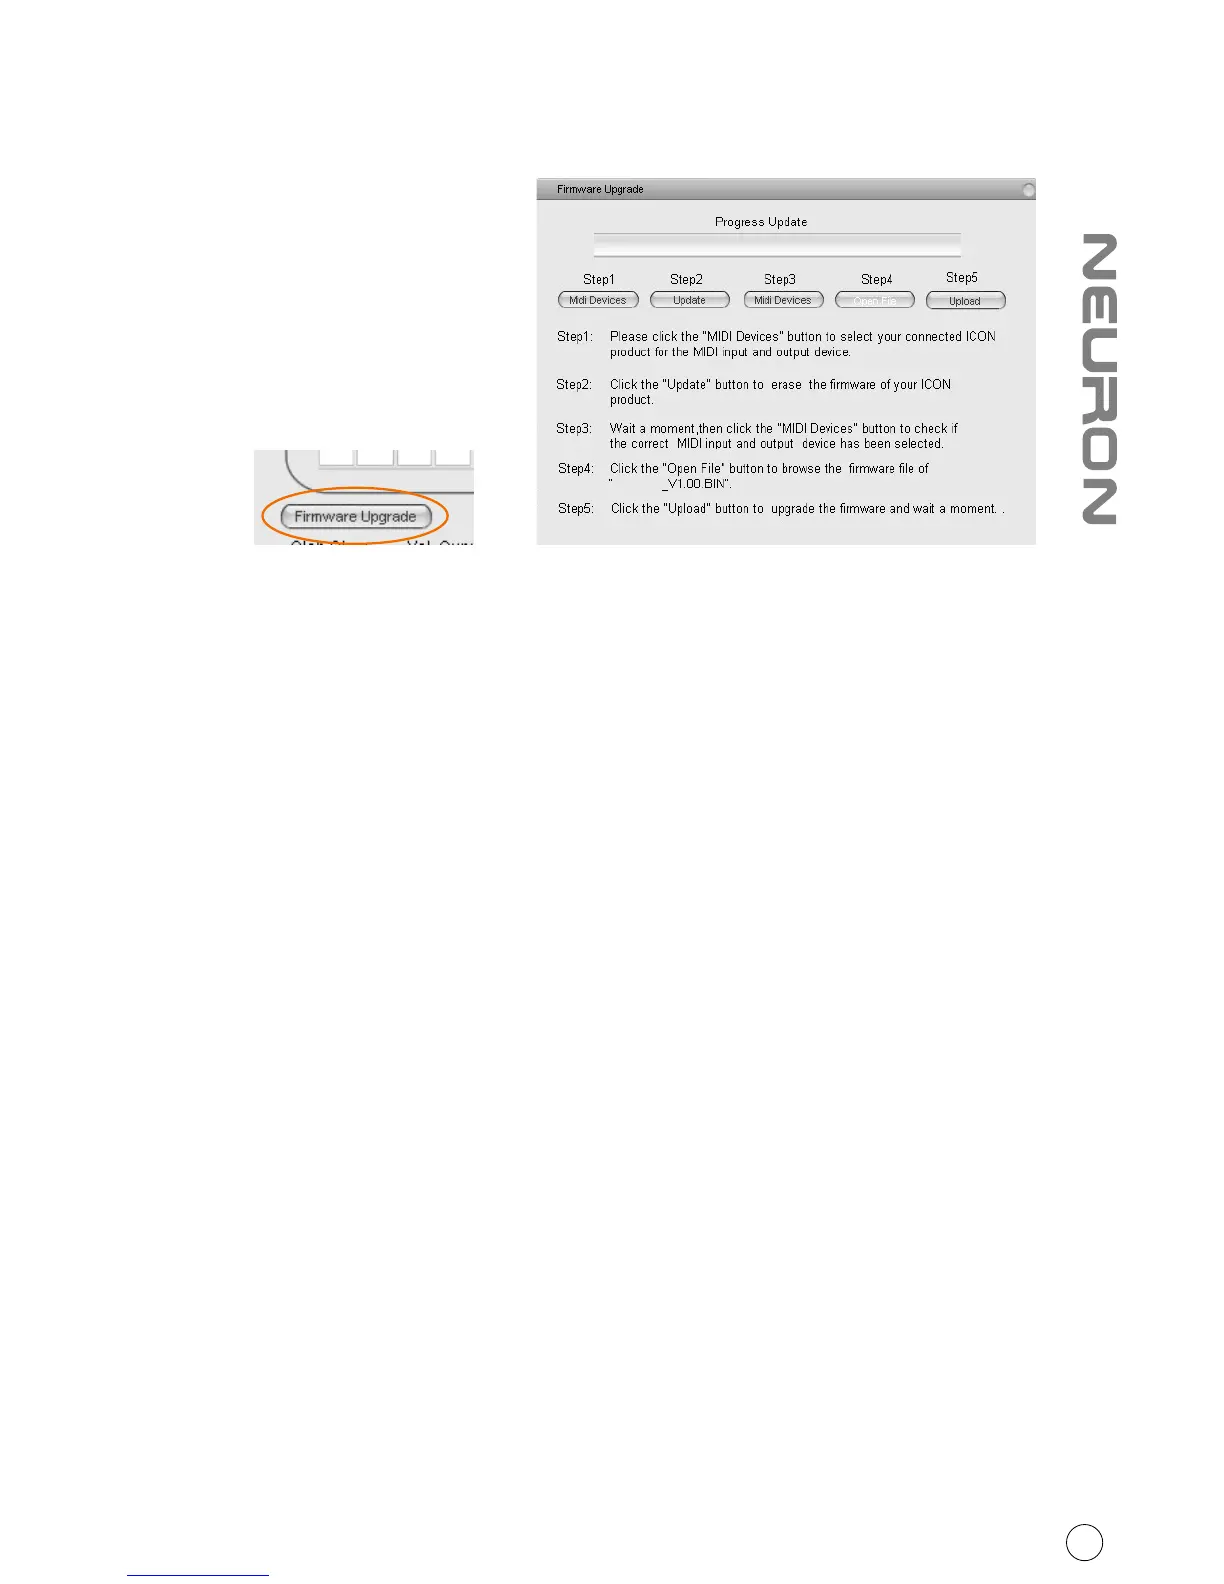
Firmware upgrade
Diagram 2Diagram 1
Step 1: Connect the ICON product using a USB connection. Press the “MIDI
Device” button at the top to select your connected ICON product as the
“MIDI In and Out” device at the pull-down menu.
Note: If your connected ICON product model name does not appear on the
pull-down menu, select “USB Audio” as the MIDI In and Out device.
Step 2: Click the “Update” button.
Step 3: Press the “MIDI Device” button at the top to select your connected
ICON product as the “MIDI In and Out” device at the pull-down menu.
Step 4: Click the “Open File” button to browse the new firmware file.
Step 5: Click the “Upload” button to upload the firmware.
Warning:The firmware upload process “MUST” be completed and not be interrupted
during the file uploading, otherwise the firmware may not be rewritten again.
Restore the factory default settings
To restore your Neuron G2 settings to factory default, simply import the
“Factory Default” setting file into your Neuron G2 with the original setting
of the iMap software.
12
Neuron G2