14
16. Make sure that all parts are properly tightened before you use the treadmill. If there are sheets of plastic
on the treadmill decals, remove the plastic. To protect the floor or carpet, place a mat under the treadmill. To
avoid damage to the console, keep the treadmill out of direct sunlight. Keep the included tools in a secure
place; one or more of the tools may be needed to make adjustments to the treadmill in the future. Note: Extra
hardware may be included.
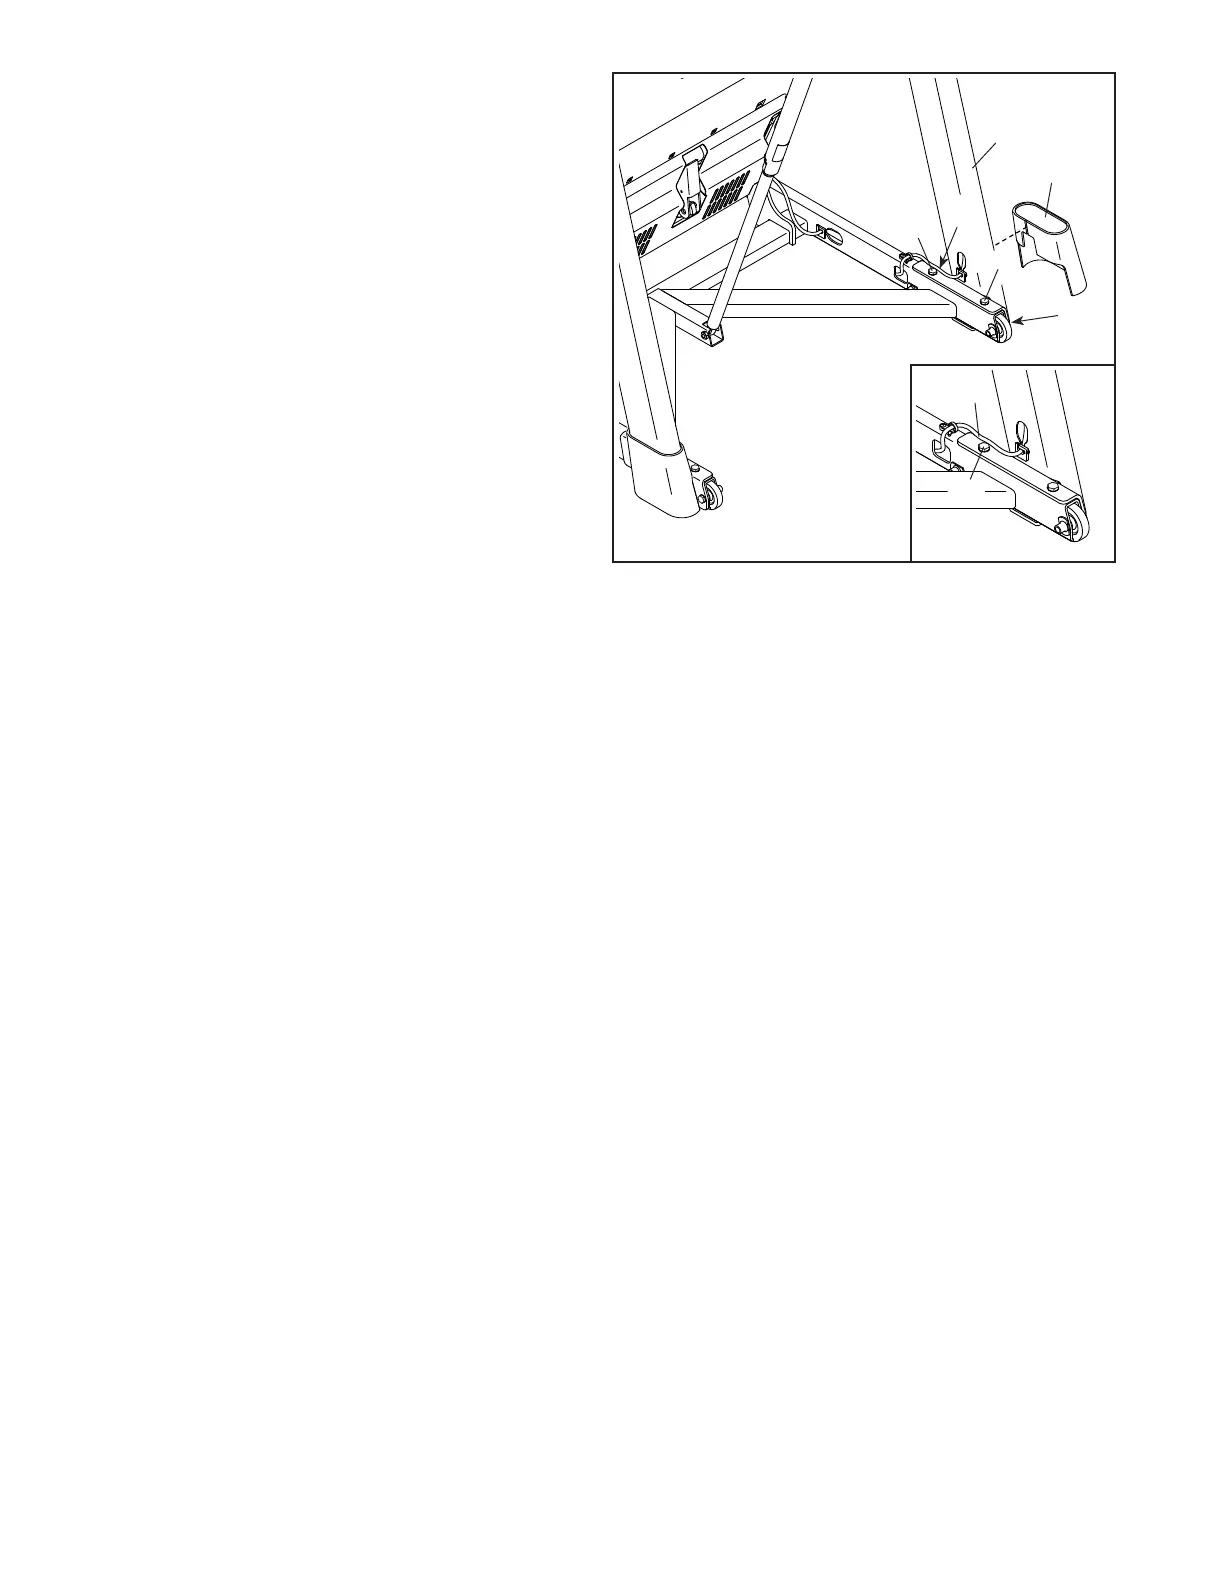
15. Firmly tighten the four indicated Screws (4, 33).
See the inset drawing. Make sure that the
Upright Wire (74) is on the indicated side of the
3/8" x 2 3/8" Screw (4).
Next, pull the Right Upright Cover (77) open
slightly, slide it around the Right Upright (73),
and then slide it down to the floor.
Repeat this step on the left side of the tread-
mill. Note: There is not a wire on the left side.
Then, lower the treadmill (see HOW TO LOWER
THE TREADMILL FOR USE on page 24).
15
77
73
33
4
33
4
74
4
 Loading...