8
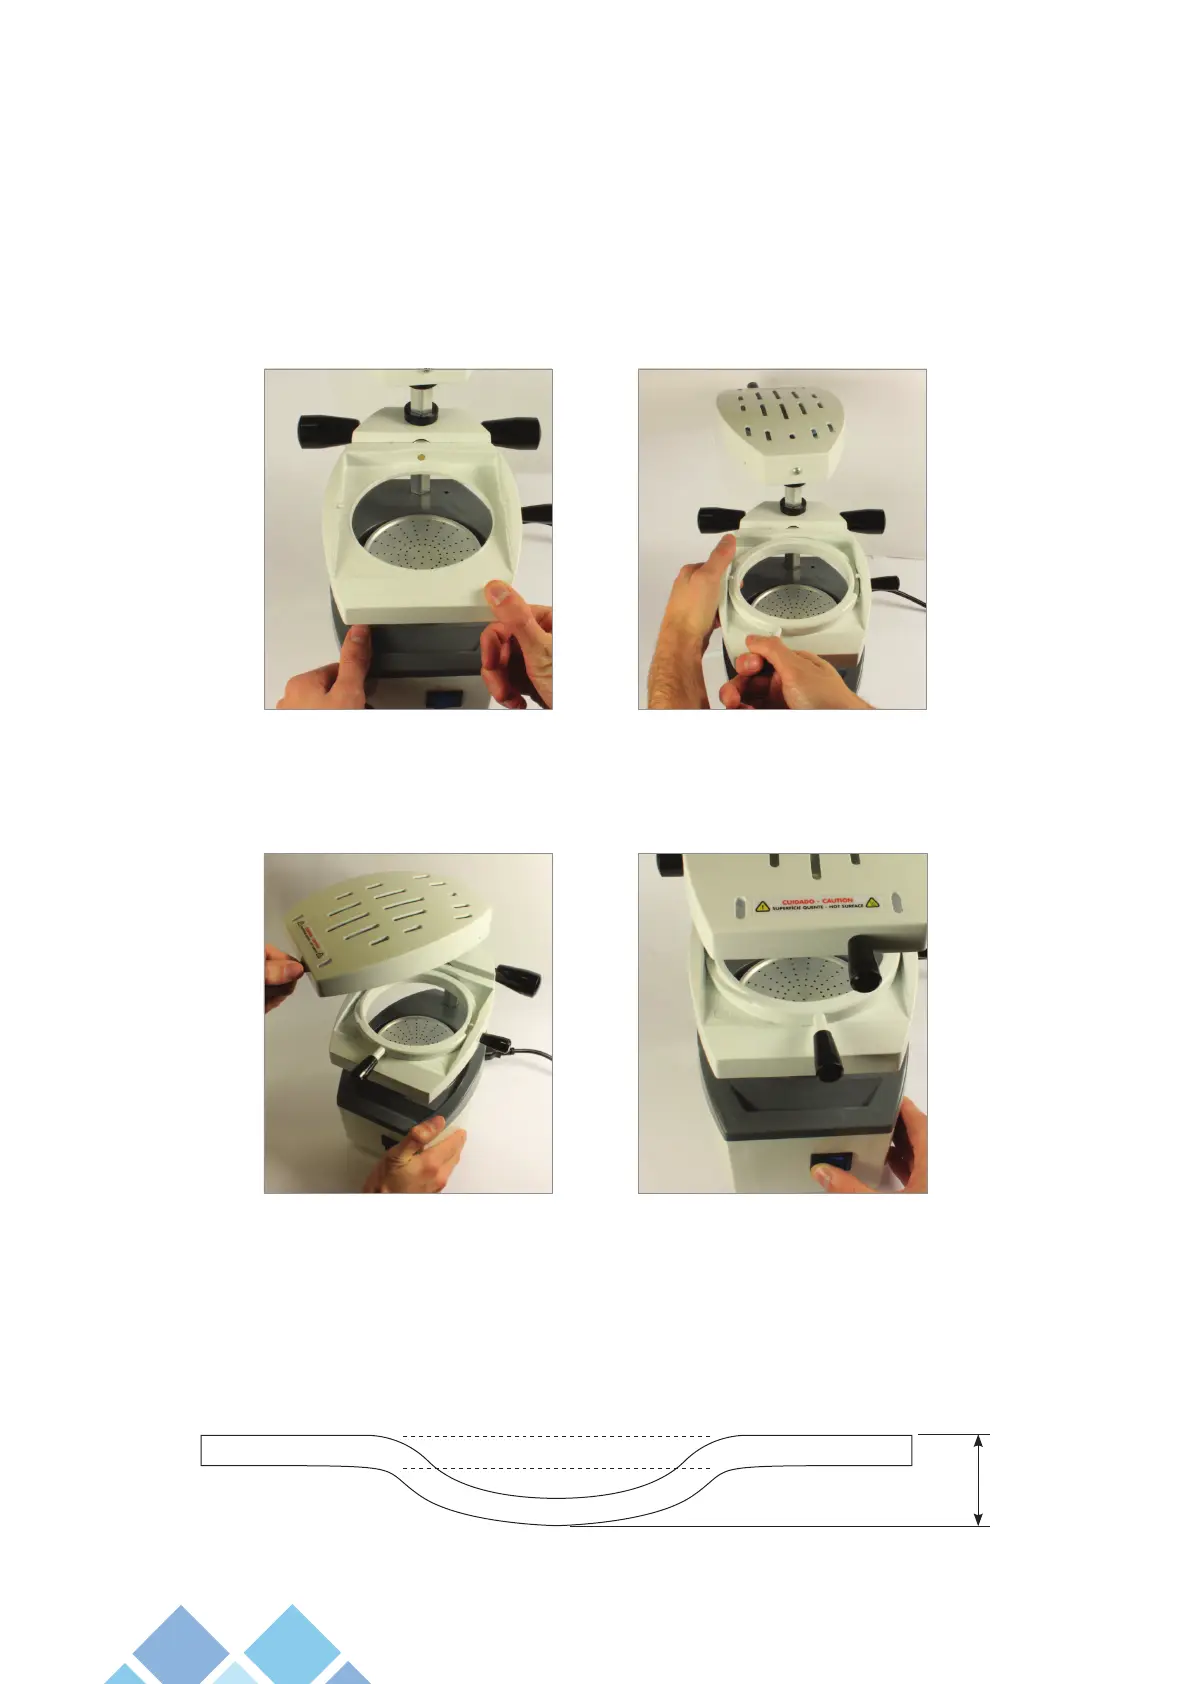
5.1.6 - Insert the blank for moulding from the front side of the xing unit observing a small access slope and introducing
it under the two side pins ( photo 11) (photo 12).
5.1.7 - Insert the smaller ring into the xing unit on the blank observing the two side pin guides (11) and turn it to the
left clockwise direction using the handle (09) locking the blank (photo 13).
Attention:
It is important to always maintain a rm grip on the blank xation unit (04) while the blank is being put in place. (Photo
13).
5.1.8 - Put the heating unit (02) back to the central position aligned with the motor cabinet and actuate the general key
(08), starting the heating process. The red light on the general switch will go on (photos 14 and 15).
5.1.8.1 - Ideal plastic forming point: Due to the existence of several types of vacuum form material (different materials
and thicknesses), the ideal plastic forming point is identied by changes in the plate and not by time. In view of this, it is
the responsibility of each blank manufacturer to provide instructions of use with their material.
In general, the ideal vacuum point is observed by the sagging of the plate from 10 to 20mm, as shown in the drawing
below.
Photo 13Photo 12
Photo 15Photo 14
10 to 20mm