EasyManua.ls Logo

ICP PHM354K00A1 - User Manual

ICP PHM354K00A1
14 pages
Print Icon
To Next Page IconTo Next Page
Loading...
Installation Instructions
PHM3 SERIES
PACKAGE HEAT PUMPS
TABLEOF CONTENTS
SAFETYLABELINGANDSIGNALWORDS ....................... 2
UNITDIMENSIONS ......................................... 3
SAFEINSTALLATIONREQUIREMENTS ......................... 3
LOCATINGTHE UNIT ....................................... 3
CLEARANCES ............................................ 4
INSTALLATION............................................ 4
INSTALLINGDUCTCOLLARS................................. 4
CONDENSATEDRAIN....................................... 5
UNITELECTRICALWIRING .................................. 5
LINEVOLTAGE............................................ 5
CONVERTING230VTO208V ................................. 6
LOWVOLTAGEWIRING ..................................... 6
THERMOSTATCONNECTIONS ................................ 6
FINALELECTRICALCHECK.................................. 6
CONTROLBOXCONFIGURATIONANDWIRING ................... 7
WIRINGDIAGRAMS ........................................ 8
RAINSHIELDINSTALLATION................................ 10
AIR DISTRIBUTIONSYSTEM................................. 10
DUCTWORK............................................. 10
FILTERS................................................ 10
UNITELECTRICALWIRING ................................. 10
START-UP PROCEDURES.................................. 1!
SPEEDTAPS ............................................ 1!
CHECKBEFORESTARTING................................. 1!
DEFROSTINTERVAL ...................................... 12
SEQUENCEOF OPERATION................................. 13
OPERATION ............................................. 14
LISTED
Printed in U.S.A. 11/8/05 427 O1 1101 OO
Question and Answer IconNeed help?

Do you have a question about the ICP PHM354K00A1 and is the answer not in the manual?

Summary

Safety Labeling and Signal Words

Danger Label

Defines the DANGER label, its appearance, and associated hazards for immediate severe injury or death.

Warning Label

Defines the WARNING label, its appearance, and associated hazards for severe injury, death, or property damage.

Caution Label

Defines the CAUTION label, its appearance, and associated hazards for minor injury or property damage.

Product Labeling

Explains the use of signal words combined with colors and pictures on product labels for hazard communication.

Unit Dimensions

Safe Installation Requirements

Locating The Unit

Clearances

Specifies minimum clearances required from adjacent structures for adequate air circulation and service access.

Installation

Installing Duct Collars

Provides step-by-step instructions for installing the supplied duct collars onto the unit casing.

Condensate Drain

Details the condensate drain outlet, the need for a trap due to negative pressure, and installation requirements.

Electric Heat

Describes the availability and basic installation principle of accessory electric heaters for the unit.

Unit Electrical Wiring

Ground Connections

Explains how to properly ground the unit using a lug on the control plate to the electrical service panel.

Line Voltage Wiring

Outlines procedures for making line voltage connections, emphasizing grounding first and using liquid-tight conduit.

Converting 230 V Units to 208 V

Provides steps to convert the unit's voltage from 230V to 208V by adjusting the control transformer connection.

Low Voltage Wiring

Guides on routing low voltage wires and refers to wiring diagrams for thermostat and accessory connections.

Thermostat Connections

Emphasizes the importance of thermostat location and refers to connection diagrams for proper wiring.

Field Installed Equipment

States requirements for field wiring of accessories, ensuring compliance with temperature limits and codes.

Final Electrical Check

Instructs to perform a final wiring check, inspecting field wiring for damage or chafing due to vibration.

Control Box Configuration and Wiring

Control Box Configuration

Illustrates the layout and components within the unit's control box.

Control Box Wiring for PHM024-42

Provides a detailed wiring diagram for the control box of PHM024-42 unit models.

Control Box Wiring for PHM048-54

Presents a detailed wiring diagram for the control box of PHM048-54 unit models.

Electrical Schematics and Diagrams

2-31;2 Ton Model Schematic

Displays the complete electrical schematic for 2 to 3-1/2 ton models, showing component interconnections.

Unit Component Arrangement

Shows a diagram illustrating the physical layout of major components within the unit's sections.

DIP Switch Settings

Explains the function and settings of DIP switches on the defrost board for various operational configurations.

4 & 5 Ton Model Electrical Schematics

4 & 5 Ton Model Schematic

Displays the complete electrical schematic for 4 and 5 ton models, showing component interconnections.

Unit Component Arrangement

Shows a diagram illustrating the physical layout of major components within the unit's sections for different models.

DIP Switch Settings

Explains the function and settings of DIP switches on the defrost board for various operational configurations on 4 & 5 ton models.

Rain Shield Installation

Air Distribution System

Ductwork

Provides guidelines for ductwork sizing, velocity, and insulation requirements for optimal performance.

Ductwork Insulation

Recommends minimum insulation thickness and vapor barrier types for outdoor and attic ductwork installations.

Ductwork Connections

Advises on using flexible connectors and ensuring plenums are sealed to the unit casing for vibration minimization.

Filters

Details filter requirements, recommended sizes, and stresses the importance of operating the unit with filters installed.

Start-up Procedures

Circulating Air Blower

Guides on how to determine the correct blower speed tap setting for desired airflow based on system static pressure.

Speed Taps

Explains how to adjust the blower motor speed terminal block to achieve the required cooling speed tap.

Check Before Starting

Lists essential checks to perform before energizing the unit, including blower speed, filter installation, and tool removal.

Cooling

Details the sequence of checks required for the cooling mode, verifying contactor, compressor, and fan operation.

Defrost Control Time Interval Adjustment

Provides instructions on how to adjust the defrost cycle interval using DIP switches on the electronic defrost control board.

Sequence of Operation

Cooling Operation (PHM324-42)

Describes the sequence of events for cooling mode on PHM324-42 units, including fan and compressor energization.

Cooling Operation (PHM348-54)

Details the cooling sequence for PHM348-54 units, including two-stage thermostat operation and high/low stage switching.

Heating Operation (PHM324-42)

Explains the heating sequence for PHM324-42 units, including compressor and auxiliary heat activation.

Heating Operation (PHM348-54)

Describes the heating sequence for PHM348-54 units, including two-stage heating and auxiliary heat control.

Continuous Fan

Explains how continuous fan operation is activated via thermostat selection and the airflow provided.

Defrost Mode

Details the defrost mode initiation, timing delays, and the sequence of operations including fan and reversing valve.

Adding Accessories

Mentions the availability of adding accessories like low/high pressure controls and ambient controls.

Low;High Pressure Controls

Describes the location of ports for installing external high and low pressure controls or low ambient controls.

Operation

Scroll Recycle Delay Timer

Explains the 5-minute recycle delay timer on the defrost board for compressor protection during power interruptions.

Pressure Switch

Details the function of low and high pressure switches in protecting the compressor from charge loss or overpressure.

Overview

This document provides installation instructions for the PHM3 Series Package Heat Pumps. It covers various aspects from safety labeling and dimensions to electrical wiring, start-up procedures, and operational sequences.

Function Description:

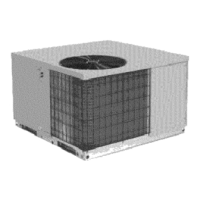
The PHM3 Series Package Heat Pumps are designed for outdoor installation, providing both cooling and heating functions. These units are self-contained, meaning all major components for both heating and cooling are housed within a single cabinet. They are intended to be placed on a ground-level platform, such as a concrete slab or concrete blocks, ensuring proper drainage and clearance from surrounding structures. The units utilize a circulating blower and a condenser fan for air distribution and heat exchange. Electric heat accessories are available to supplement the heating function when required.

Important Technical Specifications:

  • Dimensions:
    • PHM324/30 units have an "A" dimension of 32-3/8 inches (821 mm).
    • PHM336 to 54 units have an "A" dimension of 40-3/8 inches (1025 mm).
    • All dimensions are provided in inches (mm).
    • The unit features a coil access panel, blower access panel, and electrical access for line voltage power supply.
    • A round flange accommodates a 14-inch diameter return duct.
    • Condensate drain connection is 3/4-inch (19.1 mm) threaded female PVC.
    • Low voltage wiring access is 7/8-inch (22 mm).
  • Electrical Wiring:
    • All electrical work must conform to local codes, ordinances, and the National Electrical Code ANSI/NFPA 70-1990 (or current edition) in the United States, or CAN/CGA B149-1 and CSA C.22.1 in Canada.
    • Line voltage power supply must be from a separate fused circuit with a disconnect switch located within sight of the unit.
    • Supply voltage, amperage, fuse, and disconnect switch sizes must conform to local codes.
    • Unit must be grounded to the electrical service panel using a copper conductor of appropriate size.
    • Line voltage connections are made on the unit electrical control plate, accessible by removing the Blower/Electrical access panel.
    • Units can be converted from 230V to 208V by reconfiguring the 24V control transformer wiring.
    • Low voltage wiring is routed through a port on the rear panel to the control box.
  • Air Distribution System:
    • Ductwork, supply registers, and return air grilles must be designed and sized to handle the unit's cooling air volume.
    • Maximum recommended velocity in trunk ducts is 1000 ft./min (5.08 m/s), and in branches, 800 ft./min (4.06 m/s).
    • Ductwork installed outdoors should have a minimum of 2 inches (51 mm) of fiberglass insulation with a weatherproof vapor barrier.
    • Ductwork installed in attics or other exposed areas should have a minimum of 2 inches (51 mm) fiberglass insulation with an indoor type vapor barrier.
    • Flexible, non-combustible connectors are recommended between main trunk ducts and plenums to minimize vibration.
    • All return air must pass through a field-supplied filter.
    • Recommended filter sizes vary by nominal tons of air conditioning and cubic feet per minute (CFM), with separate specifications for disposable and cleanable filters. For example, a 2-ton unit (700-900 CFM) requires a 400 sq. in. (20x25) disposable filter or a 246 sq. in. (15x20) cleanable filter.
  • Electric Heat Accessories:
    • A variety of accessory electric heaters (5.0 to 20.0 KW) are available.
    • Heater modules mount on the blower inlet and include integral harnesses for connection to a remote-mounted heater control package.
  • Defrost Control:
    • The defrost board has dip switches for setting defrost intervals at 30, 60, 90, or 120 minutes (factory setting is 60 minutes).
    • The backup defrost terminate time is fixed at 10 minutes.
    • Compressor recycle delay timer is 5 minutes.
    • Power interrupt response is 17-35 msec.
    • Quiet shift compressor recycle delay is 30 seconds.
  • Pressure Switches:
    • Units are equipped with a low pressure switch on the liquid line (high side) to prevent system damage from a loss of charge.
    • PHM348-54 models are also equipped with a high pressure switch to protect the compressor.

Usage Features:

  • Outdoor Installation: Designed exclusively for outdoor use, placed on a level platform.
  • Clearances: Minimum clearances must be maintained from adjacent structures for adequate air circulation and service access. Recommended clearances include 30 inches (762 mm) for blower and evaporator/electrical access panels, 0 inches for combustible base and duct connections, 48 inches (1219 mm) between overhang and unit top, and 10 inches around the condenser coil area.
  • Condensate Drainage: A field-supplied condensate trap with a standing column of water of at least 2 inches (50.8 mm) must be installed as near to the unit as possible to counteract negative pressure from the circulating blower and condenser fan.
  • Blower Speed Settings: Blower speed tap settings are provided for rated and high airflow, varying by unit tonnage (e.g., 2-ton units use Tap 1 for rated airflow and Tap 2 for high airflow). The blower motor speed terminal block (speed taps) must be set to the proper cooling speed.
  • Thermostat Control: The unit's operation is controlled by a thermostat. Proper connection and placement of the thermostat are crucial for optimal performance. Low voltage wiring harness connection diagrams are provided for PHM324-42 and PHM348-54 units.
  • Two-Stage Operation (PHM348-54): These units utilize a two-stage indoor thermostat for both cooling and heating. The system can switch between low and high stage cooling/heating based on demand, energizing an internal solenoid valve in the scroll compressor and adjusting indoor fan speed.
  • Continuous Fan Operation: When selected on the thermostat, the indoor fan runs continuously at the selected airflow setting (for 024-042 units) or low stage (Y1) airflow (for 048 and 054 units).
  • Rain Shield Installation: A rain shield is installed to protect internal components from water, including a closed-cell foam pad and circuit breaker filler plates for unused slots.

Maintenance Features:

  • Access Panels: Blower/electrical access panels and coil access panels are removable for service and maintenance.
  • Filter Maintenance: Filters must be clean, properly sized, and installed correctly in the return air duct. The unit should not be operated without all filters in place.
  • Electrical Checks: Regular checks of electrical wiring, connections, and grounding are essential. All openings must be sealed to prevent moisture entry into the control box.
  • Defrost Control Adjustment: The defrost interval can be adjusted via dip switches on the defrost control board. Service testing procedures are outlined for forced defrost cycles.
  • Low/High Pressure Ports: The unit is equipped with extra low and high pressure ports for the installation of pressure controls or low ambient controls, facilitating system monitoring and protection.
  • Pre-Start Checks: Before starting the unit, ensure the blower motor speed terminal block is set correctly, air filters are installed, all wires are in place, and tools are removed. All service access panels must be replaced.
  • Operational Monitoring: During power application, check for proper operation of the contactor, compressor, condenser fan motor, and circulating air blower. Any unusual sparking, odors, or noises require immediate shutdown and re-inspection.
  • Temperature Limitations: Do NOT operate the unit on cooling when the outdoor temperature is below 45°F (PHM324) or 40°F (PHM330-54) to prevent damage to the compressor.

ICP PHM354K00A1 Specifications

General IconGeneral
Model NumberPHM354K00A1
CategoryHeat Pump
BrandICP
Refrigerant TypeR-410A
Voltage (V)208/230
Phase1

Related product manuals