ADS-HRR(SR)-MFT1-DS-IG-EN maestro.idatalink.com
FORD EDGE WITH MYFORD TOUCH 20142019
Automotive Data Solutions Inc. © 2023
3
Fig. 1.4
Fig. 1.6
Fig. 1.2
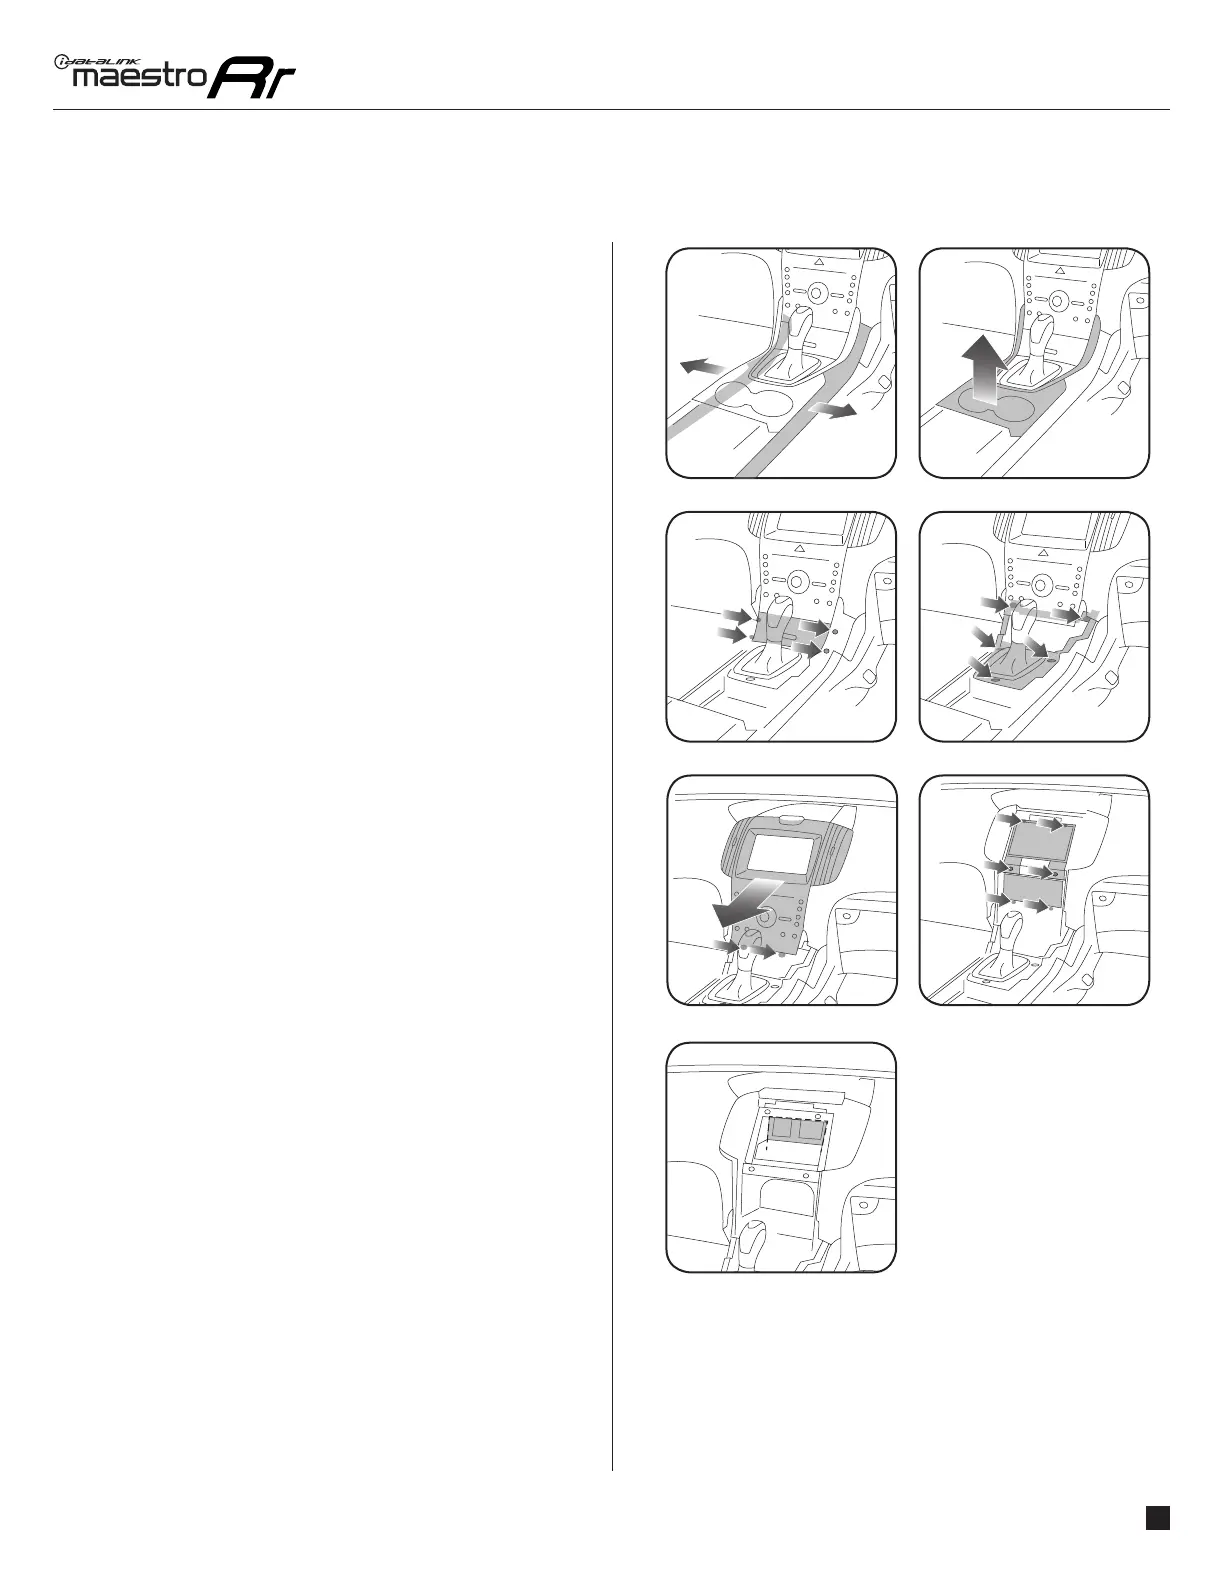
DASH DISASSEMBLY
NOTE: Requires shallow mount radio. Requires trimming
in the dash.
1. Unclip and remove the two (2) trim panels at the left and
right of the center console. (Fig. 1.1)
2. Unclip and remove the center console trim panel (around
the shifter). Unplug the connectors. (Fig. 1.2)
3. Remove four (4) 5.5mm screws holding storage
compartment in front of the center console. Remove and
unplug it. (Fig. 1.3)
4. Remove fi ve (5) 7mm screws holding the shifter housing.
Unclip and pull it backward. Do not remove it. (Fig. 1.4)
5. Remove two (2) 7mm screws at the bottom of the radio
and climate control panel. Carefully unclip and remove the
radio and climate control panel, starting from the bottom
(air vents are fragile). Unplug the connectors. (Fig. 1.5)
6. Remove four (4) 7mm screws holding the screen. Unplug
and remove the OEM screen. (Fig. 16)
7. Remove two (2) screws holding the radio. Unplug and
remove the OEM radio. (Fig. 1.6)
8. Cut and remove the plastic behind the screen. (Fig. 1.7 )
Keep screws and brackets fot MFT1 dash kit assembly.
Unbox MFT1 dash kit and locate bracket set #1, discard
set #2.
1
INSTALLATION INSTRUCTIONS P1 /2
 Loading...