ADS-HRR(SR)-MFT1-DS-IG-EN maestro.idatalink.com
FORD MUSTANG WITH MYFORD TOUCH WITHOUT AMP 20152019
Automotive Data Solutions Inc. © 2023
3
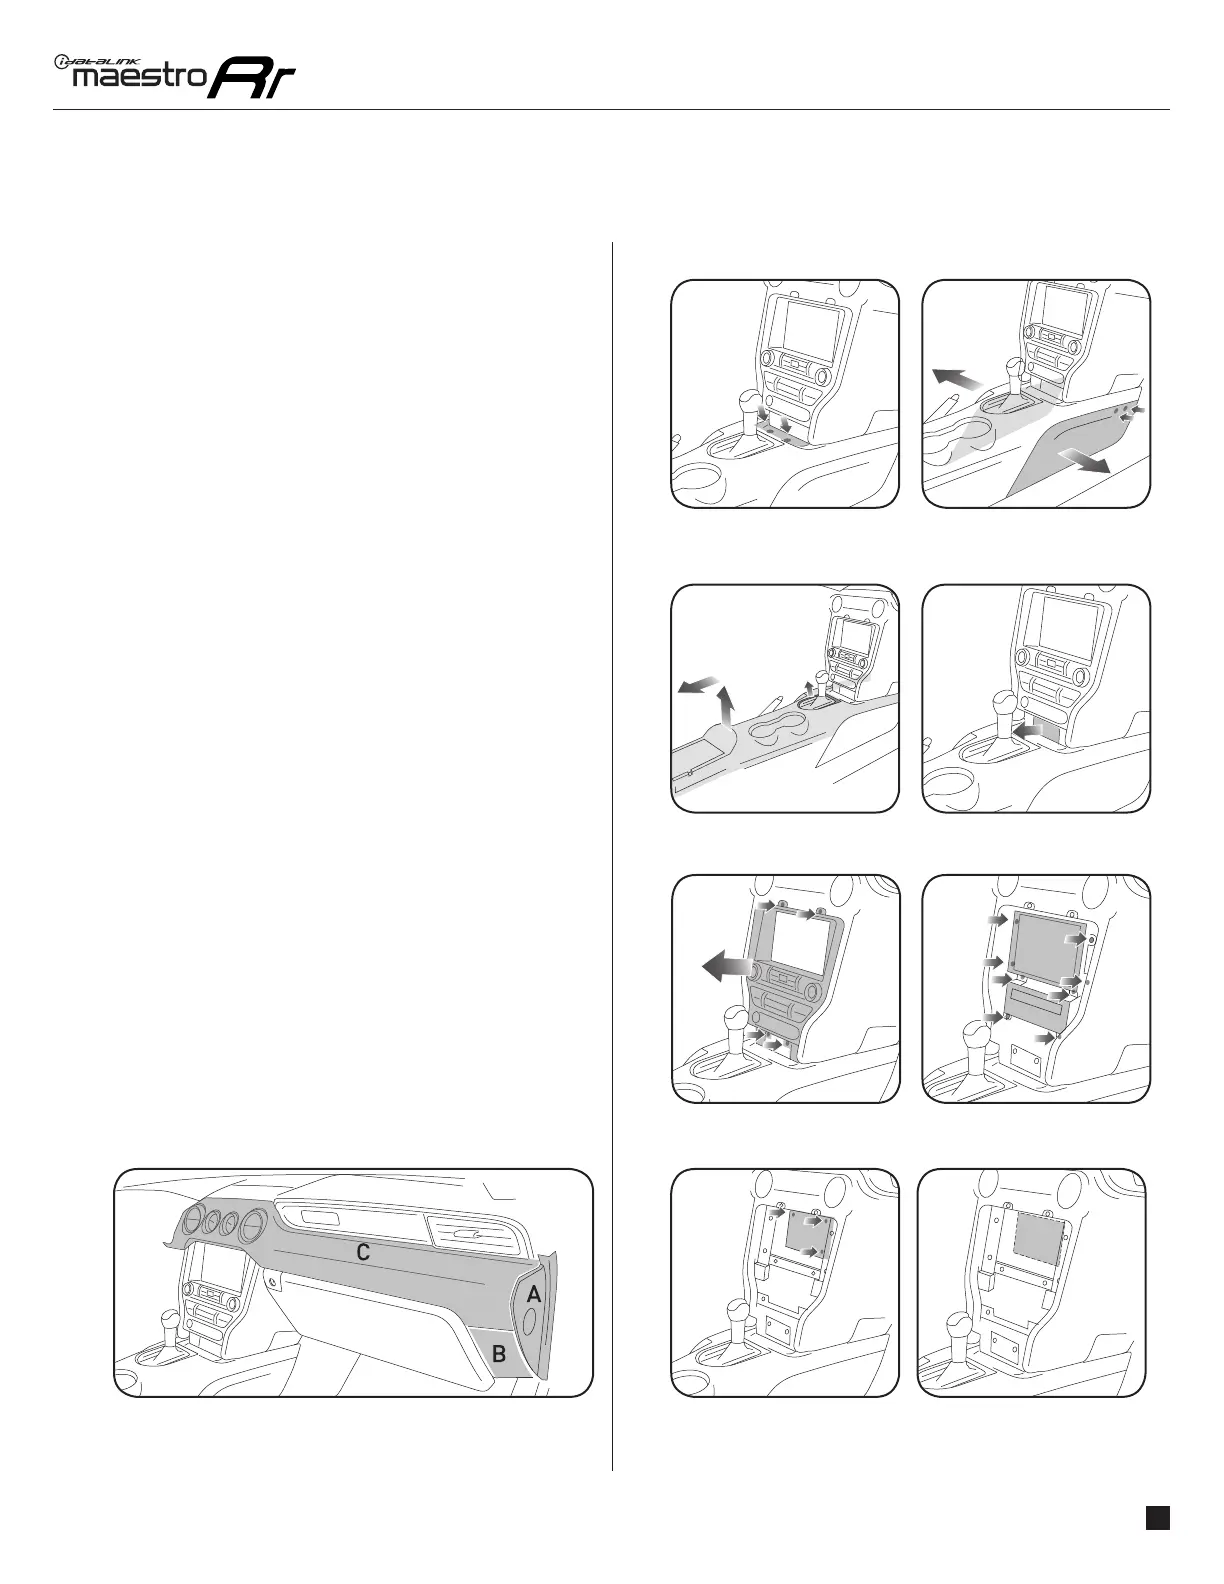
Fig. 1.8 Fig. 1.9
Fig. 1.4
Fig. 1.6
Fig. 1.5
Fig. 1.7
Fig. 1.2
Fig. 1.1
Fig. 1.3
DASH DISASSEMBLY
1. Open the passenger door. Unclip and remove trim panel
from the side of dash. (Fig. 1.1-A)
2. Open the glove box. Unclip and remove trim panel on the
right. (Fig. 1.1-B)
3. Unclip and remove the (vent) dash panel. (Fig. 1.1-C)
4. Remove the tray cover in front of shifter and remove the
two (2) 7mm screws. (Fig.1.2)
5. Unclip and remove the front side panels from the center
console and remove four (4) 7mm screws under the panels.
(Fig. 1.3 )
6. Unclip the shifter bezel trim and pull it slightly. Open the
center console storage compartment. Unclip the center
console trim panel and slide it toward the rear of vehicle.
(Fig. 1.4)
7. Remove the plastic tray in front of shifter. Remove the
plastic trim at the bottom of center dash panel. (Fig. 1.5)
8. Remove four (4) 7mm screws holding the trim radio panel.
Unclip, remove and unplug the radio panel. (Fig. 1.6)
9. Remove four (4) 7mm screws holding the radio. Remove
four (4) 7mm screws holding the screen frame. Remove
and unplug the OEM screen and radio. (Fig. 1.7)
10. Remove three (3) 7mm screws holding the Sync module
and remove it (if applicable). (Fig. 1.8)
11. Cut and remove back panel in radio cavity behind the
screen. (Fig. 1.9)
Unbox MFT1 dash kit and locate bracket set #2, discard
set #1.
1
INSTALLATION INSTRUCTIONS P1 /2
 Loading...