53
Installation and Servicing
SECTION 3 - SERVICING
3.31 HEAT ENGINE RENEWAL
Refer also to Section 2.1 - ‘Boiler Exploded View’
IMPORTANT - Before starting the removal procedure, protect the
gas and electrical controls with a waterproof sheet or plastic bag.
1. Refer to Section 3.8.
2. Drain the boiler. Refer to Section 3.19.
3. Remove the fan / venturi assembly and place on one
side. Refer to Section 3.9.
4.
Remove burner and place on one side. Refer to
Section
3.11.
5. Remove the ignition electrode. Refer to Section 3.12.
6. Remove the spark generator. Refer to Section 3.13.
7. Remove the gas valve. Refer to Section 3.14.
8. Remove the expansion vessel. Refer to Section 3.32.
9. Remove the ow thermistor. Refer to Section 3.29.
10.
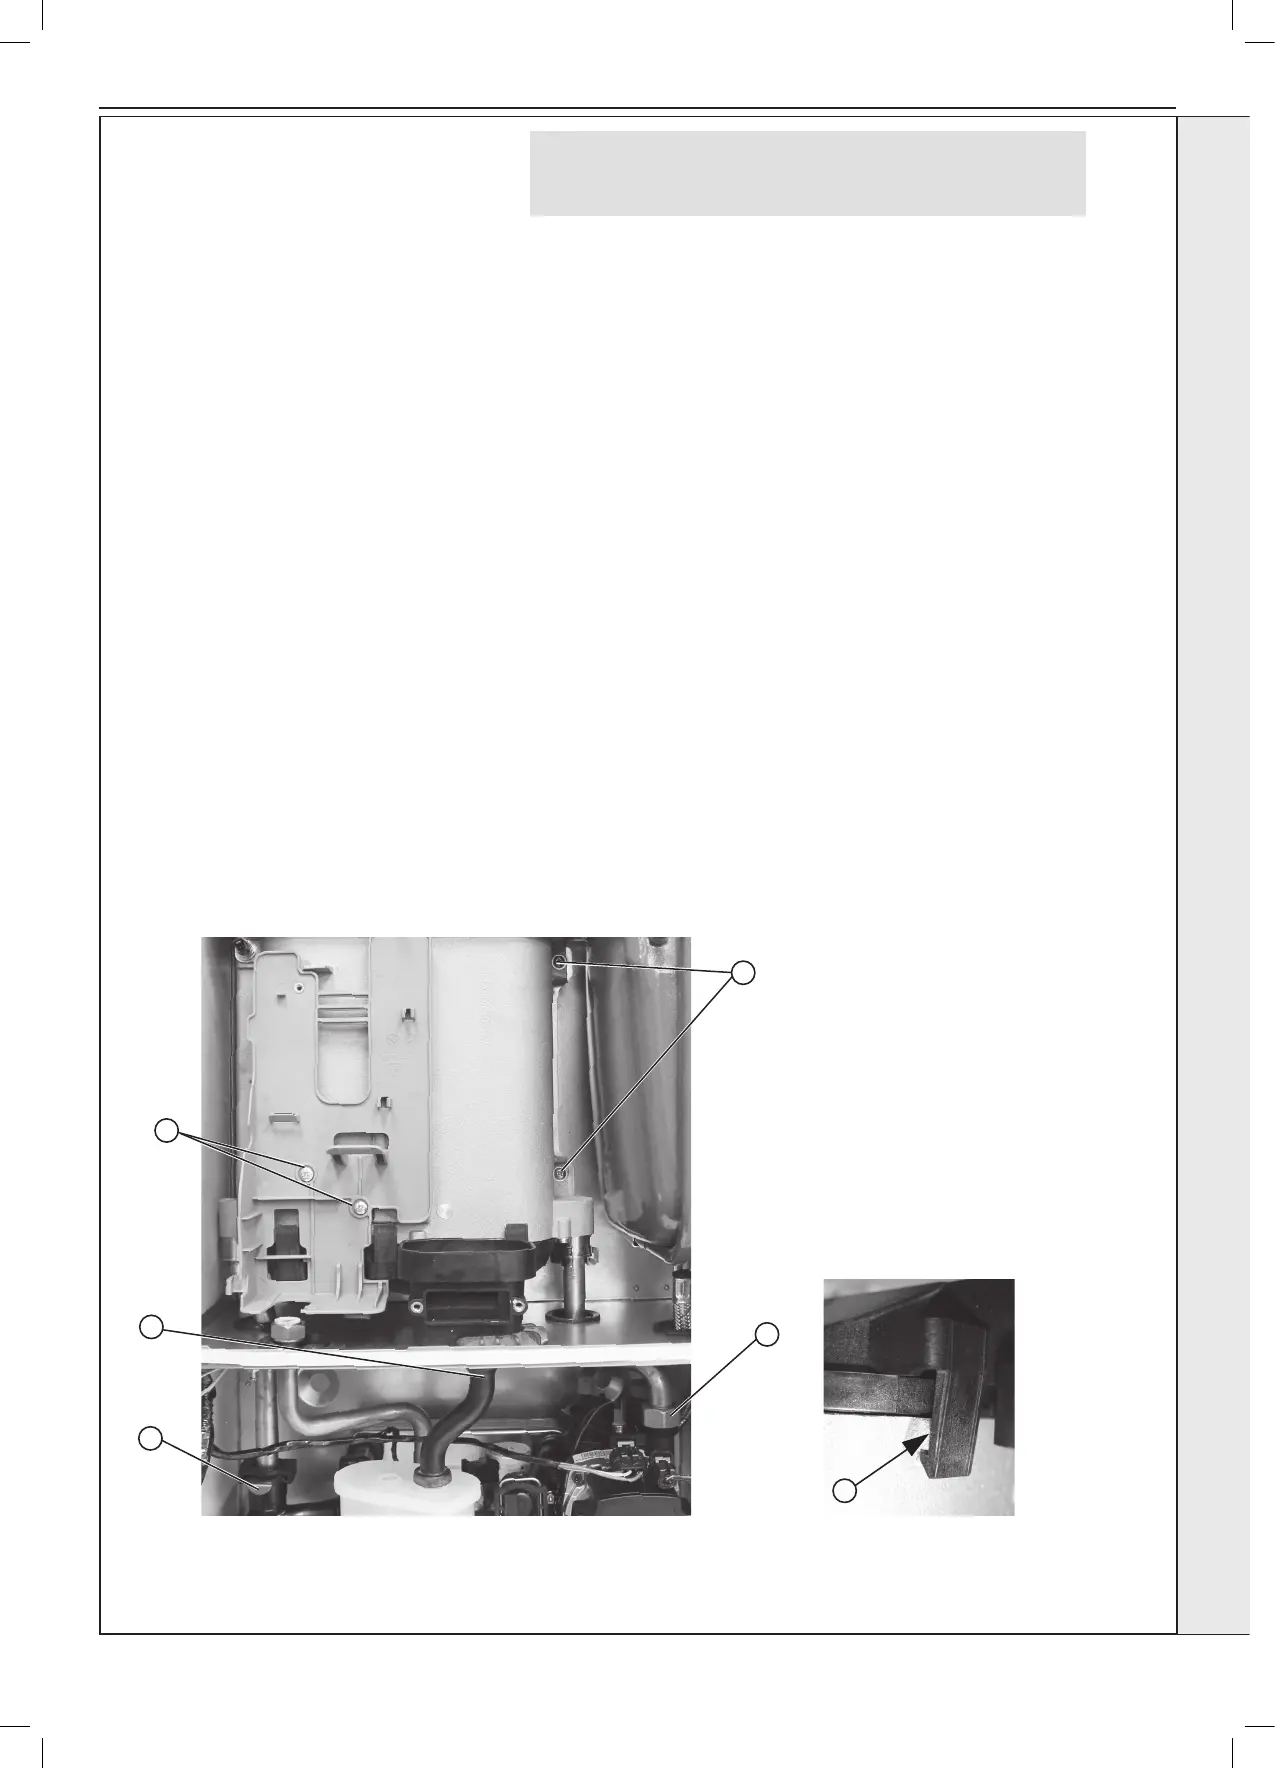
Remove the 2 M5 screws retaining the gas valve mounting
bracket and transfer bracket to the new heat exchanger.
11. Undo the inlet pipe union nut, swing the pipe and pull
down to remove from heat exchanger.
12. Pull out the ow pipe spring clip, pull the pipe down to
remove from heat exchanger.
13. Remove the condensate rubber pipe from the sump.
14. Remove the two heat exchanger xing screws.
15. To
remove the Heat exchanger slide out of location bracket.
16. If replacement sump required: Rotate heat exchanger
assembly 180º. Place new sump onto heat exchanger,
ensuring correct orientation and seal is in place. Then gently
apply pressure to the base of the sump at each tab xing
point and engage tabs onto the heat exchanger.
17.
Reassemble in reverse order, ensuring the heat exchanger LH
retaining bracket is correctly positioned. Replace any new ‘o’
rings supplied with new heat exchanger and replacing gaskets
or seals if any sign of damage is evident. When replacing the
spring clips located on the return pipe connection, ensure clip is
oriented to correctly match connecting pipe diameters.
18.
Ensure the trap/siphon is lled with water. Refer to Section 3.15.
19. Rell the boiler.
20. Ensure all gas valve connections are gas tight with a gas
soundness check up to the gas control valve.
21. Check operation of the boiler. Refer to Sections 2.24 & 2.25.
Shown as 180º position
10
13
12
11
16
14
SERVICING



 To Next Page