24
1
2
3
4
17
max.
16 Nm
max.
12 Nm
8 Thermostatic cartridge replacement cont’
17
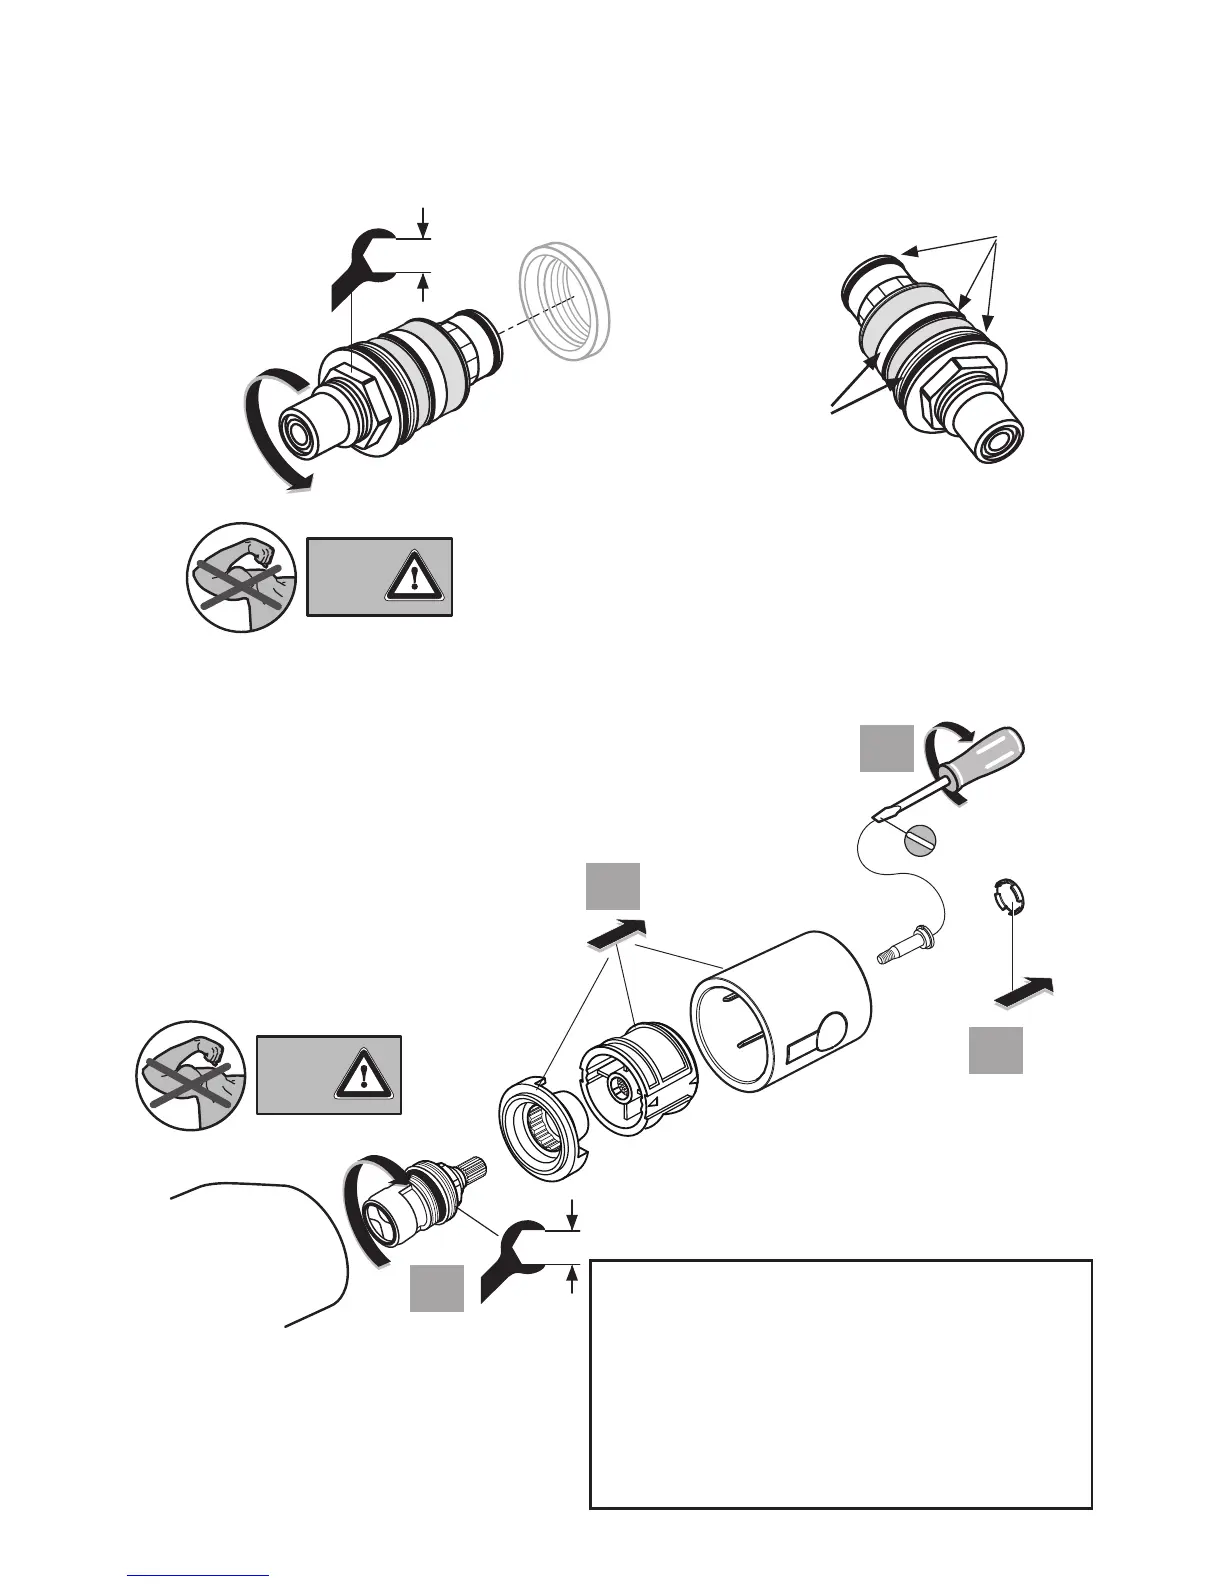
5. Unscrew cartridge with a 24mm A/F deep socket, expect some trapped water to
escape. Replace the cartridge if necessary. When retting cartridge, do not over
tighten, hand tighten the rst few threads, maximum torque 16Nm.
To clean the screens remove the o-rings shown
The sreens will then slide off. When clean replace the
sreens then the o-rings which should be lightly greased
with a WRAS approved silicone grease
(eg Kluber Unisilikon GBU2
lter screens
lubricate
o-rings
before
retting
GENERAL MAINTENANCE TIPS:
• Isolate both water supplies rst.
• Drain down the pipe work & product as much as possible:
fully open ow handle & unscrew shower hose.
• Use the correct size tools.
• Expect some trapped water to escape from the mixer.
• Ensure parts are re-assembled in the correct ‘reverse’ sequence.
• Observe torque settings - where specied.
• Restore both water supplies.
• Check all joints for leaks upon completion.
9 Flow cartridge replacement
1. Prise out the index button.
2. Remove handle screw.
3. Pull off the ow control handle.
4. Pull of handle carriers.
5. Unscrew cartridge with 17mm
A/F spanner and replace if necessary.
To replace the ow control cartridge:
 Loading...