12
4.2 Installing rim mount products
The thermostatic mixing valve must be installed in such a position that maintenance of the TMV and its
valves and the commissioning and testing of the TMV can be undertaken.
30
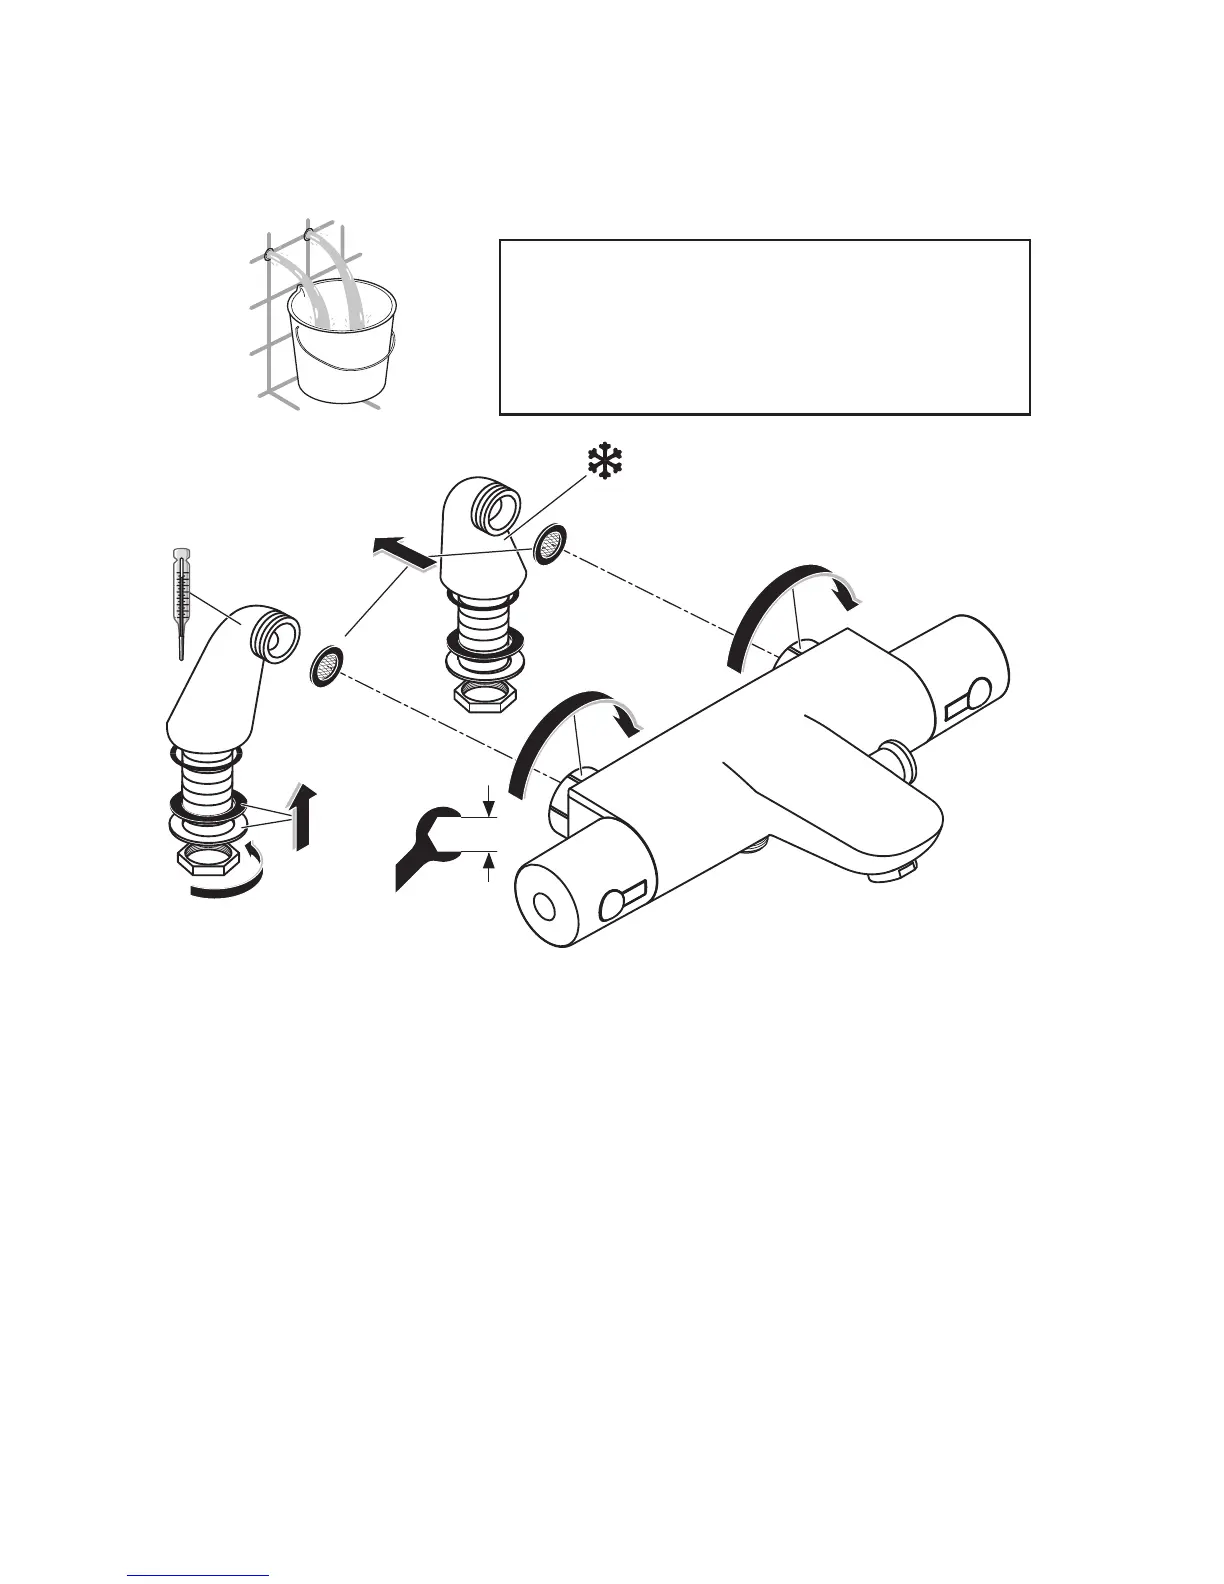
Loosely assemble both of the bath legs to the main body of the mixer, ensuring the seals shown are
located within the captive nuts. Hand tighten both captive nuts sufciently to hold the assembly securely
together.
Make sure that seals are located in the bottom face of both bath legs. The back-nuts (and washers, if
supplied) will be tted from the underside of the bath. If they are already assembled to the legs, they
should be removed.
Offer the tails of the legs into the two holes in the bath. Align the legs and gently lower the mixer onto the
rim of the bath. IMPORTANT: make sure the seals are still correctly located in the grooves of the bath
legs, otherwise splashed water may seep pass the legs and onto the oor under the bath.
The back-nuts (and washers, if supplied) can be tted to the tails from under the bath. Keeping the
tails central in the bath holes, check that the mixer is still positioned correctly on the bath rim, and then
tighten the back-nuts.
The captive nuts connecting the mixer to the legs can also be tightened, use a strap wrench or 30mm
A/F spanner, taking care not to damage the chromed surfaces.
Connect the water supply pipes to the inlet tails of the mixer. HOT pipe to the left and COLD to the right.
Tighten all joints, turn on the water supplies and check for leaks.
Hose from the shower kit should be connected to the outlet on the under side on the mixer.
IMPORTANT
BEFORE CONNECTION, FLUSH WATER
THROUGH PIPEWORK TO REMOVE ALL
DEBRIS ETC. WHICH COULD DAMAGE
THE VALVE MECHANISM
 Loading...