30
23
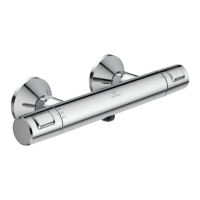
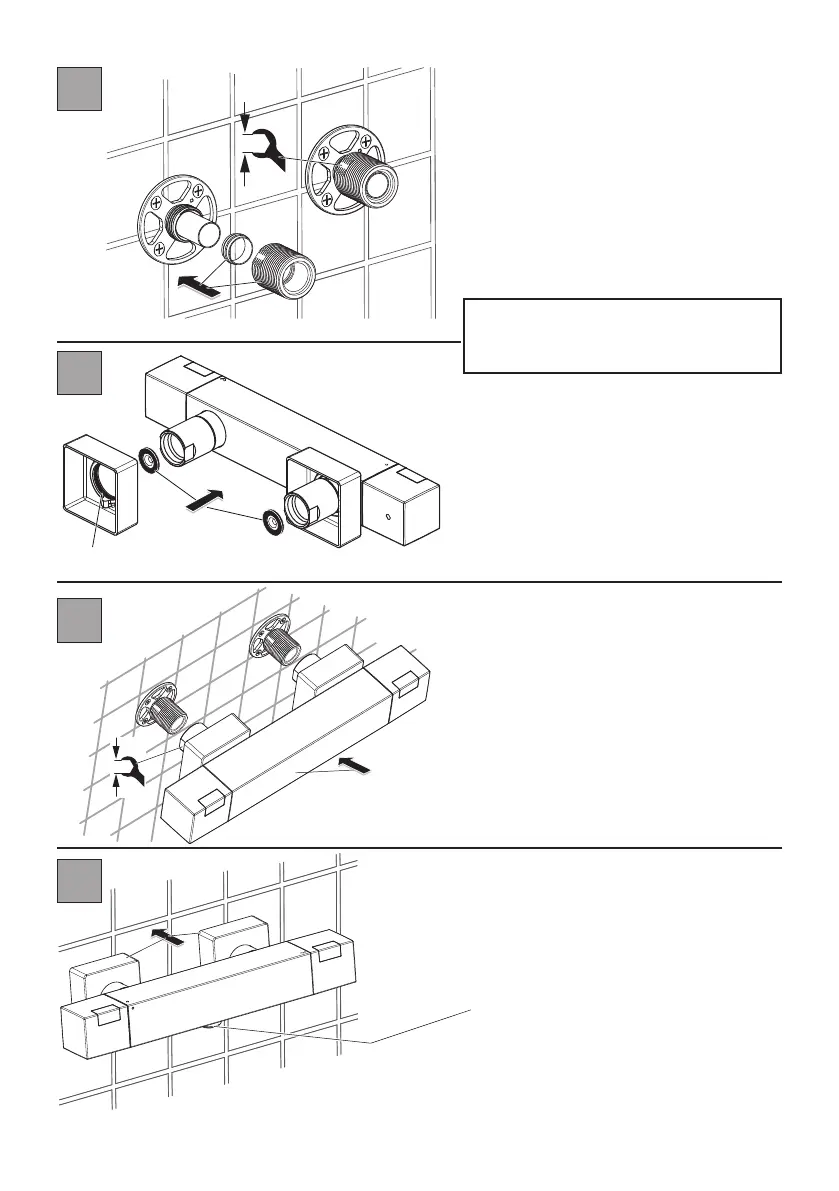
Slide the olives onto the pipes. Screw the
two connectors onto the wall brackets by
hand until they stop against the olives.
Use a 23mm A/F spanner (or adjustable)
on the connectors to tighten.
The connectors will have to be securely
tightened to form the necessary compres-
sion joint between the olive, wall bracket
& connector.
Fit the O-rings into both escutcheons as
shown. Slide the escutchens onto the
mixer’s inlets right upto the rear face of
the mixer.
Fit the washer seals (with integral strai-
ners) into both inlet bores, ensuring the
domed area of the strainer is pointing
outwards (not into the mixer).
Align the mixer’s inlets legs with the
wall brackets & start screwing the
coupling nuts onto the threads. Screw
a couple of threads of each nut & then
alternate to ensure mixer remains
parallel to the wall.
O-rings can be wetted with
water to help them slide.
Fit the O-rings provided into
the grooves of the escutcheon
Tighten the coupling nuts as far as
possible by hand & then use a 30mm
spanner to just put enough squeeze on
the washers to make a good seal.
Turn on the water supplies, ensure that there are no leaks.
The mixer installation is complete
The shower kits are supplied with their own tting instructions,
next step is to position & install the appropriate shower kit.
8
9
6
7
Slide the escutcheons along the inlet
legs until they are pressed against the
wall. If necessary, rotate the escut-
cheons to ensure they look parallel with
the mixer body.
The hose from the shower kit should be
connected to the shower outlet located
on the underside mixer body. Ensure
hose seal is in place.
11
NOTE FOR IRELAND: 15mm olives are
supplied with this product. Use 1/2”
olives if 1/2” supply pipes are tted.
Fit seals
 Loading...