22
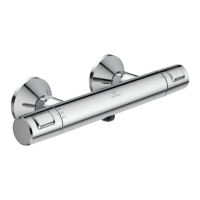
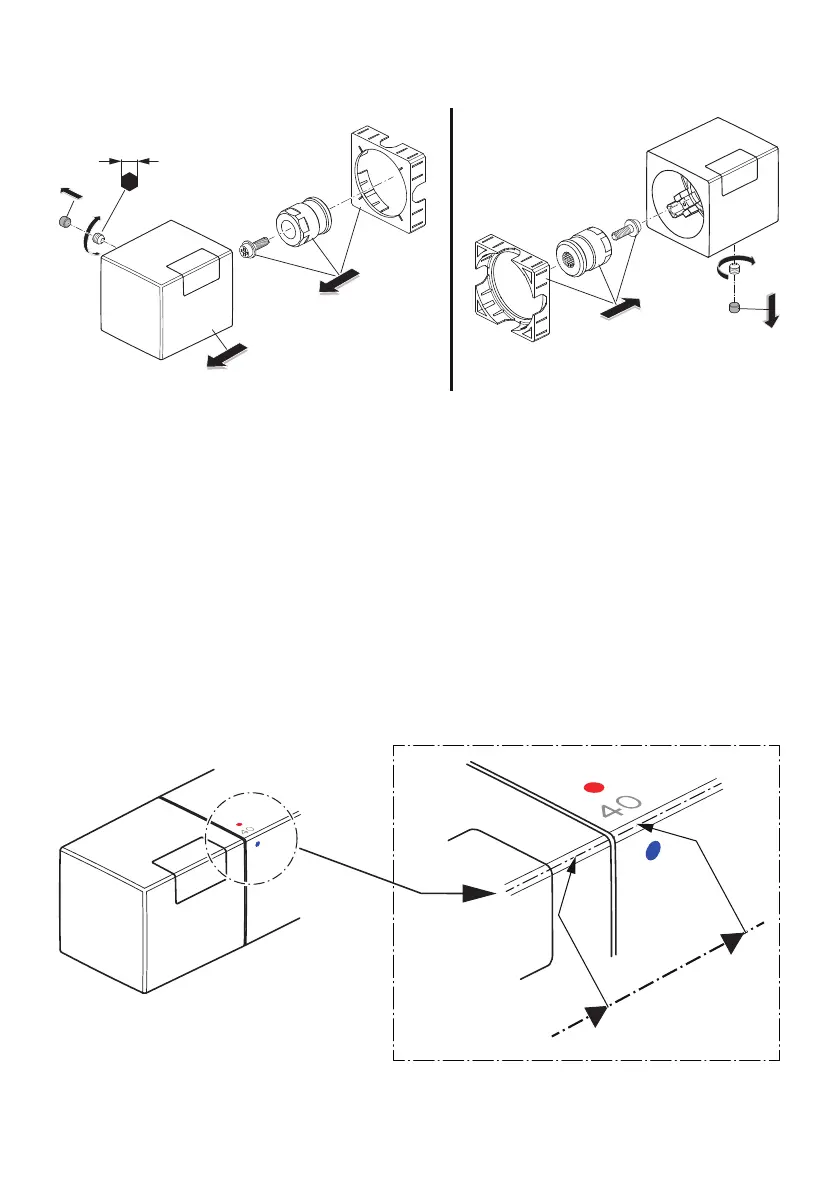
16 HANDLE REMOVAL FOR CARTRIDGE ACCESS
To gain access to either the thermostatic, ow or diverter cartridges, it will be necessary to
remove the appropriate handle.
1. Carefully prise out the rubber plug tted either at the rear of the handle (left side) or the underside of
the handle (right side). A sharp blade can be used, take care not to damage the chromed surface.
2. Use a 2.5mm hexagonal key on the grub screw located inside the handle, undo suciently to
loosen handle as complete removal of the grub screw is not necessary.
3. Carefully pull the handle o the drive bush.
4. The drive bush can be removed if necessary by undoing the Phillips screw shown, using a suitable
screw driver.
5. If necessary, the square end caps tted at each end of the mixer body can be removed. They can
be be carefully prised out. Then just pushed back in after completing the maintenance work.
Cartridge can still be removed with the end caps left in place.
6. Reverse this sequence & ret the handles.
7. Align the handles as shown below. Rotate the handle on the bush until alignment is achieved then
tighten the grub screw.
Right handle for ow & divert.
Similarly, when the right handle is correctly
aligned, in the parked position, ow will be o.
2,5
Left handle for
temperature
End
cap
Drive
bush
Right handle for
flow & divert
Correct handle
alignment for
temperature side
 Loading...