This document is a user guide for the Ideal Logic Combi, Logic Combi E, and Logic + Combi electronic 7-day timers, specifically for models 24, 30, and 35. It provides instructions for setting up and using the timer, as well as advanced features and troubleshooting information for boiler error codes.
Function Description:
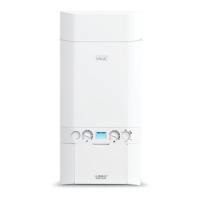
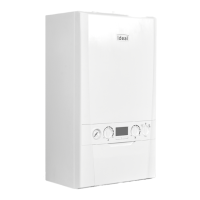
The Ideal Logic Combi Timer is an electronic 7-day timer designed to control the central heating system of Ideal Logic Combi, Logic Combi E, and Logic + Combi boilers. It allows users to program specific "on" and "off" times for central heating over a 7-day period, providing flexible and energy-efficient control. The timer automatically updates for Summer/Winter Time (GMT/BST) changes. It features a simple user interface and provides English language boiler fault messages with suggested corrective actions to aid diagnostics.
Important Technical Specifications:
The timer includes a Real Time Clock (RTC) with a backup supply to maintain the date and time even when power is removed from the boiler. If power is removed for more than 3 hours and then restored, the date and time will need to be re-entered, but programmed periods will be retained.
Usage Features:
Timer Controls:
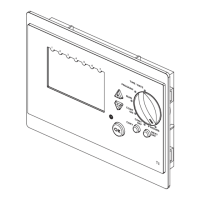
The timer features a display, a "Boiler Lit Symbol" (indicating when the boiler is active), "+/- keys" for adjusting values, a "Control Knob" for program selection, an "Indication of programmed day" display, an "Indication of programmed on time" display, a "Next Day Key," a "Copy Key," a "Reset Button," and an "OK Key."
Setting the Time and Date:
- Turn the Control Knob to the "TIME/DATE" position.
- Use the "+/- keys" to set the current hour and press "OK."
- Use the "+/- keys" to set the current minutes and press "OK."
- Use the "+/- keys" to set the current year and press "OK."
- Use the "+/- keys" to set the current month (January = 1) and press "OK."
- Use the "+/- keys" to set the current day of the month and press "OK."
- Turn the Control Knob to "RUN," "Cont On," or "Cont Off" to exit.
Setting the Program:
- Turn the Control Knob to the "PROGRAM" position.
- Use the "+/- keys" to set the hours for Monday's 1st On Time and press "OK."
- Use the "+/- keys" to set the minutes for Monday's 1st On Time and press "OK."
- Use the "+/- keys" to set the hours for Monday's 1st Off Time and press "OK."
- Use the "+/- keys" to set the minutes for Monday's 1st Off Time and press "OK."
- To set a 2nd On Time for Monday, use the "+/- keys" to set the hours and press "OK." If no further times are needed for Monday, press the "Next Day Key."
- Continue setting minutes for the 2nd On Time, then hours and minutes for the 2nd Off Time, and so on for a 3rd On period if desired.
- To copy Monday's settings to Tuesday, press the "Copy key" and then the "OK key." To move to the next day without copying, press the "Next Day key." Repeat for all days of the week.
- Once programming for Sunday is complete, turn the Control Knob to the "RUN" position to activate the program.
Operating Modes:
- Automatic Mode (RUN): The timer operates according to the programmed "on" and "off" times. Turn the Control Knob to the "RUN" position.
- Continuously On (CONT ON): The central heating operates continuously. Turn the Control Knob to the "CONT ON" position.
- Continuously Off (CONT OFF): The central heating remains off. Turn the Control Knob to the "CONT OFF" position.
Advanced Features:
+ Hours Mode:
This function allows the boiler to operate continuously for up to 3 hours.
- If used during an "off" period, the boiler will turn on for up to 3 hours.
- If used during an "on" period less than 3 hours before an "off" period, it can extend the "on" time.
- Turn the Control Knob to the "+ HOURS" position.
- Use the "+/- keys" to set the desired "+ Hours" time and press "OK."
- Turn the Control Knob to "RUN" or "CONT OFF" to exit.
Holiday Mode:
This feature allows users to set a period during which the heating will be off, useful for vacations.
- Press the "+ key" for more than 3 seconds.
- Use the "+/- keys" to set the start year of the holiday and press "OK."
- Use the "+/- keys" to set the start month of the holiday (January = 1) and press "OK."
- Use the "+/- keys" to set the start day of the month for the holiday and press "OK."
- Use the "+/- keys" to set the length of the holiday in days and press "OK."
To delete a previously set holiday period, change the number of days to 0.
Timed Pre-Heat:
When Domestic Hot Water preheat is switched on at the boiler control, the boiler will preheat during the timed "on" central heating periods to provide more efficient hot water delivery. This function is disabled when the preheat switch is set to off.
Maintenance Features:
English Language Error Description:
The timer displays boiler fault codes in plain English, along with suggested corrective actions to help diagnose and resolve issues.
Boiler Error Codes and Corrective Actions:
- L1 - OVERHEAT LOCKOUT:
- Fill system to 1.0 bar.
- Bleed radiators.
- Check radiator valves are open.
- Reset boiler.
- L2 - IGNITION LOCKOUT:
- Check other gas appliances work.
- Reset boiler.
- L3 - NO WATER FLOW LOCKOUT:
- Fill system to 1.0 bar.
- Bleed radiators.
- Check radiator valves are open.
- Reset boiler.
- L4 - NO WATER FLOW LOCKOUT:
- Fill system to 1.0 bar.
- Bleed radiators.
- Check radiator valves are open.
- Reset boiler.
- L5 - TOO MANY RESETS ON ROOM STAT:
- Reset boiler.
- L6 - FAULT 8:
- Contact installer.
- F1 - LOW WATER PRESSURE:
- Fill system to 1.0 bar.
- Bleed radiators.
- F2 - FLAME LOSS:
- Check other gas appliances work.
- F3 - FAN FAULT:
- Contact installer.
- F4 - FLOW THERMISTOR FAULT:
- Contact installer.
- F5 - RETURN THERMISTOR FAULT:
- Contact installer.
- F6 - OUTSIDE SENSOR FAULT:
- Contact installer.
- F7 - LOW MAINS VOLTAGE:
- Contact electricity provider.
- F9 - PCB FAULT:
- Contact installer.
- F0 - NO WATER FLOW THERMISTOR FAULT:
- Contact installer.
- FA - FLOW/RETURN REVERSED:
- Contact installer.
- c0 - PCB REPLACED:
- Reset boiler.
- c2 - BOILER TYPE CARD FAULT:
- Contact installer.
Important Notes:
- When replacing any part on this appliance, only use spare parts that conform to the safety and performance specifications required by Ideal.
- Do not use reconditioned or copy parts that have not been clearly authorized by Ideal.
- National regulations and respective safety instructions must be observed.
- Interferences and changes to the device will lead to cancellation of the warranty.