EasyManua.ls Logo

IDS Xwave2 User Manual

IDS Xwave2
8 pages
To Next Page IconTo Next Page
Page #1 background imageLoading...
Page #1 background image
IDS X-Series v2.7
Change Guide
Introduction
With X-Series v2.7 comes the new Xwave
2
. The latest in bi-directional wireless technology that
will ensure your detectors are properly supervised.
Xwave
2
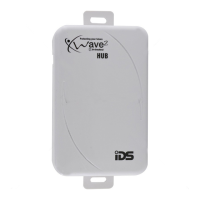
The IDS X-Series Bi-directional Xwave
2
Hub offers an additional 16 wireless supervised zones
and two programmable outputs. The hub can also learn up to 16 Xwave
2
Bi-directional remote
transmitters. It is wired to the X-Series panel in the same way as all other peripheral devices, on
the keypad bus.
1. Installation
Xwave
2
works on the IDS X-Series panels, versions 2.7 and above.
1.1. Addressing
To address the Xwave
2
Hub, set the dipswitches as per the table below. Depending on what
address is used on the Hub will determine the zone numbers it uses.
Note: The unit must be powered down when selecting the unit’s address.
Binary value on switch
Hub zones
Dipswitch 1 up
1 -16
Dipswitch 2 up
17 - 32
Dipswitches 1 + 2 up
33 48
Dipswitch 3 up
49 - 64
Dipswitch 6 up
3 second button panic disabled
Question and Answer IconNeed help?

Do you have a question about the IDS Xwave2 and is the answer not in the manual?

IDS Xwave2 Specifications

General IconGeneral
TypeManaged
Ports24 x 10/100/1000Base-T(X) + 4 x 100/1000Base-X SFP
Switching Capacity56 Gbps
Forwarding Rate14.88 Mpps
MAC Address Table Size8K
VLAN SupportYes
PoENo
Dimensions440 x 200 x 44 mm
Operating Temperature-10°C to 60°C
Power Supply100~240VAC, 50/60 Hz
Storage Humidity5% to 95% (non-condensing)

Summary

1. Installation

1.1. Addressing

Sets dipswitches to address the Xwave² Hub and determine zone numbers.

1.5. Xwave² Hub Trouble Display

How the Hub indicates errors via LED pulses and error codes.

2. Location 260

2.1. Learning an Xwave² Detector (Sub Location 1)

Methods for learning Xwave² detectors to the hub.

3. Xwave² Remotes

3.3. Adding the Remote Transmitter to a User code

Steps to pair a remote transmitter with a user code.

3.4. Allocating Remote Transmitter Buttons

How to assign functions to the remote transmitter buttons.

4. Walk Test

5. I/O Module