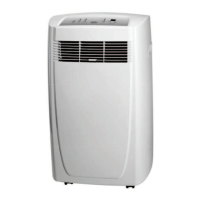
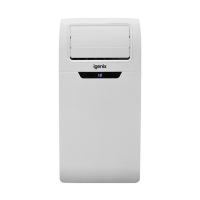
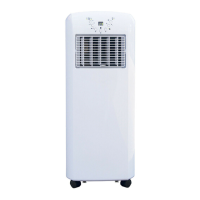
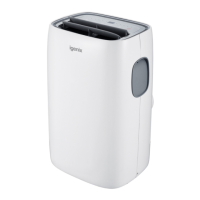
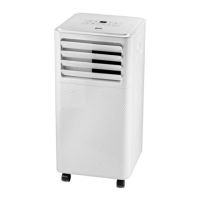
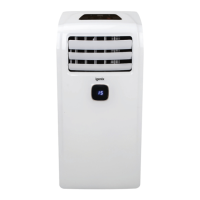
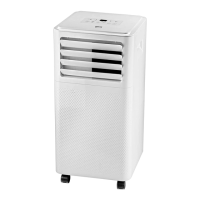
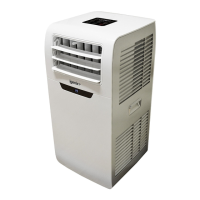
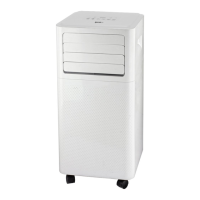
This document describes the Igenix 4-in-1 Portable Air Conditioner, models IG9919 and IG9922, designed for domestic and light office use.
Function Description:
The Igenix portable air conditioner is a versatile 4-in-1 unit capable of cooling, heating, dehumidifying, and fan-only operation. It is designed to provide comfort in various environmental conditions. The unit expels hot air through an exhaust hose, which needs to be vented outside, particularly in air cooling and heating modes. In dry mode, the appliance also discharges moisture outside. The fan-only mode does not require the exhaust hose.
Important Technical Specifications:
| Model |
IG9919 |
IG9922 |
| Cooling Capacity (Btu) / (W) |
9000Btu / 2500W |
12000Btu / 3200W |
| Heating Capacity (Btu) / (W) |
7847Btu / 2300W |
9894Btu / 2900W |
| Dehumidification at 30°C/80%RH (L/day) |
26.4 |
36 |
| Cooling Input Power (W) |
840 |
1230 |
| Heating Input Power (W) |
780 |
1035 |
| Air Flow Volume (m³/h) |
300 |
300 |
| Power Supply (Hz) |
50 |
50 |
| Compressor |
Rotary |
Rotary |
| Refrigerant |
R290 |
R290 |
| Fan Speeds |
High/Medium/Low/Auto |
High/Medium/Low |
| Timer |
Yes |
Yes |
| Operating Temperature (°C) |
18 - 35 |
18 - 35 |
| Energy Rated Class |
A |
A |
| Room Size (m²) |
Up to 20m² |
Up to 25m² |
| Net Weight (kg) |
31 |
31 |
| Product Dimensions (H x W x D) (mm) |
715 x 445 x 370 |
715 x 445 x 370 |
The unit produces less than 65dB(A) sound energy, complying with EU regulation EN12102 for local air conditioners.
Usage Features:
Installation:
- Initial Setup: After transport or tilting, the unit must stand for 12 hours before connecting to the mains to allow coolant gases to settle.
- Unpacking: Remove all packaging and the exhaust assembly. Lift the unit by its carry handles.
- Exhaust Hose Assembly:
- Extend the exhaust hose by pulling both ends.
- Screw one end of the hose into the exhaust hose connector (anti-clockwise).
- Screw the other end of the hose onto the exhaust hose adapter.
- Slide the assembled exhaust hose into the exhaust duct at the back of the unit until it clicks into place.
- Positioning: The unit has castor wheels for easy movement but should be kept upright. It must be placed on a dry, stable surface, at least 45cm away from walls, curtains, or heat sources for adequate air circulation. The exhaust heat must be expelled outside through a window, door, or wall vent. The exhaust hose can extend from 30cm to 150cm, but shorter lengths are recommended for better results. Avoid kinks or bends greater than 30 degrees in the hose to prevent overheating.
- Window Slider Kit: The kit is designed for most standard vertical and horizontal windows. Panel B slides into Panel A and is sized to the window width, then locked with a screw (C) to ensure no gaps or air pockets. If the window opening is smaller than the kit's minimum length, the end without the hole can be cut.
Operation:
- Control: The unit can be partially controlled via the top control panel, but full functionality requires the remote control.
- Power On/Off: Plug the unit into the mains socket (it will be in standby). Press the "①" button to turn it on. The last active function will appear. To turn off, always use the "①" button and wait a few minutes before unplugging to allow internal checks.
- Remote Control: Point the remote at the appliance receiver (within 7 meters, without obstacles). Handle with care; avoid dropping or exposing to direct sunlight/heat. If it malfunctions, try removing and reinserting batteries.
- Battery Installation: Remove the rear cover, insert two "AAA" 1.5V batteries in the correct orientation. Dispose of old batteries according to local regulations. Do not mix old/new or different battery types. Remove batteries if not using the remote for an extended period.
Modes:
- Cool Mode: Ideal for hot, muggy weather.
- Press the "MODE" button repeatedly until the "Cool" symbol lights up.
- Set target temperature (18°C-32°C / 64°F-90°F) using the "A" or "V" buttons.
- Select fan speed (High/Medium/Low/Auto) using the "X" button.
- Heat Mode:
- Press the "MODE" button repeatedly until the "Heat" symbol appears.
- Set target temperature (13°C-27°C / 55°F-81°F) using the "A" or "V" buttons.
- Select fan speed (High/Medium/Low/Auto) using the "X" button.
- Note: In very cold rooms, the appliance may defrost automatically ("LE" displayed), temporarily interrupting operation. The fan may run for short periods even after the set temperature is reached.
- Dry Mode: Reduces room humidity.
- Prepare the unit as for cool mode, with the exhaust hose attached to discharge moisture outside.
- Press the "MODE" button repeatedly until the "Dry" symbol appears ("dh" displayed).
- Fan speed is automatically selected and cannot be manually adjusted.
- Fan Mode: Circulates air without cooling or heating. The air hose is not needed.
- Press the "MODE" button repeatedly until the "Fan" symbol appears.
- Select fan speed (High/Medium/Low) using the "X" button. Display shows "==" for high, "--" for medium, "__" for low.
- Sleep Mode (Remote Control Only): Reduces brightness and noise for nighttime use.
- Select Cool or Heat mode first.
- Press the "Sleep" button on the remote.
- Maintains optimum temperature with silent operation and low fan speed.
- In COOL mode, the temperature increases by 1°C (1°F) per hour for 2 hours, then maintains for 6 hours before turning off.
- Can be cancelled by pressing "Sleep", "Mode", or "Fan Speed" buttons. Not available in FAN or DRY mode.
- Temperature Unit Switch: Hold "+" and "-" buttons together for 3 seconds while the appliance is running to switch between °C and °F.
- Timer Function: Delays start-up or shut-down to optimize electricity usage.
- Programming Start-up:
- Turn off the appliance.
- Press the "TIMER" button; the screen displays 1-24 hours.
- Press repeatedly to select desired time.
- Wait 5 seconds for timer activation (Timer symbol appears).
- To cancel, press "TIMER" again (Timer symbol disappears).
- Programming Shut-down:
- While the appliance is running, press the "TIMER" button; the screen displays 1-24 hours.
- Press repeatedly to select desired time.
- Wait 5 seconds for timer activation (Timer symbol appears).
- To cancel, press "TIMER" again (Timer symbol disappears).
Tips for Correct Use:
- Close windows and doors in the room being conditioned.
- If semi-permanently installed, leave a door slightly open (approx. 1cm) for ventilation.
- Protect the room from direct sun exposure by closing curtains/blinds.
- Do not place objects on the appliance.
- Do not block air inlets or outlets.
- Ensure no heat sources are in the room.
- Do not use in very damp rooms (e.g., laundries) or outdoors.
- Ensure the appliance is on a level surface; use castor locks if necessary.
Water Drainage:
- Manual Draining: Recommended weekly.
- Unplug the unit.
- Place a container under the lower drain plug.
- Remove the lower drain plug.
- Allow water to drain completely.
- Replace the drain plug firmly.
- Turn on the unit.
- Continuous Draining:
- Unplug the unit.
- Remove the drain plug (some residual water may spill, so have a container ready).
- Connect the drain hose.
- Direct the hose to a floor drain or bucket.
- Turn on the unit.
- Error Code "FE" (FULL TANK): Indicates excess water condensation; drain the unit using one of the above methods.
- Note: Ensure the drain hose is not higher than the drain outlet for proper drainage.
Maintenance Features:
Cleaning the Cabinet:
- Before cleaning, turn off the appliance (using the "ⓘ" button) and unplug it after a few minutes.
- Wipe the outer cabinet with a slightly damp cloth, then dry with a dry cloth.
- Do NOT: wash with water, use petrol, alcohol, solvents, or spray antibacterial liquids.
Cleaning the Air Filters:
- Clean the filter weekly for efficient operation.
- Open the grid at the back of the appliance and remove the evaporator (filter).
- Caution: Avoid contact with metal parts.
- Use a vacuum cleaner to remove dust.
- If very dirty, immerse in warm water (max 40°C / 104°F) and rinse several times.
- Allow the filter to dry fully before re-attaching it to the intake grille.
Start of Season Operations:
- Check power cable and plug for damage; ensure proper earthing.
- Follow installation instructions.
End of Season Operations:
- To empty the internal circuit, remove the cap and drain all water into a basin. Replace the cap.
- Clean and thoroughly dry the filter before storing.
Troubleshooting Guide:
- Unit will not switch on: Check trip switch/fuse, wait 3 minutes, check plug connection, check remote batteries.
- Runs for a short while then switches off: Set temperature may be too close to room temperature (lower it to restart), check for bends/obstacles in exhaust hose, check if timer function is active.
- Runs without cooling in Air Conditioning mode: Close doors/windows, remove other heat-generating appliances, clean dirty air filter, check for blocked air outlets/inlets, set temperature may be too high, check if room size exceeds unit specification.
- Unpleasant smell in the room: Clean the air filter.
- Water is leaking from unit: Drain the water tank, ensure rubber caps are securely fitted to drainage points, ensure unit is on a flat and even surface.
Error Codes:
- LE (LOW TEMPERATURE / frost prevention): The appliance has a frost protection device. It will restart automatically when defrosting is complete.
- PF (PROBE FAILURE / sensor damaged): Contact an authorized service center.
- FE (FULL TANK / safety tank full): Empty the internal safety tank as per "End of Season Operations."
Mains Plug Fuse Replacement (Class I):
- This appliance must be earthed.
- Remove the fuse cover with a small flat-head screwdriver.
- Replace the fuse with a new one of the same Amp rating.
- Replace the fuse cover and push it back into place.
- The unit must not be disposed of with normal unsorted municipal waste, in accordance with European Directive 2012/19/EU (WEEE).
- Old appliances should be collected separately for recovery and recycling.
- The "crossed out wheeled bin" symbol indicates separate collection is required.
- Contact local authorities or retailers for proper disposal information.
Warranty:
- Standard 12-month warranty against mechanical and electrical defects from the purchase date.
- Extendable to 24 months by registering the product within 30 days of purchase.
- Warranty is valid for domestic household use only and according to the user manual. Misuse, accidental damage, neglect, tampering, incorrect adjustment/installation, resale, removed/invalid serial numbers, or unauthorized repairs invalidate the warranty.
- Consumable parts (shelving, dials, filters, belts, trays) are not covered.
- For breakdowns, refer to the troubleshooting guide. If further assistance is needed, contact Customer Service at 01473 271 272 or write to 38 Bluestem Road, Ransomes Europark, Ipswich, IP3 9RR.
- Provide the Product Code (IG or DF) and PO Number, along with fault details.
- Proof of purchase is required for repair/replacement.
- If an item is replaced under warranty, the warranty period for the replacement item is calculated from the original purchase date.
- Charges may apply if no fault is found or if the product is outside the warranty period.