900861-00NC
35
IHP.us.com
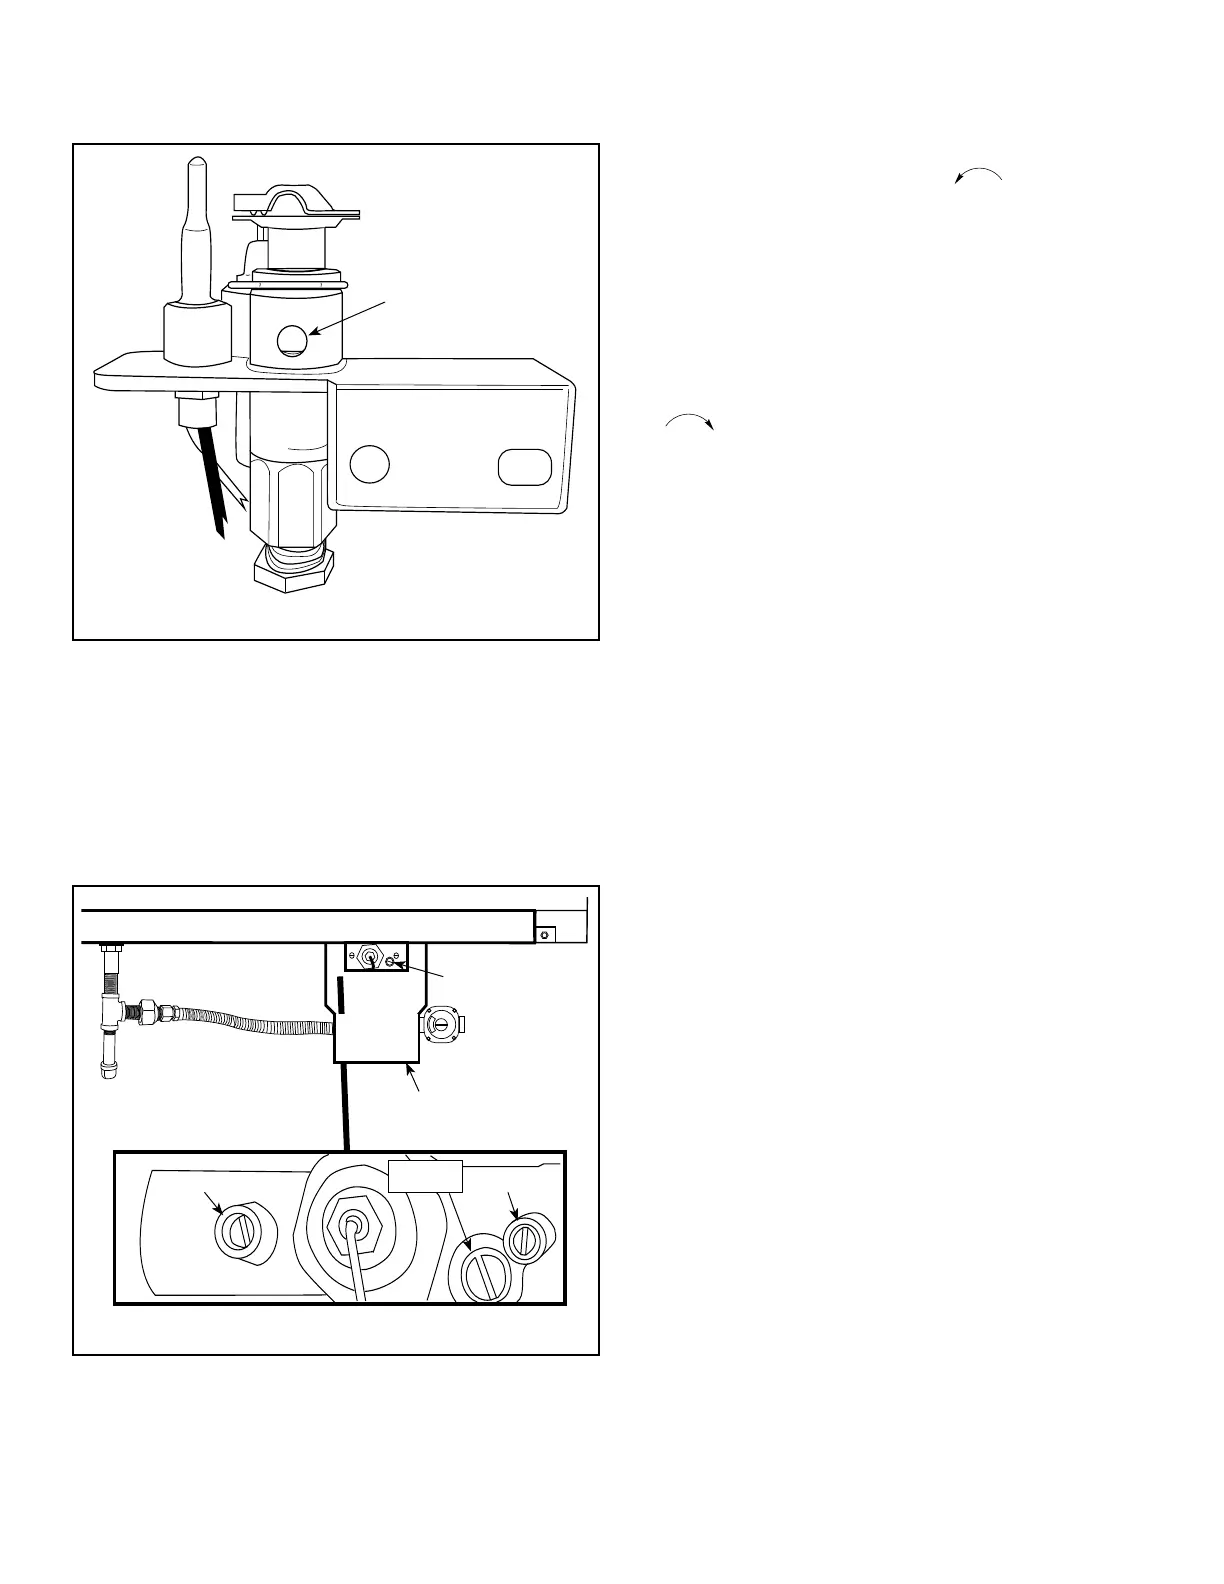
NOTE: Figures 48 and 49 provide a visual reference of the pilot
orifice from Natural gas to LP gas through the vent hole of the pilot
assembly.
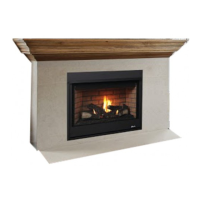
Step 10. Look for the low rate set screw in the gas valve box. There
is a cutout (window) area that allows access to the low rate set
screw. Figure 50 shows the side view of the burner pan and a
close-up detail.
Step 11. Remove the low rate set screw with a flat bladed screw-
driver turning the screw counter-clockwise
. The set screw has
a rubber “O” ring on the outer portion of the screw, as a result the
screw will rotate only 3-4 revolutions and not unscrew any farther.
NOTE: If you drop the low rate screw inside the valve area you can
retrieve it through the access door of the valve box.
Step 12. Remove the low rate set screw using a small pair of nee-
dle-nose pliers. Grab the outer edge of the screw and pull outward.
Step 13. Insert the correct new low rate screw from Table 1 with
the needle-nose pliers. Secure the new low rate set screw (clock-
wise ) with screwdriver until it is tight and now longer spins.
CAUTION: DO NOT REMOVE OR LOOSEN THE SMALL SET SCREWS
ON EACH SIDE OF THE V-WIRE. THESE ARE PRESSURE TEST
PORTS. IF THESE ARE LOOSENED THEY MUST BE RE-TIGHTENED
TO ENSURE NO GAS LEAKS OCCUR.
Step 14. Ensure you test the burner pan after it is installed into the
fireplace. Turn on gas supply and test for gas leaks, using a gas leak
test solution—also known as bubble leak solution.
NOTE: Using a soapy water solution is an effective leak test solution
but it is not recommended, because the soap residue that is left on
the pipes/fittings can result in corrosion over time.
A. Light the fireplace (refer to the lighting instructions label on the
appliance).
B. Brush all joints and connections with the gas leak test solution to
check for leaks. If bubbles are formed, or gas odor is detected,
turn off the appliance. Either tighten or refasten the leaking
connection, and then retest as described above.
C. When the gas lines are tested and leak free, rinse off the leak
testing solution.
Step 15. Fill out the label “This fireplace has been converted to LP
gas” and affix it to the blank area on the rating plate.
Step 16. Conversion is now complete.
NATURAL GAS TO PROPANE GAS CONVERSION
Continued
Figure 49 - Pilot assembly converted to LP
Vent Hole
(mostly open after
converting to LP)
Figure 50 - Detailed location of low rate set screw
Pressure Tap
Pressure Tap
Low Rate Set Screw
Valve Box
Burner Pan Side View
Low Rate
Set Screw