8
Install the Microwave Oven
(30" [76.2 cm] Installation Only)
1. Empty microwave oven of any loose contents.
2. Attach the extension plate to each of the side brackets using
3/8" (0.95 cm) T10 screws, as shown.
3. Loosen the middle and rear screws on each side of
microwave oven. The screws are located at the same height
as the door handle.
4. Place the side bracket over the 2 screws, fitting the screw
heads through the keyholes on the bracket. Then slide the
side bracket up so that the lower portions of the keyholes
rest on the screws.
5. Tighten screws to secure the side bracket to the microwave
oven.
6. Repeat steps 4 and 5 on the other side of the microwave
oven.
7. With the microwave oven near the opening, plug the
microwave oven into the grounded 3 prong outlet.
8. Using 2 or more people, slide microwave oven all the way
into the opening, and center the microwave oven within the
opening.
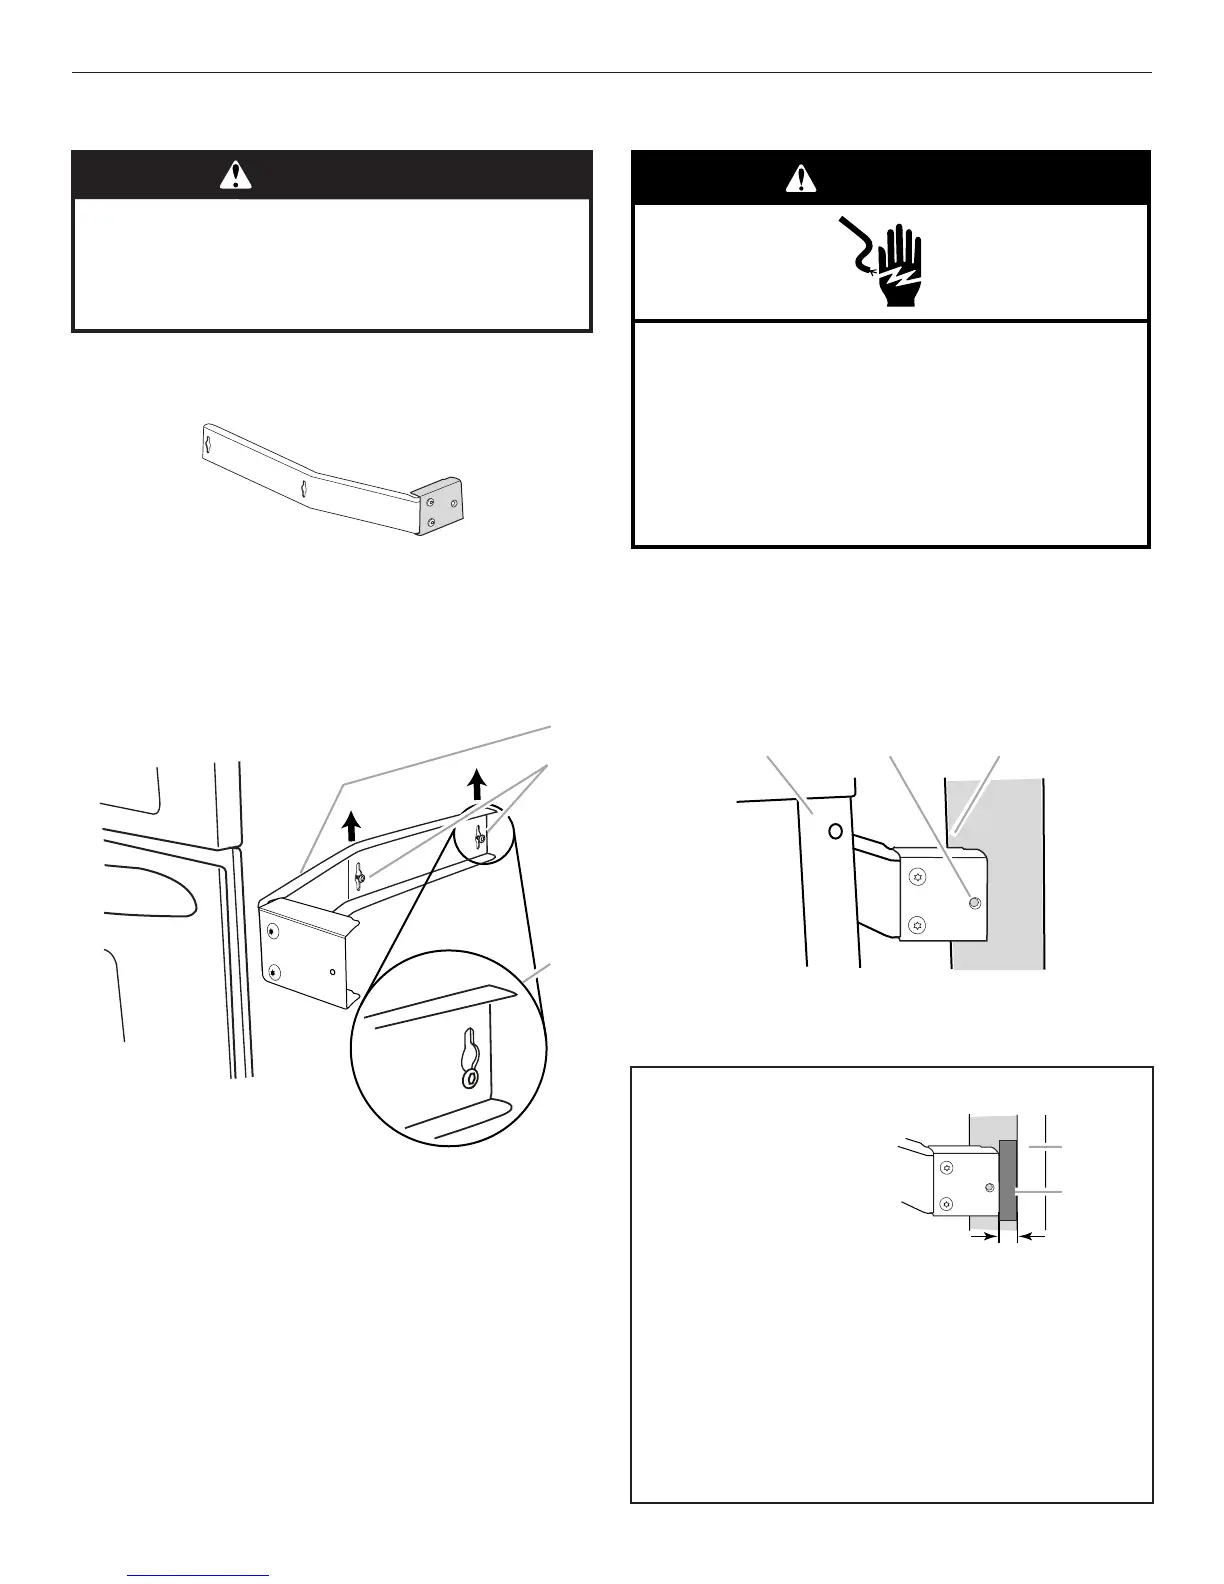
NOTE: The screw holes in the winged ends of both side
brackets must be fully over the wood of the wall or cabinet,
as shown.
WARNING
Excessive Weight Hazard
Use two or more people to move and install
microwave oven.
Failure to do so can result in back or other injury.
B
A. Side bracket
B. Existing screws (middle and rear)
C. Proper side bracket attachment
Electrical Shock Hazard
Plug into a grounded 3 prong outlet.
Do not remove ground prong.
Do not use an adapter.
Do not use an extension cord.
Failure to follow these instructions can result in death,
fire, or electrical shock.
WARNING
A. Door front facing
B. Side bracket screw hole
for cabinet attachment
C. Cabinet front
¹⁄₄" (6 mm)
Outer w
Shim
For installation in double-walled cabinetry only:
The clearance of 1/4" (6 mm)
must exist between the end of
the side bracket and the outer
wall.
If this clearance exists,
proceed to Step 9 below, and
complete installation.
If this clearance does not
exist, follow these steps:
a. Wedge 1/4" (6 mm) shim between side bracket and outer
wall;
b. Use 7/64" (3 mm) drill to drill pilot hole through screw hole
in side bracket;
c. Install 1
1
/
2
" (3.81 cm) square/Phillips screw, and then
remove shim.
d. Repeat steps a, b, and c on other side.
NOTE: To ensure proper side trim panel fitting, do not
overtighten screws.
Proceed to Step 11.
 Loading...