ENGLISH 28
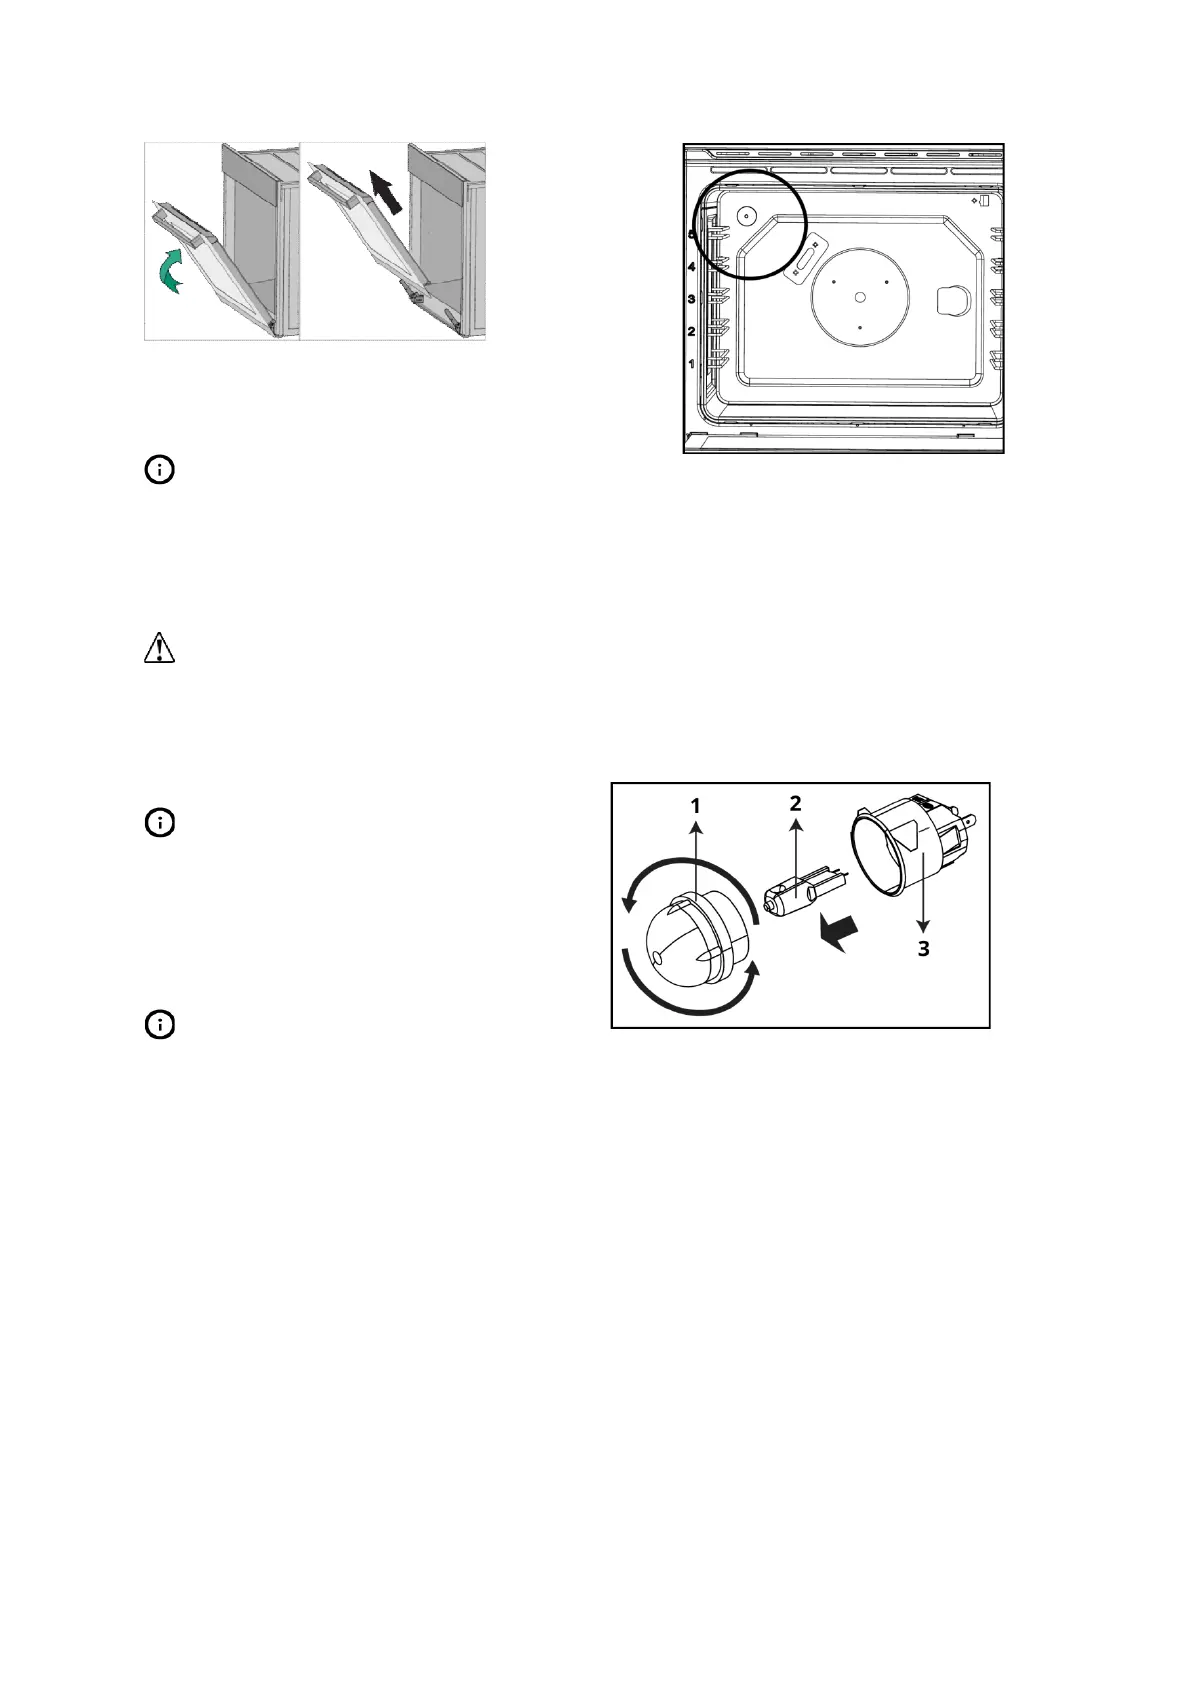
4. Remove the front door by pulling it
upwards to release it from the right and
left hinges.
process should be performed in reverse
order to install the door. Do not forget to
close the clips at the hinge housing when
reinstalling the door.
Replacing the oven lamp
Before replacing the oven lamp, make
sure that the product is disconnected
from mains and cooled down in order
to avoid the risk of an electrical shock.
Hot surfaces may cause burns!
The lenses must be in place when using
the oven.
The lenses serve to protect the light
bulb from breaking.
The lenses are made of glass. Handle
carefully to avoid breakage. Broken
glass could cause an injury.
Position of lamp might vary from the
figure.
Oven lamps can be obtained from
Authorised Service Agents or technician
with license.
Each oven is equipped with one halogen lights
located in the back wall of the oven. The lights
are switched on when the door is opened or
when the oven is in a cooking cycle. The oven
lights are not illuminated during self clean.
Each light assembly consist of a removable
lens, a light bulb as well as a light socket
housing that is fixed in place. Light bulb
replacement is considered to be a routine
maintenance item.
Bulb socket (fixed in place)
Disconnect the product from mains.
Turn the glass cover counter clockwise to
remove it.
Pull out the oven lamp from its socket and
replace it with the new one.
Install the glass cover.