3 - 6 3. INSTALLATION AND CONNECTION
BS-79 BS-79 0212 VOL1 (U) (E)
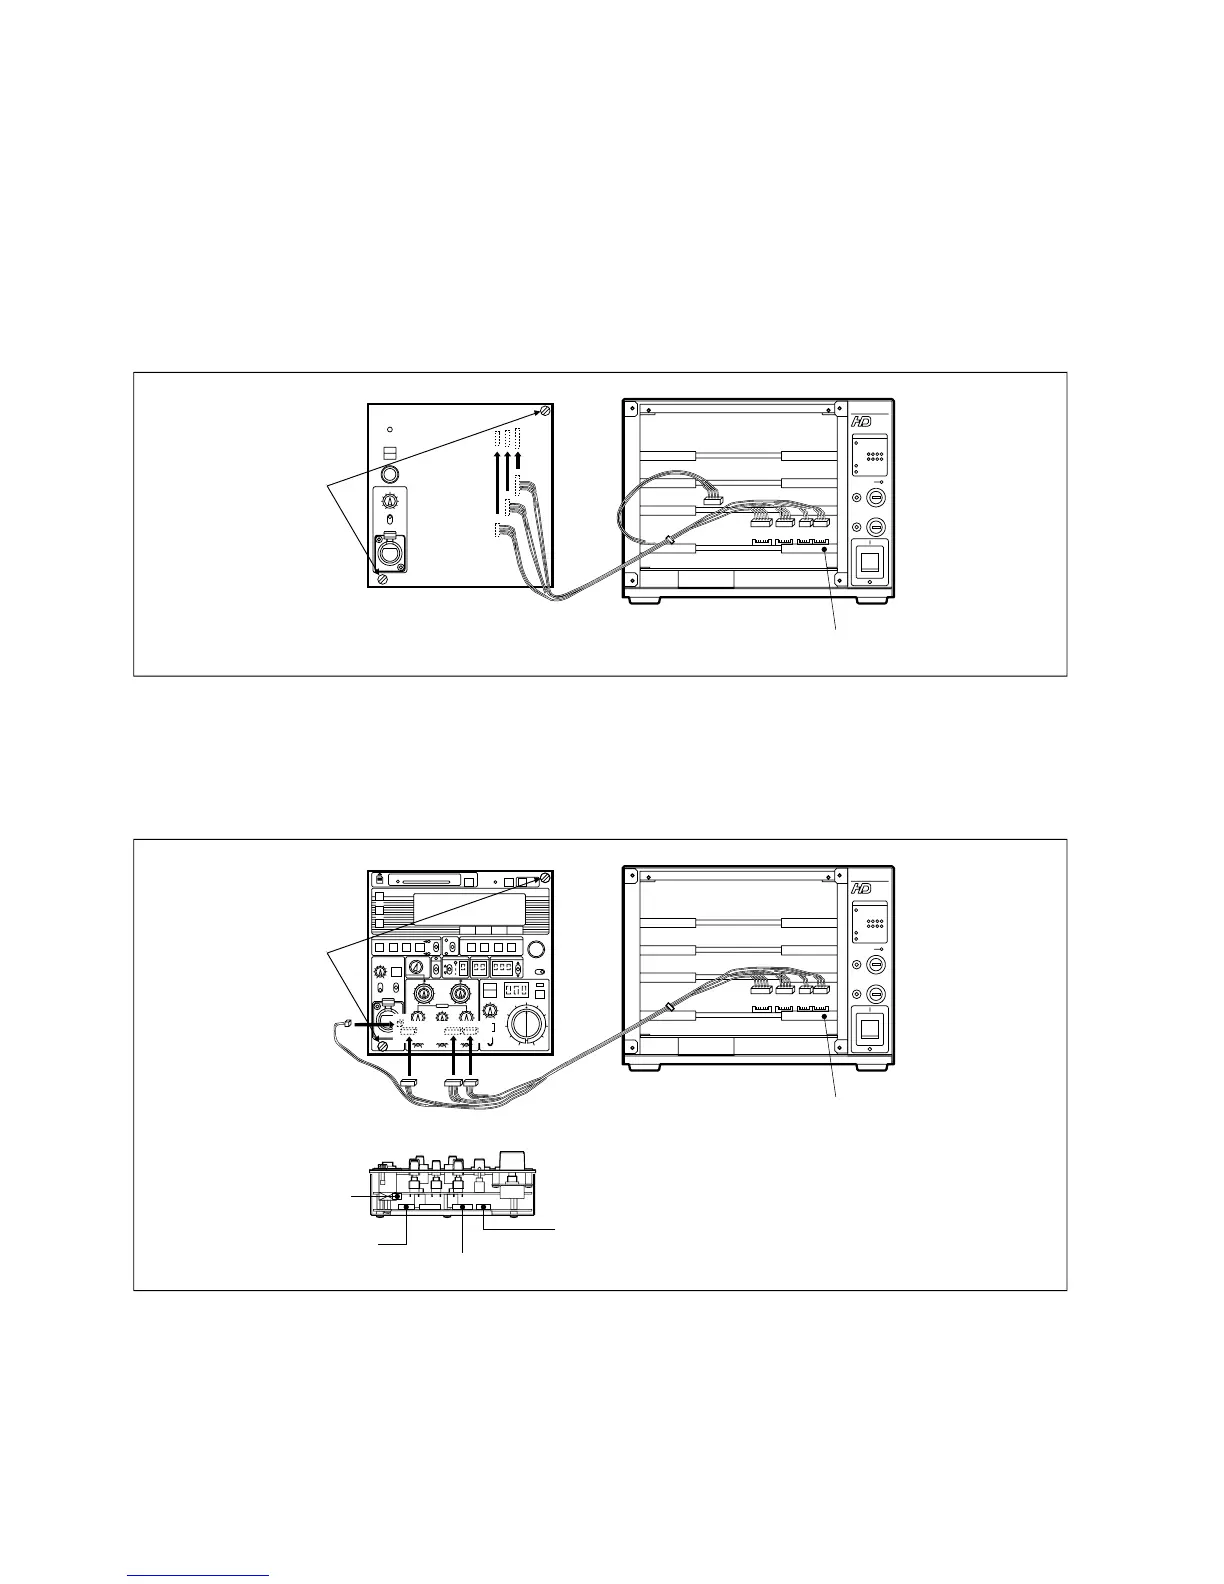
3.5 Mounting a BS Front Panel
On the front of the BS-79, you can mount an RBK-79 or RCP-50 as the BS front panel.
[Mounting an RBK-79]
1. Place the BS MAIN POWER switch to the "O" (off) position.
2. Connects the RBK-79 connectors and AUDIO module connectors inside the BS-79 with an RCP joint cable.
The RBK-79 has no 14-pin connector, however. Contain the joint cable plug in the space left between the RBK-79 and BS-
79.
3. Secure the RBK-79 on the front of the BS-79 with two screws.
Be careful that the cable does not get caught between the panels.
RCP joint cable
AUDIO module
16p 14p 10p12p
Tighten the
two screws.
BS-79
RBK-79
14p
10p
12p
16p
[Mounting an RCP-50]
1. Place the BS MAIN POWER switch to the "O" (off) position.
2. Connect the RCP-50 connectors and AUDIO module connectors inside the BS-79 with an RCP joint cable.
3. Secure the RCP-50 on the front of the BS-79 with two screws.
Be careful that the cable does not get caught between the panels.
RCP joint cable
AUDIO module
16p 14p 10p12p
Tighten the
two screws.
BS-79
RCP-50
CN7 (10pin)
CN10 (16pin)
CN11 (14pin)
CN9 (12pin)
Underside of the RCP-50