EN
18
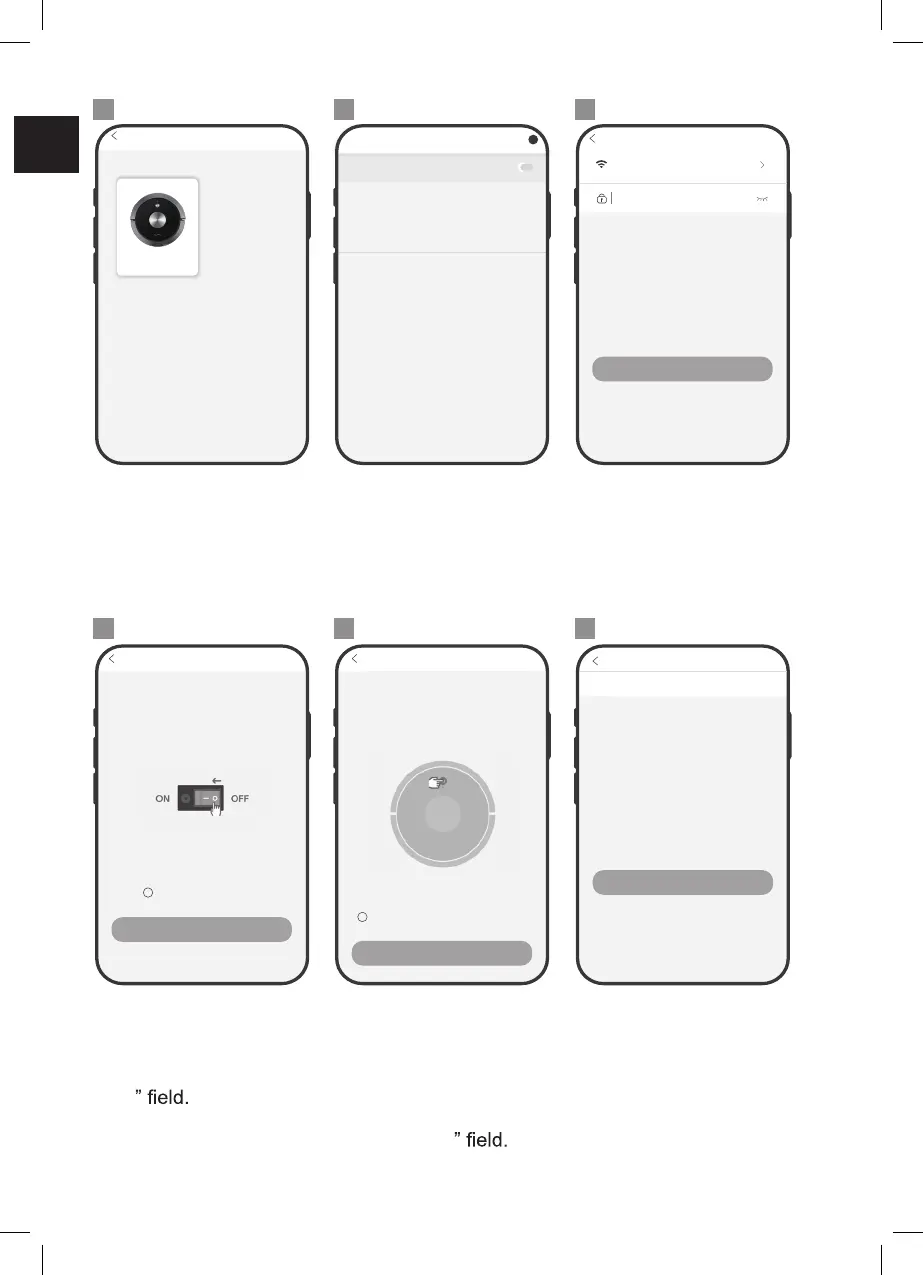
• Choose your robot.
• Switch on the WiFi. NOTICE - The robot is not 5G
Wi-Fi compatible.
• Choose the WiFi network.
• Enter the WiFi password.
• Tap on “Next”.
4 5 6
• Set the ON/OFF
switch to I position.
• Mark the “Robot
already switched
on
• Tap on “Next”.
•
•
•
Press and hold the start/
pause button on the
robot for 3 seconds.
The robot beeps.
Mark the “Starting WiFi
paring mode already
announced
Tap on “Start connecting”.
• Tap on “Settings”.
7 8 9
A series robot vacuum
Add a robot
A9
To see available networks, turn Wi-Fi on.
Wi-Fi preferences
To improve location accuracy, system apps and
services can still scan for Wi-Fi networks. you
can change this in scanning settings.
Select Wi-Fi
Off
?
Note: Robot can’t connect to 5G WiFi
Connecting to home WiFi
Choose a WiFi network
Enter WiFi passwork
Next
Preparing to find a network
Turn on power switch on the side of the
main body. (Note: Don’t place main body
on charging dock)
Robot already switched on
Next
Press and hold for 3 seconds and you
will hear a buzz. Don’t release until voice
announcement says “Starting WiFi Paring
Mode.” WiFi light starts blinking once robot
enters AP mode.
No voice announcement. Retry previous steps.
Preparing to find a network
Next
“Start WiFi pairing” already announced
Preparing to find a network
Robot WiFi: Robot-XXXX Settings
Note:
Select “Robot-XXXX” connection. Enter
Default password: 123456789. Return to
Current page and press “Start connecting”.
Start connecting