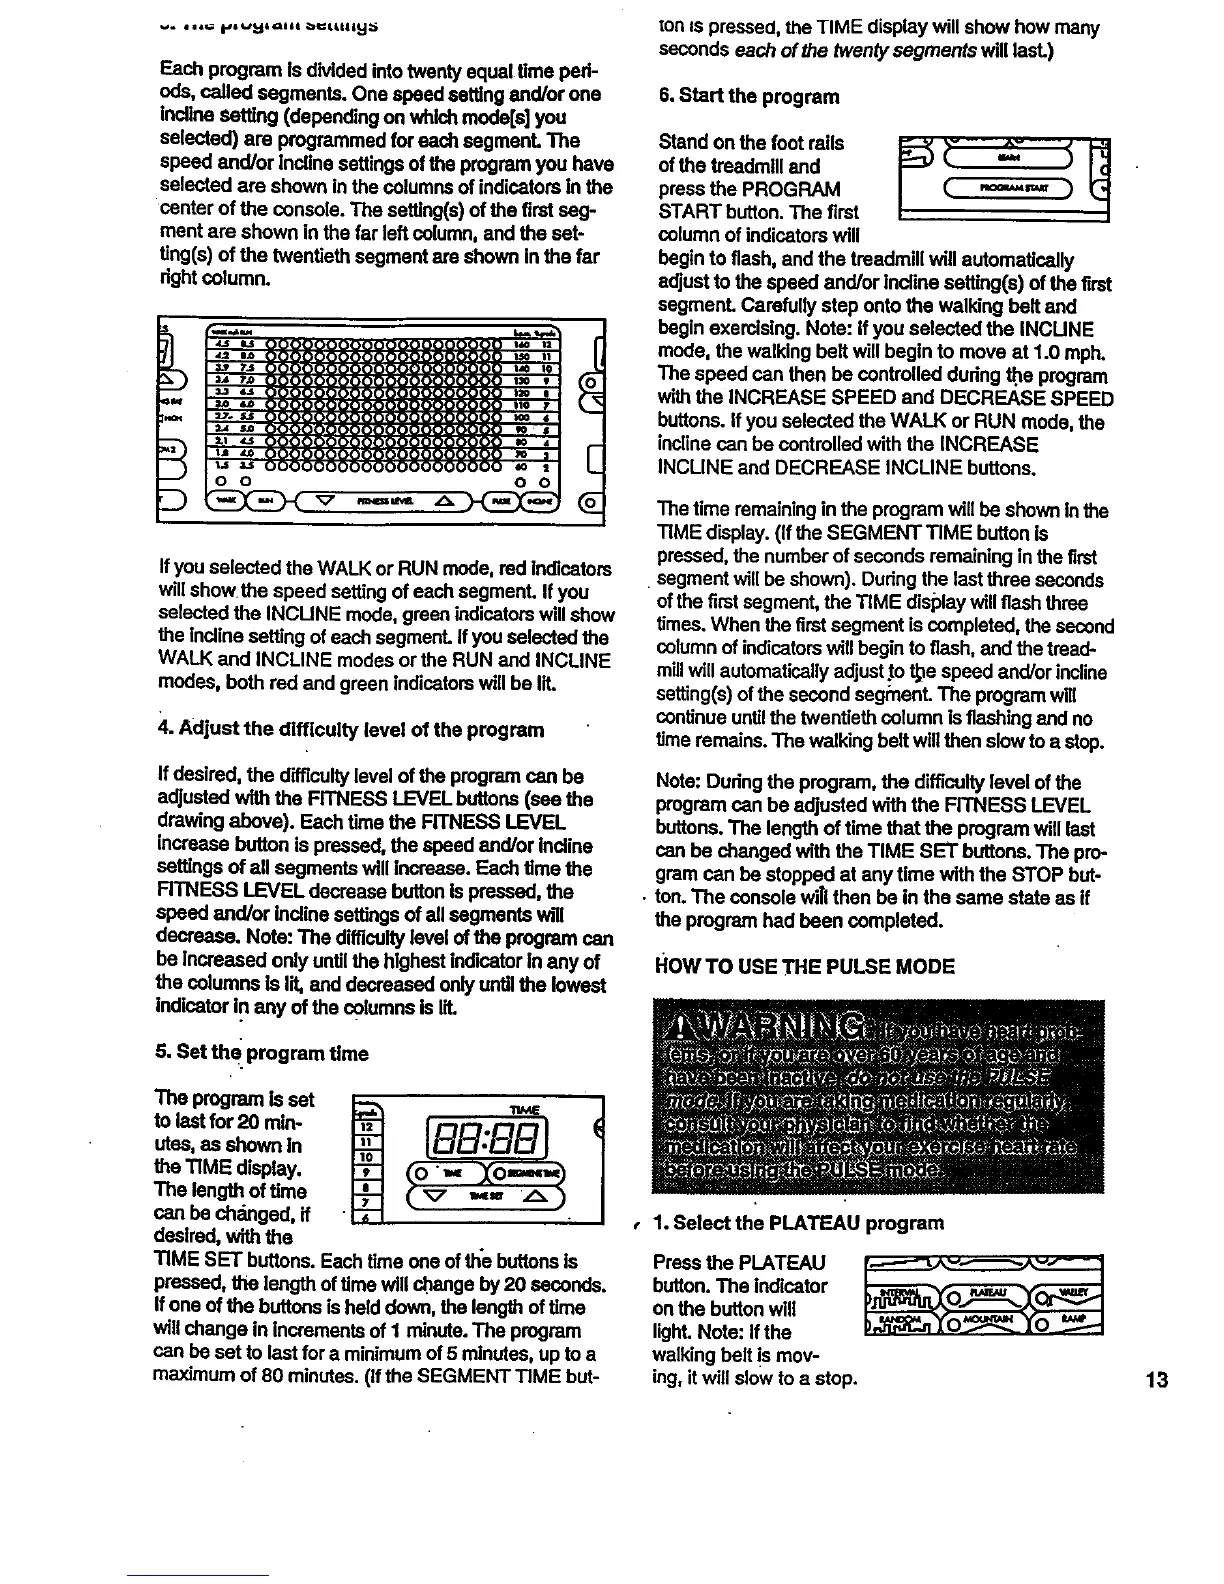
Each program is divided intotwenty equal time ped-
ods, called segments. One speed setting and/or one
incline setting (depending on which mode[s] you
selected) are programmed for each segmenL The
speed and/or indlne settings of the program you have
selected are shown in the columns of indicators in the
canter of the console. The setting(s) of the first seg-
ment are shown in the far left column, and the set-
ting(s) of the twentieth segment are shown In the far
dght column.
$
__j
a
_t2 i
D
I
Ifyou selected the WALK or RUN mode, red Indicators
will show the speed setting of each segment. Ifyou
selected the INCUNE mode, green indicators will show
the incline setting of each segmenL Ifyou selected the
WALK and INCLINE modes or the RUN and INCLINE
modes, both red and green indicators will be lit.
4. Adjust the dlfflculty level of the program
If desired, the difficulty level of the program can be
adjusted with the FITNESS LEVEL buttons (see the
drawing above). Each time the FITNESS LEVEL
increase button is pressed, the speed and/or Incline
settings of all segments will increase. Each time the
RTNESS LEVEL decrease button Is pressed, the
speed and/or incline settings of all segments wtil
decrease. Nots: The difficulty level of the program can
be Increased only untilthe highest indicator In any of
the columns Is lit, and decreased onlyuntil the lowest
Indicator in any of the columns is lit.
5. Set the program time
ton ISpressed, the TIME display will show how many
seconds each ofthe twenty segments will last.)
6. Start the program
Stand on the foot rails o . .
of the treadmill and
press the PROGRAM
START button. The first
column of indicators will
begin to flesh, and the treadmill will automatically
adjust to the speed and/or Incline setting(s) ofthe first
segment. Carefully step onto the walking belt and
begin exercising. Note: If you selected the INCUNE
mode, the walking belt will begin to move at 1.0 mph.
The speed can then be controlled dudng _e program
with the INCREASE SPEED and DECREASE SPEED
buttons. If you selected the WALK or RUN mode, the
inclinecan be controlled with the INCREASE
INCLINE and DECREASE INCLINE buttons.
The time remaining in the program willbe shown In the
TIME display. (If the SEGMENT TIME button is
pressed, the number of seconds remaining in the first
• segment will be shown). During the last three seconds
ofthe firstsegment, the TIME display will flash three
times. When the first segment is completed, the second
column of indicatorswill begin to flash, and the tread-
millwill automatically adjust to _e speed and/or incline
setting(s) ofthe second seg_nent. The program will
continue untilthe twentieth column isfleshing and no
time remains. The walking belt will then slow to a stop.
Note: Dudng the program, the difficulty level of the
program can be adjusted with the FITNESS LEVEL
buttons.The length of time that the program will last
can be changed with the TIME SET buttons. The pro-
gram can be stopped at any time with the STOP hut-
. ton. The console wiTIthen be in the same state as if
the program had been completed.
HOW TO USE THE PULSE MODE
The program is set
to last for 20 min-
utes, as shown In
the TIME display.
The length of time
be changed, if
desired, with the
TIME SET buttons. Each time one of the buttons Is
pressed, the length oftime will change by 20 seconds.
If one of the buttons is helddown, the length of time
will change in increments of I minute. The program
can be set to last for a minimum of 5 minutes, up to a
maximum of 80 minutes. (if the SEGMENT TIME but-
IBB:BBI
)
• 1. Select the PLATEAU program
Press the PLATEAU
button. The indicator
on the button will
light. Note: If the
walking belt is mov-
ing, it will slow to a stop. 13