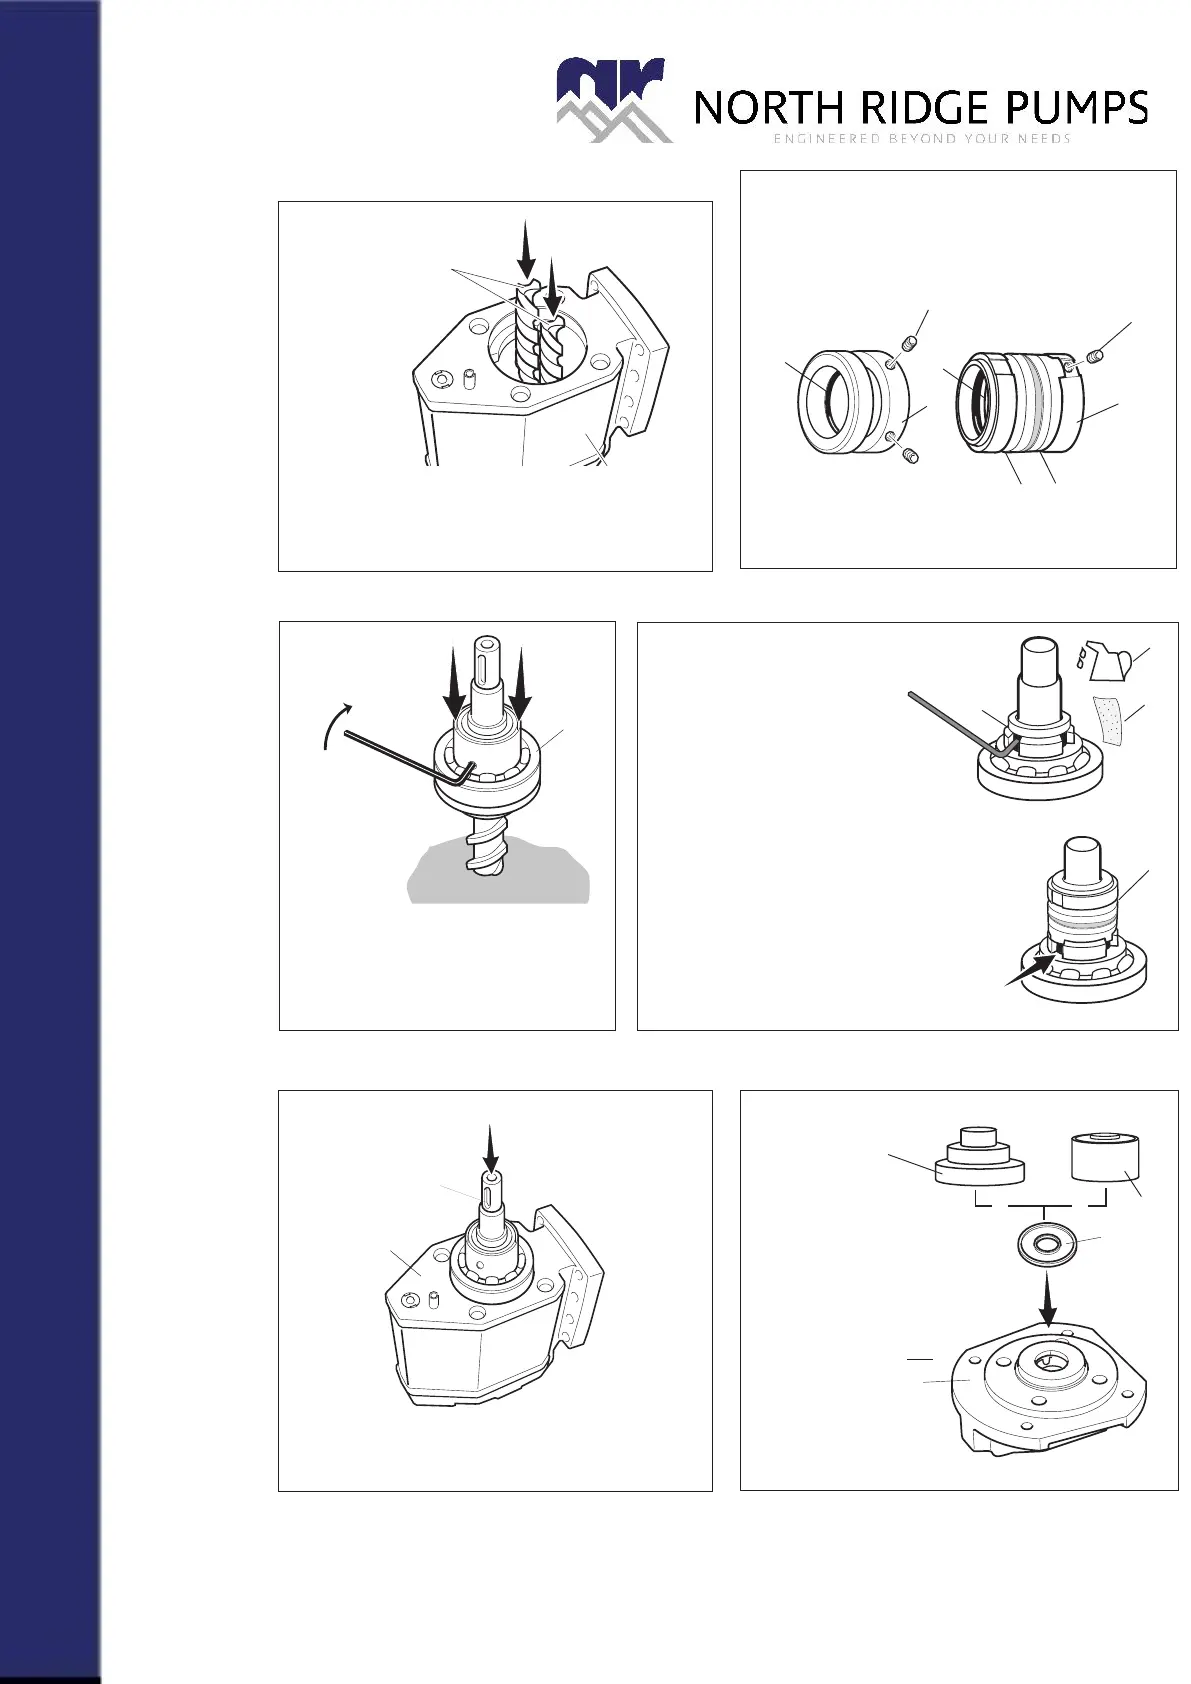
Reassembly
A.
Fig. 19
Fig. 20
Fig. 17 Fig. 18
Fig. 21
C. xVxx
E.
Fig. 22
• Lubricate the idler rotors 202
and t them into the pump body 401.
Lubrication groves turning downwards.
B.
• Un-pack a new shaft seal 509.
• Check that the O-ring S6 is in place.
xVxx xTxx
• Polish the power rotor shaft
1020 with a ne emery and oil.
• Fit the rotating member above
the ball bearing 122 and lock it
with its stop screws S8.
D. xTxx
• Polish the power rotor shaft
1020 with a ne emery and oil.
• Fit the carrier S5 tight against the
ball bearing. Make sure the carrier
is not tted upside down.
• Firmly tight the two stop screws S8.
• Lubricate the O-ring S6 in the rotating
member with oil.
• Press the rotating member S4, S7
gently on to the rotor shaft and make
sure the driving lugs enters the slots
in the carrier S5.
• Insert the Power rotor 1020 into the pump body
401.
F.
• xTxx:
Press the Secondary
seal 125 in place with
a suitable tool in two
steps as shown. Use a
column drill machine as
a press tool.
• xVxx:
Pos 125 should not
be replaced.
NOTE!
Tool 2 has one end
for sizes 025, 032 and
one end for size 038
401
Oil can
Emery
S6
S6
S4
S8
S8
S5
S4 S7
Tool 1
Tool 2
S5
Rotating
member
Product Specification Sheet
X-Cel House, Chrysalis Way, Langley Bridge, Eastwood, Nottinghamshire NG16 3RY
Tel: +44 (0) 1773 302 660 | Email: sales@northridgepumps.com | Website: www.northridgepumps.com