44
Cleaning and MaintenanceCleaning and Maintenance
Open the nozzle shutter (
☞
Page 43)
* The nozzle extends to open the nozzle shutter.
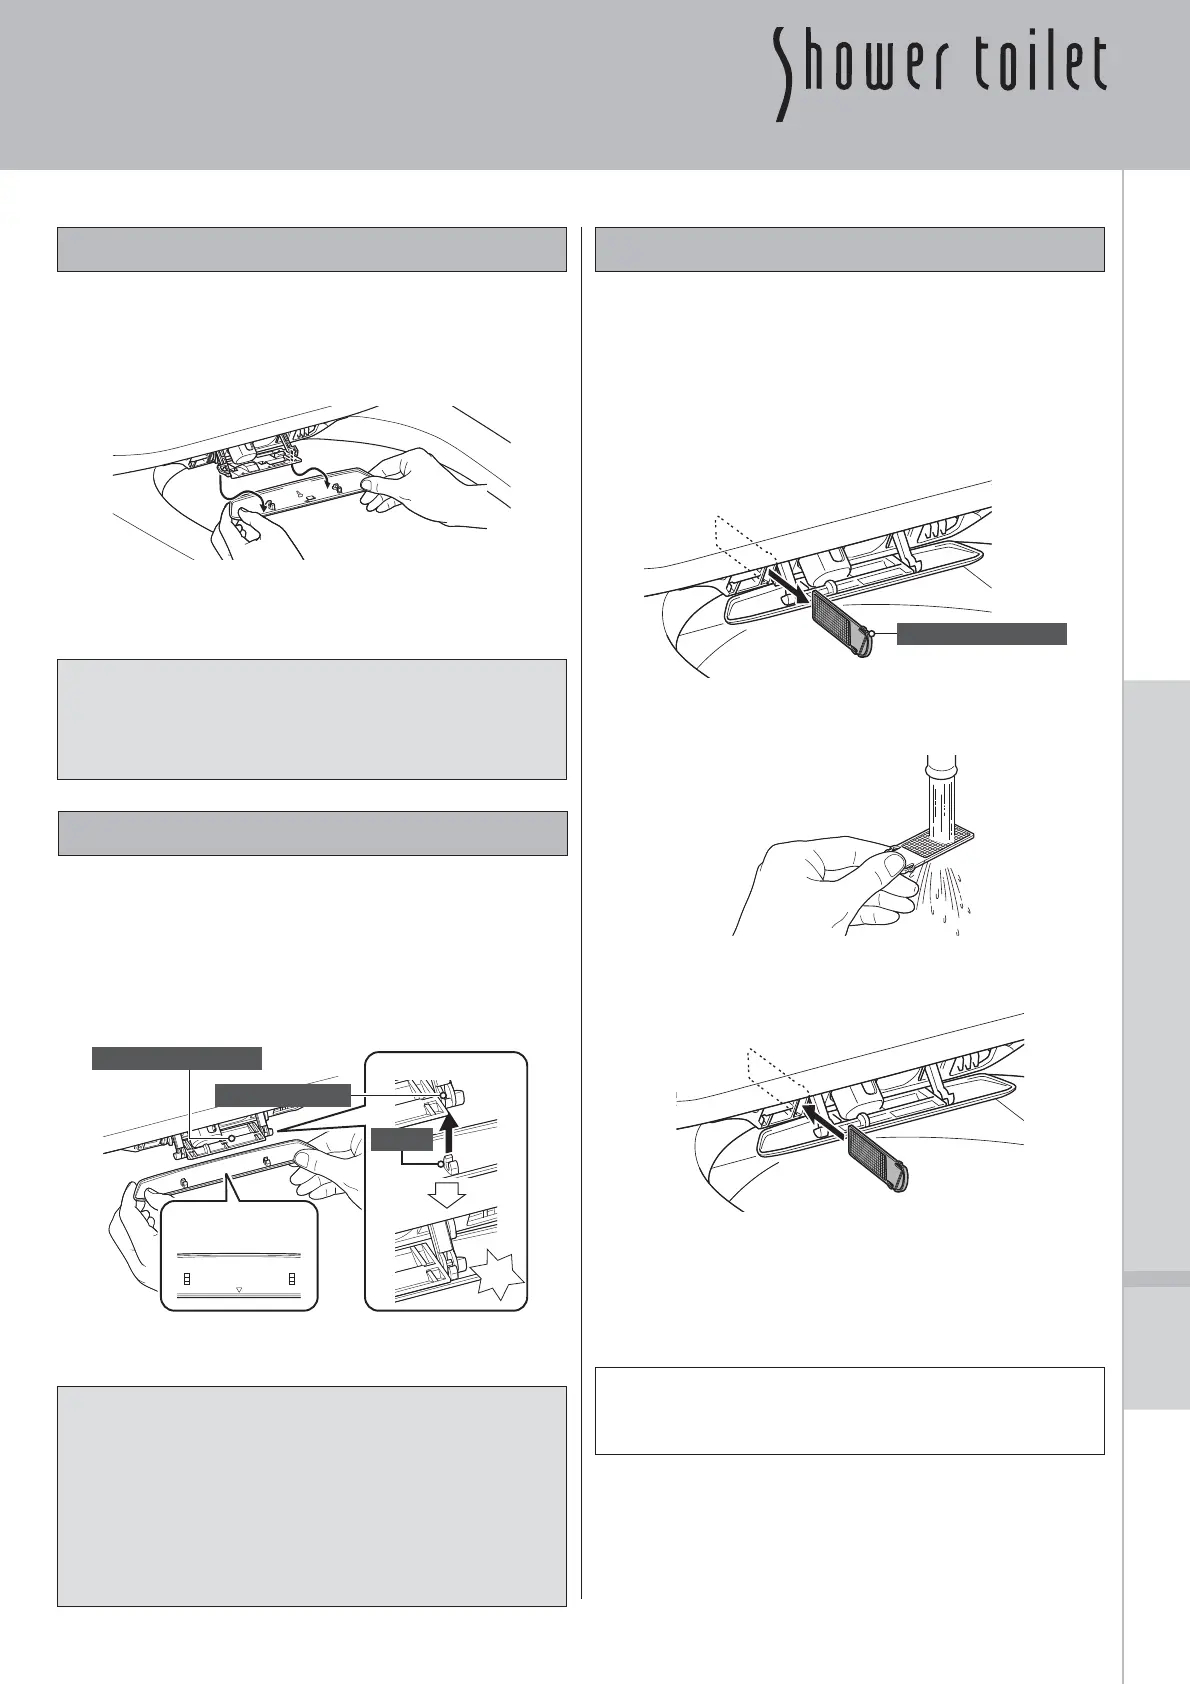
Pull the nozzle shutter down toward you
with both hands to remove.
Clean the removed nozzle shutter.
Use a soft, damp cloth to clean.
[CAUTION]
Do not wipe parts with a dry cloth or toilet paper.
Do nut scrub with a toothbrush.
* Doing so may cause damage.
Open the nozzle shutter (
☞
Page 43).
* The nozzle extends to open the nozzle shutter.
Remove the deodorizing lter.
Deodorizing lter
Wash the deodorizing lter to remove
dust and such.
Allow the deodorizing lter to dry and
then reinstall.
Press the
【
STOP
】
button to return the
nozzle shutter to the original position.
* Make sure the auto clean and auto seat open
functions are turned off before returning the nozzle
shutter to its original position.
Reusing the toilet
Always perform the necessary preparations and
checks before use. (
☞
Page 8)
Removing the Nozzle Shutter Cleaning Deodorizing Filters
Dust and such that has accumulated on the deodorizing
lter may result in reduced deodorizing performance.
Clean the lter if odors are noticeable.
Assembling the Nozzle Shutter
Attach the two lugs of the nozzle shutter
into the slot in the shutter base from below.
* If the shutter base is closed, perform the procedure
described in the "Opening the Nozzle Shutter" section.
* Make sure the auto clean and auto seat open
functions are turned off before returning the nozzle
shutter to its original position.
Click
Slot
Lug
Shutter base
Attach so that the triangle
mark faces forward.
[Enlarged View of the Lug]
Press the
【
STOP
】
button to return the
nozzle shutter to the original position.
[CAUTION]
Press until it clicks into place.
Make sure the shutter is correctly installed.
Installing the shutter in the incorrect vertical
orientation can cause malfunctions such as no
nozzle extension or no shutter opening.
Do not apply excessive force.
* Doing so may damage the part.



 To Next Page