Complete Assembly Details
1.
Attach
the
handles
co
the rims
of
the wheels.
2.
Put
the larger
of
the
two
crank wheels on the height adjustment rod at
the front
of
the machine.
Noce: The key in the shaft muse mate wich the keyway in
che
crank
wheel hub.
3. Puc the smaller wheel on the
side rod.
1.
Loosen all
four
black
scar
knobs
at
che
corners
of
che
saw
cable.
2.
Insert
the
rails
into
dove-
tailed
ways.
The wedge on each knob
muse
be
below
che
rail.
The front rail has
che
scale.
An
exclusive Inca feacure,
chese
guide rails allow the fence
and extension cables
co
be
used either left
or
right
of
che
blade
as
your work
requires.
1: Threaded bolt 2: spring 3: Wedge
4: washer 5: Knob
Turning
che
height crank clockwise will
raise
the blade.
Turning the
.angle
.c..mnk
clockwise will
I.ili
che
blade coward
450.
If
they become sciff and difficulc
co
turn,
ic
is time
co
clean
che
threads
by blowing or vacuuming and oiling.
(use
white
lithium
grease)
Note:
Whenever
you
raiJe,
tower
or
alter
the
blade
angle,
alwayJ
tooJen
the
tock-
ing
knobs
on
both
wheels
and
retighten
both
tocks
afterwards.
White
not
criti-
cal,
it
helps
the
saw
hold
an
angle
or
height
with
absolute
accuracy
for
repeated
cuts.
Align
the
Masterfence
I.
Place
the
MasterFence
on
the
rails.
Note:
The
rear
fence
clamp
should
be
turned
so
that
the
clamp
knob
points
to
the
rear,
away
from
the
operators
position
Also:
There
is
a small
tip
on
the
rails
so
a little jiggling
should
get
it
to
drop
into
position.
2.
The sliding extrusion may be mounted on either side of
che
fence
3. Make sure
che
rails are locked in posicion
by
cighcening the four lock-
ing knobs beneath
che
cable, one at each corner.
4.
Position
the
fence
just
at
the
edge
of
a
mitre
slot
wich
che
low
excrusion against the table. Lock
it
in place.
5.
Run
your
finger
along
the
mitre
slot,
feeling
if
che
fence and
sloe
are parallel.
6.
If
not, slightly loosen
che
cwo
allen head screws which hold
che
fence
co
its main casting. They are locaced directly below the two holes
near the lever end
of
the fence.
7. With the casting still locked
co
the rail,
swing
the
far
end
of
the
fence left
or
right until
it
is
parallel
co
che
slot.
8. Tighten the screws.
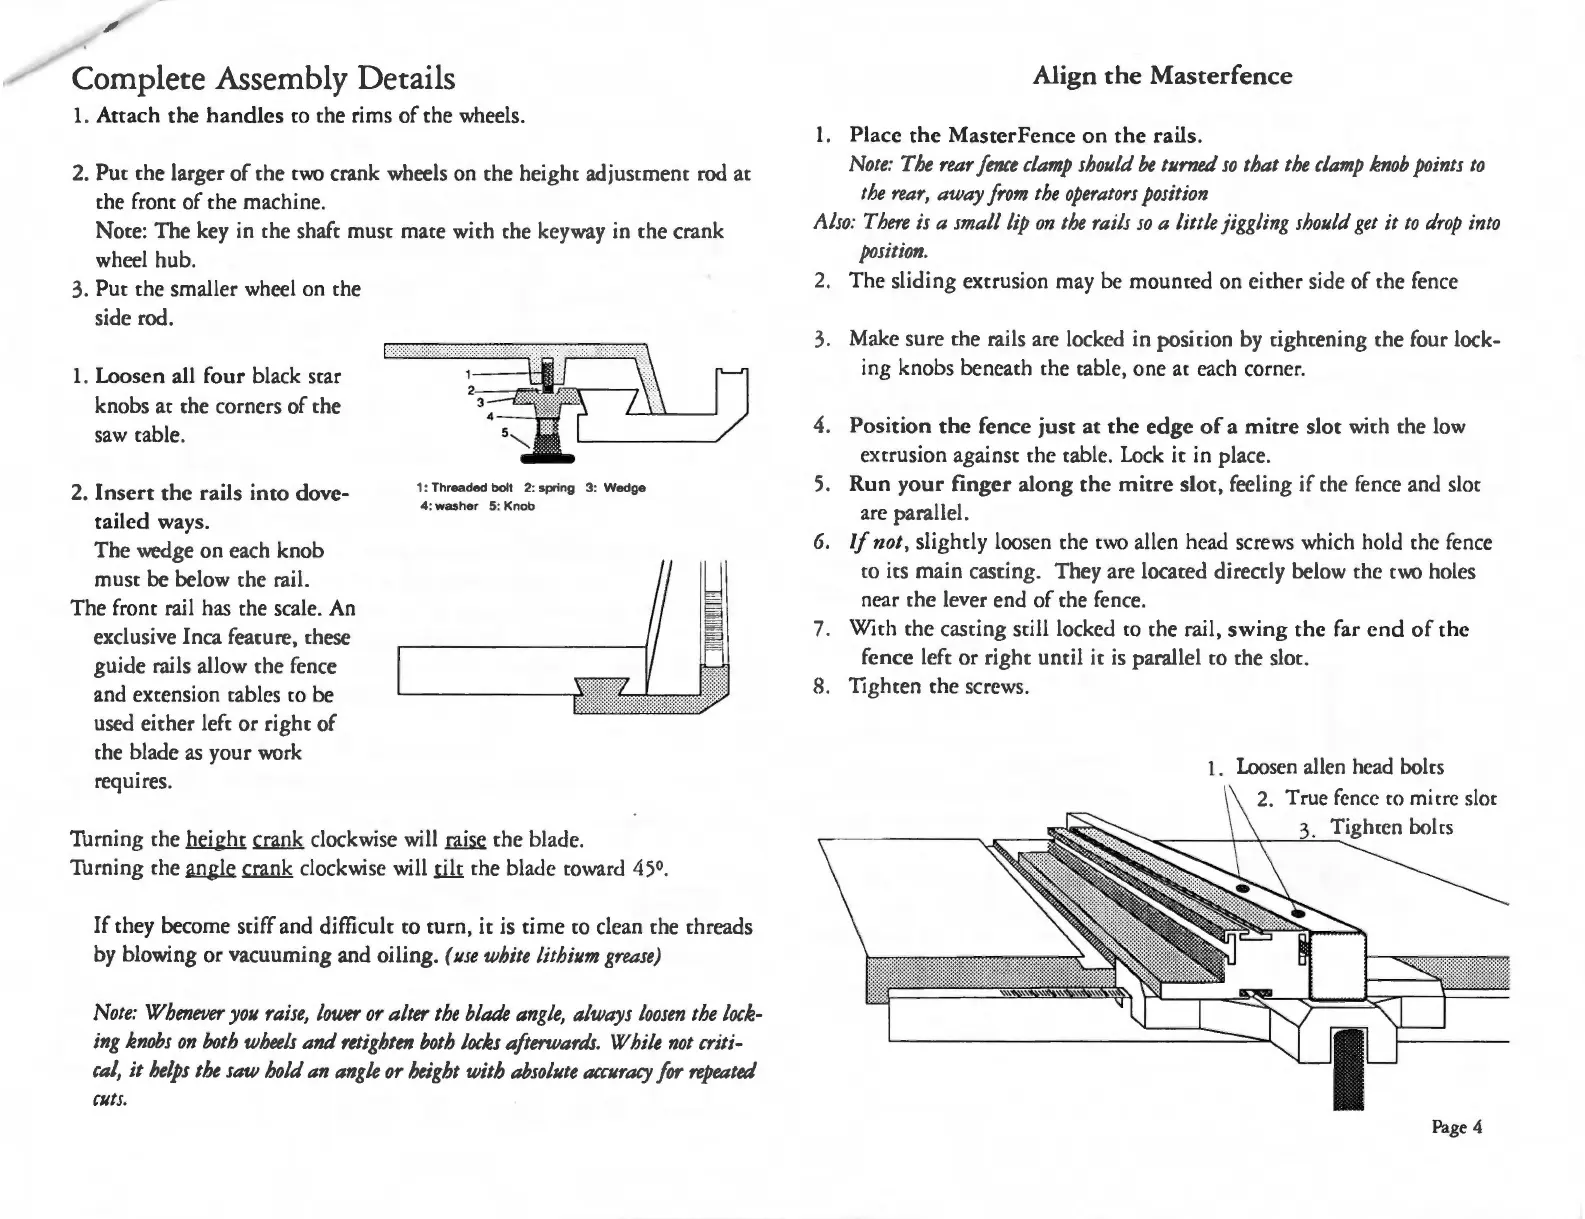
1.
Loosen
allen head
boles
True
fence
co
mitre slot
_-.......~-
-+--i.:
-
~3""-'._T...:ighrcn
bol
rs
Page4