Part
3
Ripping
technique
is important in order
co
cut straight and true
It
may
seem
obvious
but
as
with all
saw
cuts, you
must
prepare
i!lll:JiJJ!
.li·:1:=J1'·1=1:::11:11:::111
1
;11ttlllll
f k
For the smoothest cut,
we
recom-
mend you set the blade height
so
that the gullet between teeth
is
level with the mp
of
the
wood
being cue.
If
you raise the blade mo high, the
teeth are exiting the wood at a
high angle which causes tear-out.
1.
Make sure the
wood
is level on the table
as
the
wood
approaches the
blade
Cautions:
If
the
wood
is
not
flat
it
can
cause
the
blade
to
suddenly
catch
the
wood
causing
sudden
shock
to
teeth
or
wood
Both
teeth
and
wood
can
shatter
with
unpleasant
results.
2. Support the work after
it
passes the blade
co
avoid losing control
of
the end
of
the cut.
Note:
A
catch
table
behind
your
saw
or
a
set
of
rollers
will
help
to
avoid ruining
valuable
work
and
help
prevent
injury.
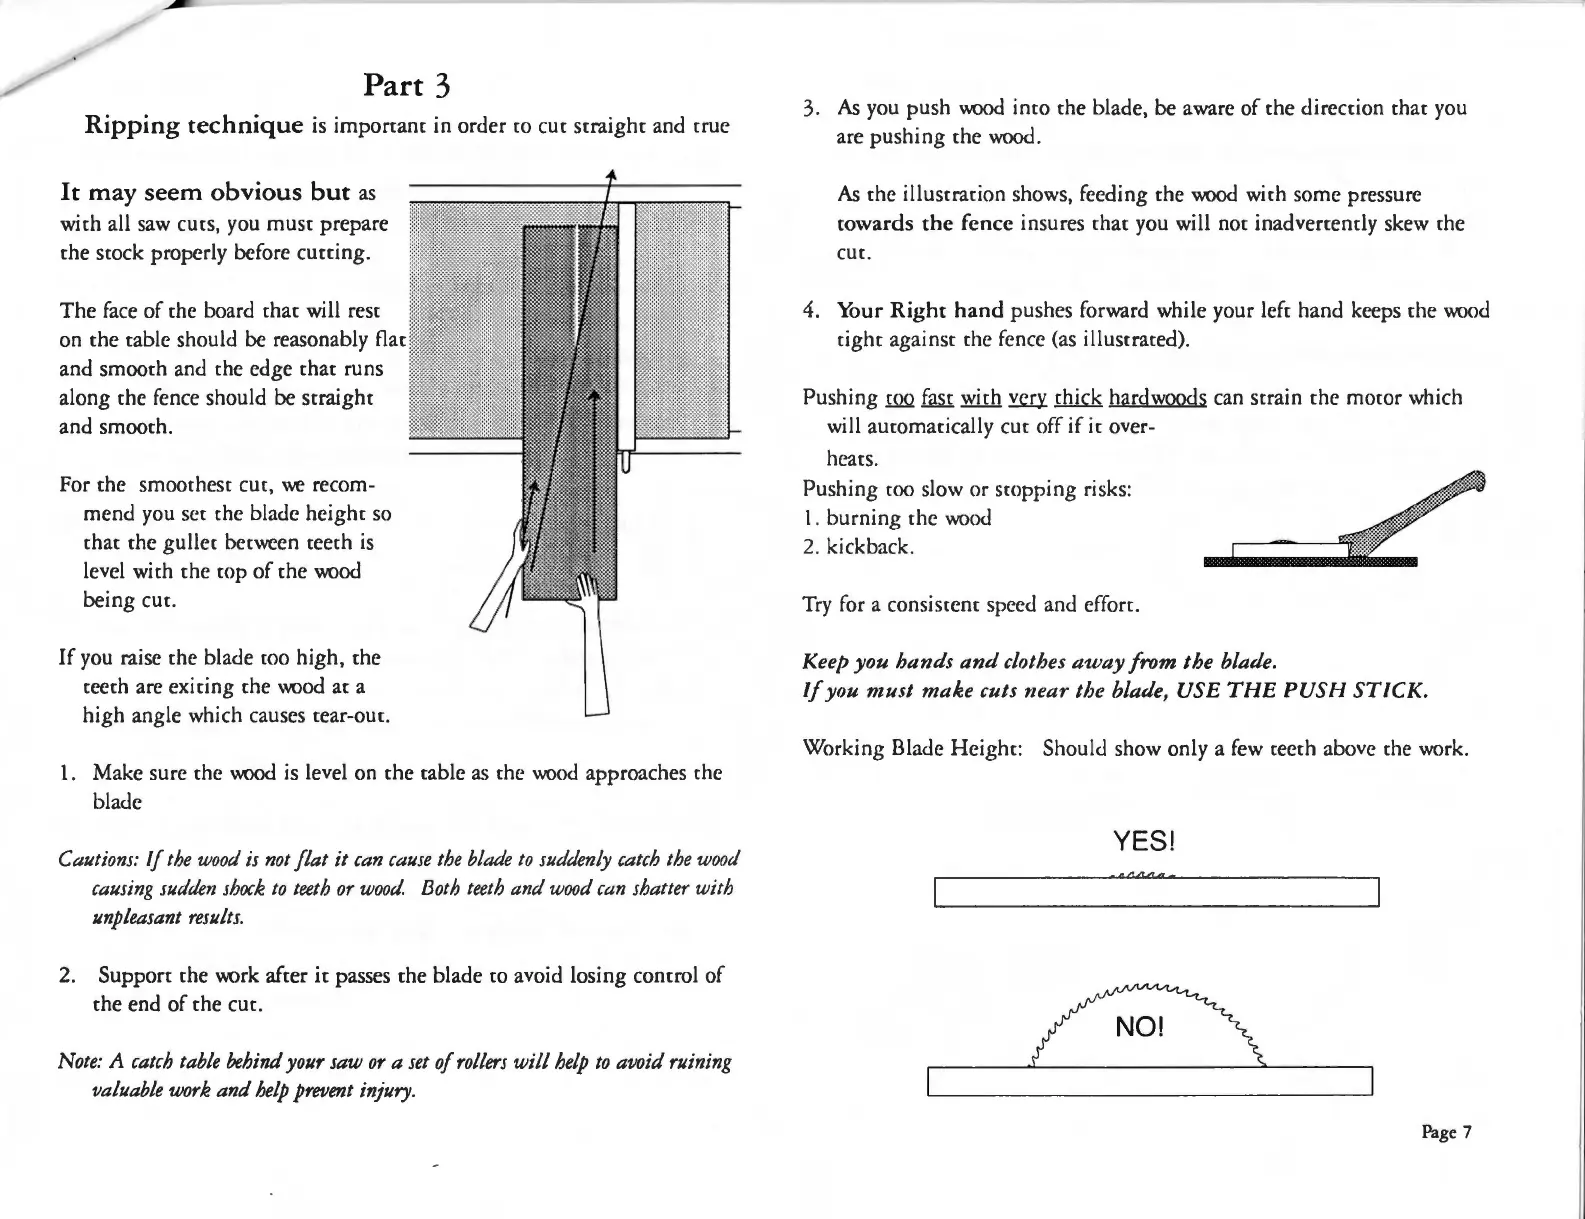
3.
As
you push
wood
imo
the blade, be aware of the direction that you
are pushing the
wood.
As
the illustration shows, feeding the
wood
with some pressure
towards
the
fence insures that you will not inadvertently skew the
cut.
4. Your
Right
hand
pushes forward while your left hand keeps the
wood
tight
against the fence (as illustrated).
Pushing
IQQ
fufil.
with
~
chick hardwoods can strain the momr which
will aucomatically
cue
off
if
ic
over-
heats.
Pushing too slow or srnpping risks:
l.
burning
the
wood
2. kickback.
Try for a consistent speed and effort.
Keep you hands
and
clothes
away
from the blade.
If
you
must
make
cuts near the blade, USE
THE
PUSH
STICK.
Working Blade Height: Should show only a few teeth above the work.
YES!
Page 7