List of figures
Figure 1 Radar baseboard XMC4700 ................................................................................................................. 5
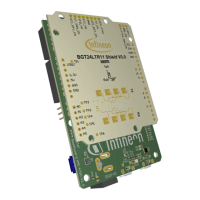
Figure 2 BGT24LTR11 radar shield .................................................................................................................... 6
Figure 3 Resistors to be removed for I
2
C communication ............................................................................... 7
Figure 4 Jumper selection for IOREF ................................................................................................................ 8
Figure 5 Use SPI pins on P3 instead of P7 (ISCP) .............................................................................................. 8
Figure 6 Downloading the Arduino IDE ............................................................................................................. 9
Figure 7 Arduino IDE: File > Preferences ......................................................................................................... 10
Figure 8 Entering the location from which the package can be downloaded .............................................. 10
Figure 9 Installing the XMC package ............................................................................................................... 11
Figure 10 Selecting XMC baseboard ................................................................................................................. 11
Figure 11 Including and using the Library in Arduino sketch .......................................................................... 12
Figure 12 Declaring Pulsed Doppler Radar object ........................................................................................... 12
Figure 13 Initializing hardware and parameters for Pulsed Doppler Radar .................................................... 13
Figure 14 Example for callback function definition ......................................................................................... 15
Figure 15 Call run() in main loop() .................................................................................................................... 16
Figure 16 Accessing example sketches from this library ................................................................................. 17
Figure 17 Example sketch: Radar_Pulsed_Doppler_LED ................................................................................. 18
Figure 18 Compiling the sketch ........................................................................................................................ 18
Figure 19 Compilation successful ..................................................................................................................... 18
Figure 20 Attach the BGT24LTR11 radar shield to the radar baseboard XMC4700 ......................................... 19
Figure 21 Connect USB cable to debug port .................................................................................................... 19
Figure 22 Uploading code onto board .............................................................................................................. 20
Figure 23 Observe LED color change with motion ........................................................................................... 20
Figure 24 Example sketch: RadarPulsedDopplerLED_Andee_RGB ................................................................. 21
Figure 25 Compiling the sketch ........................................................................................................................ 21
Figure 26 Compilation successful ..................................................................................................................... 22
Figure 27 Attach the BGT24LTR11 shield to the radar baseboard XMC4700 ................................................... 22
Figure 28 Stacking the RGB LED lighting shield onto the radar baseboard XMC4700 .................................... 23
Figure 29 Stacking the Annikken Andee U shield onto the set-up ................................................................... 23
Figure 30 Jumper wire connections on the Andee U ....................................................................................... 24
Figure 31 Connect the USB cable onto the debug port ................................................................................... 24
Figure 32 Uploading the code onto the board ................................................................................................. 25
Figure 33 Application starts with white light .................................................................................................... 25
Figure 34 Andee app – scan for devices ............................................................................................................ 25
Figure 35 Andee app – connect to device ......................................................................................................... 26
Figure 36 Andee app – GUI upon successful connection ................................................................................. 26
Figure 37 Changing pre-defined fast speed threshold ..................................................................................... 27
 Loading...