www.insigniaproducts.com
16
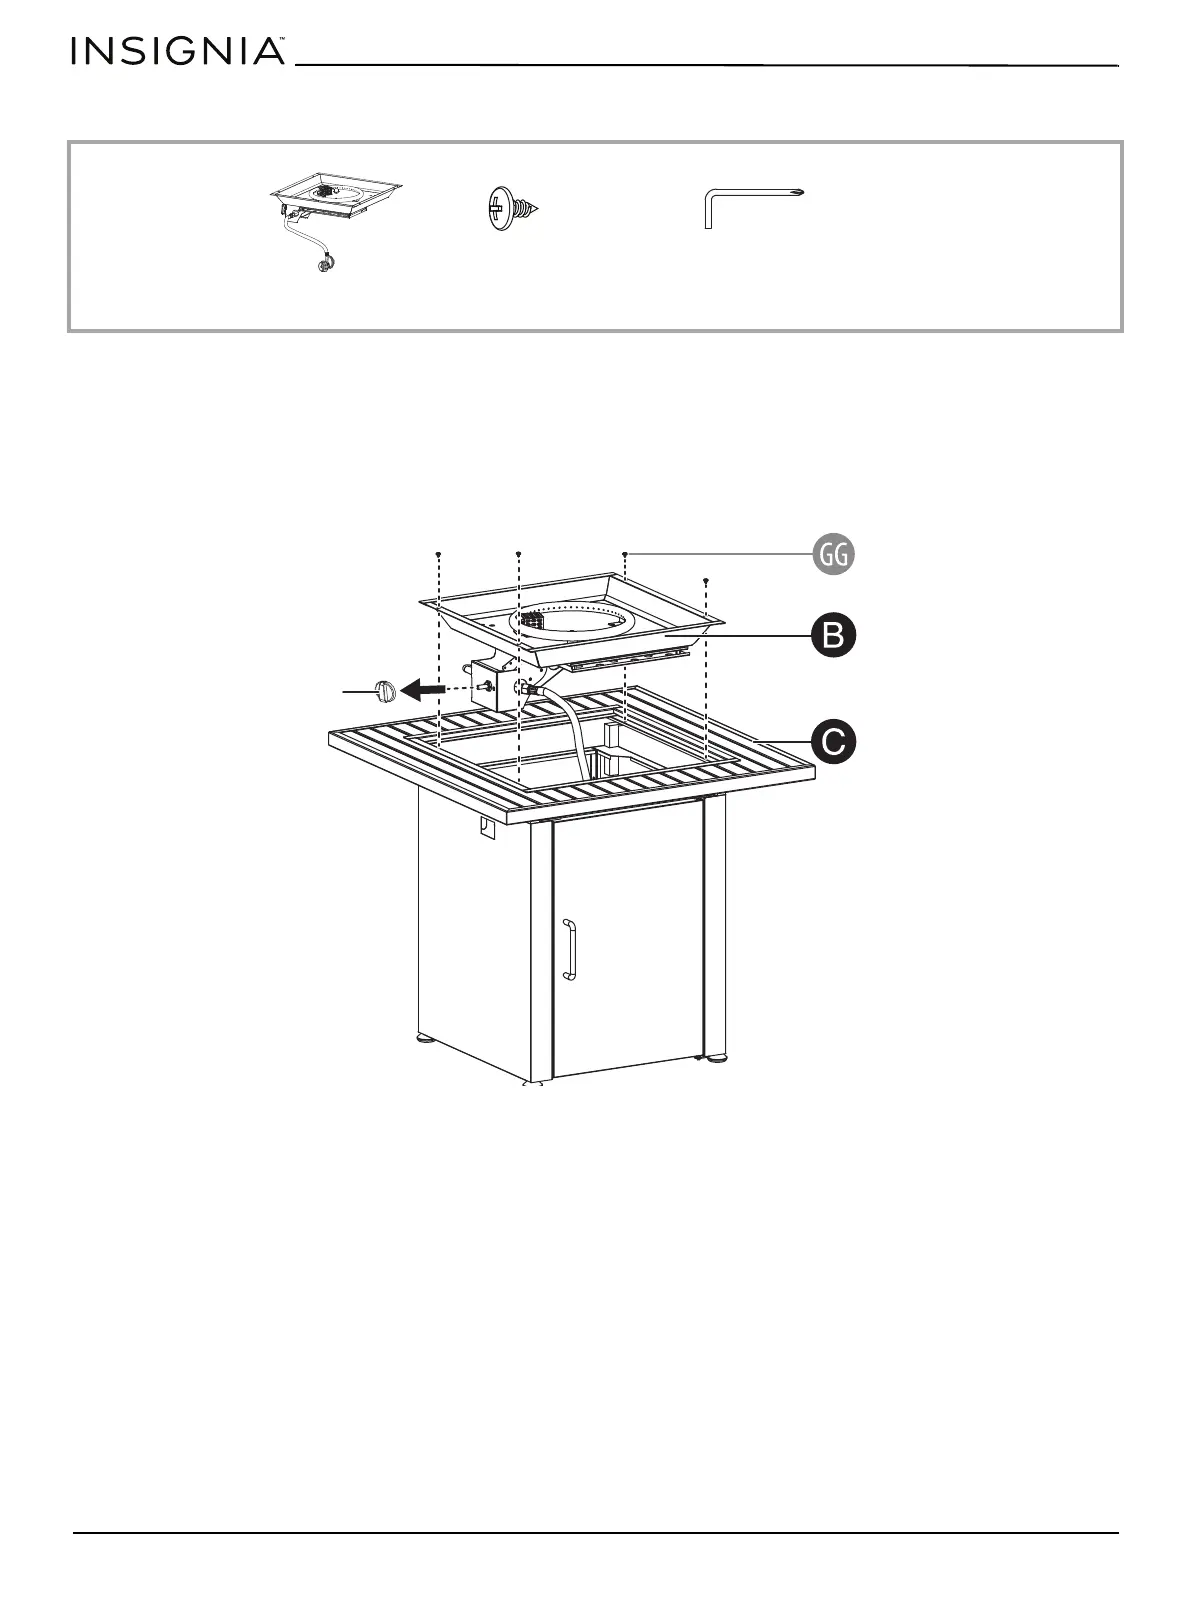
STEP 5: Installing the burner assembly
You need
1 Turn the table assembly upright.
2 Remove the knob from the burner assembly by pulling it outward off the shaft.
3 Place the burner assembly (B) into the square cutout in the table (C) so that the four screw holes in the burner assembly
align with the holes in the square cutout in the table.
4 Secure the burner assembly (B) to the table (C) with four STA4.2 x 12 mm bolts (GG). Tighten the bolts with the Phillips
screwdriver (FF).
GG ST4.2 x 12 mm bolt
B burner assembly
FF Phillips screwdriver
Top of your fire table
Knob

 Loading...