The steam release valve fits loosely. It does not lock tightly into the lid.
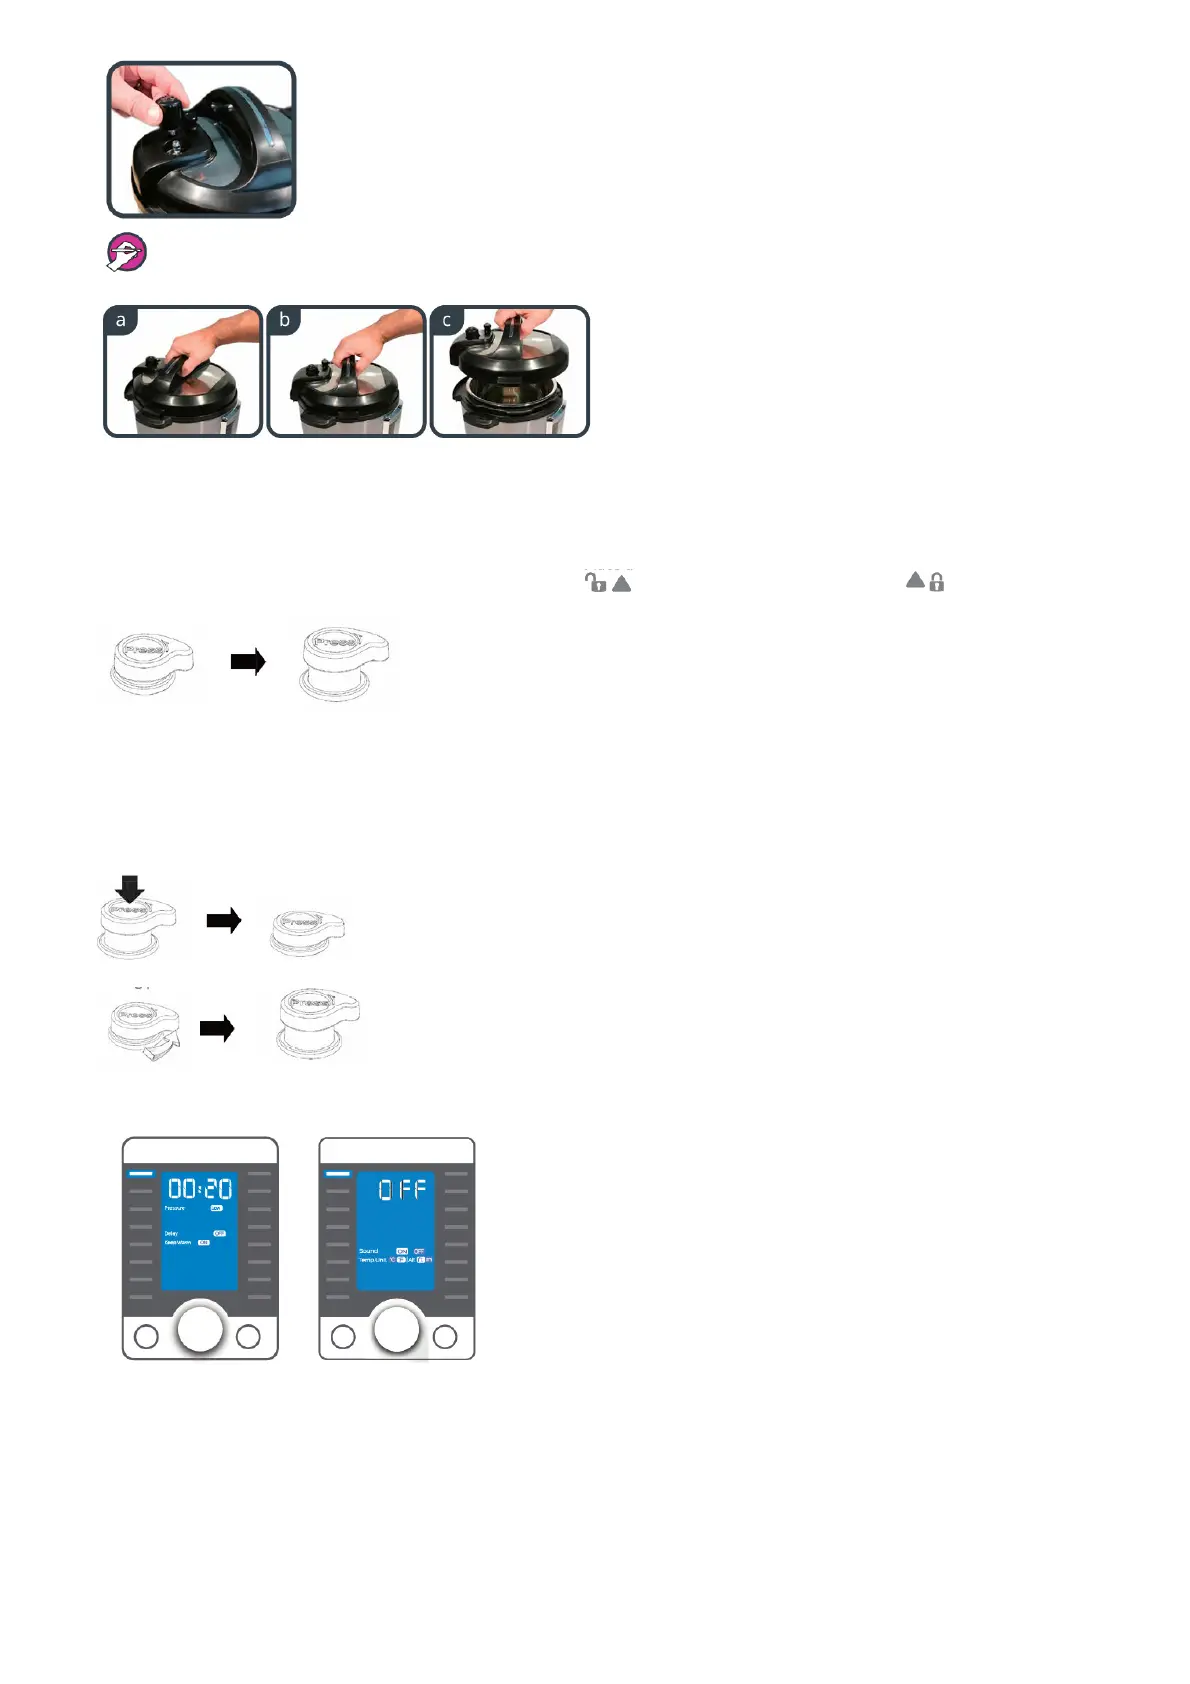
3. Remove the lid by holding the handle, turning the lid counter-clockwise and lifting the lid.
4. Remove the inner pot from the pressure cooker. Add food and liquid into the inner pot as the recipe directs. If steaming, place the steam rack on the
bottom of the inner pot first. Always add at least 2 cups (~18 fl oz / 500 mL) of liquid for minimum liquid requirement. See “Cooking and Safety Tips” on
page 20-21.
5. Make sure the outside of the inner pot is dry prior to placing the inner pot back into the pressure cooker. Make sure there is no food debris on the heating
element.
6. Make sure the sealing ring rack is completely set in the groove on the inside of the sealing ring. Ensure there is no deformation on the sealing ring rack.
Do not attempt to repair a deformed ring rack.
7. Place the lid on the pressure cooker, align the ▼ mark on the lid with the ‘ (unlock) mark and turn clockwise to the (lock) mark.
8. The Quick Release button will automatically reset and pop up to the Sealing position when the lid is closed (button up = sealed).
Pressure Cooking
The following are all pressure cooking programs: Ultra, Pressure Cook, Meat/Stew, Soup/Broth, Bean/Chili, Steam, Sterilize, Rice, Multigrain, Porridge, Egg and
Cake.
1. How the Quick Release button works: when the lid is closed, the Quick Release button will automatically pop up to the Sealing Position (button up =
sealed).
For Quick Release – press down the Quick Release button until it clicks and locks into the Venting position.
To Stop Quick Release – slightly turn the Quick Release button counter clockwise until it pops up to the Sealing
posit
2. Connect the power cord. The default cooking program Pressure Cook flashes and the LCD displays the program settings. Press Start to begin cooking right
the way, or adjust program settings according to page 13.
When the cooker is idle for 30 seconds, the LCD will display OFF, indicating
3. To begin cooking, follow these steps:
 Loading...