This document is a "Get Started" guide for the Instant™ Vortex™ Plus 10L Air Fryer Oven, designed to help users cook delicious meals with less oil and hassle.
Function Description
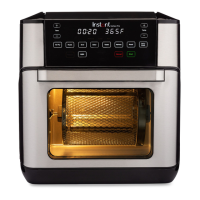
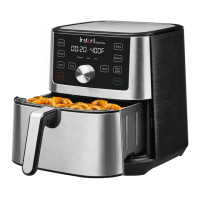
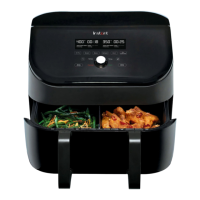
The Instant™ Vortex™ Plus 10L is an air fryer oven that utilizes rapid air circulation, also known as Even Crisp Technology™, to crisp or cook food, providing the rich, crispy flavor of deep frying with minimal oil. It is a versatile appliance capable of performing multiple cooking functions, including air frying, roasting, baking, grilling, dehydrating, and reheating. Additionally, it features a rotisserie function that rotates food during cooking for even and delicious results.
Usage Features
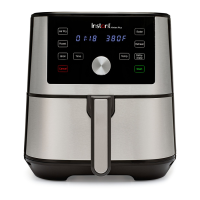
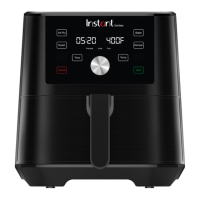
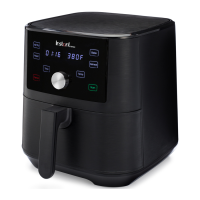
Control Panel and Settings:
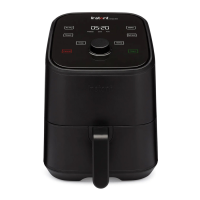
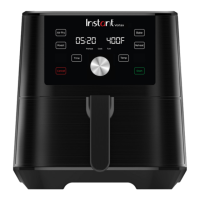
The appliance features a simple and easy-to-read control panel.
- Message Bar: Displays cooking time, temperature, messages, and error codes.
- Temperature Control: Allows users to increase or decrease cooking temperature.
- Time Control: Allows users to increase or decrease cooking time.
- Smart Programs: Dedicated buttons for various cooking functions: Air Fry, Roast, Grill, Bake, Reheat, and Dehydrate.
- Rotate: Activates the rotisserie rotation for applicable programs.
- Light: Turns the internal light on/off.
- Cancel: Stops the current program.
- Start: Initiates the cooking program and saves custom settings.
Sound and Temperature Scale:
- Sound On/Off: Users can toggle notification sounds by pressing and holding "Time -" and "Temp -" for 5 seconds in Standby mode. Error alerts cannot be turned off.
- Temperature Scale: The display can show temperature in Fahrenheit (°F) or Celsius (°C) by pressing and holding "Temp +" and "Temp -" for 5 seconds in Standby mode.
Custom Settings and Reset:
- Save Custom Settings: Users can adjust and save custom Time and Temperature settings for Smart Programs. This is done by selecting a Smart Program, adjusting Temp and Time, and then pressing Start. These settings are saved for future use of that specific program.
- Reset Individual Smart Programs: To restore a single Smart Program to its factory default, press and hold its button for 5 seconds in Standby mode.
- Reset All Smart Programs: To restore all Smart Programs to their factory defaults, press and hold "Temp +" and "Time +" simultaneously until the cooker beeps.
Cooking Process (General):
- Preparation: Cut, chop, season, marinate, or batter ingredients according to the recipe.
- Placement: Place food on the appropriate cooking utensil (cooking tray or drip pan) and insert it into the air fryer. Close the door.
- Program Selection: Select the desired Smart Program.
- Temperature/Time Adjustment: Adjust temperature using "Temp +/-" buttons and cooking time using "Time +/-" buttons.
- Start: Press "Start" to begin. The display will show "On" during pre-heating. Once the target temperature is reached, the countdown timer begins.
- Turn Food (if applicable): For some programs, "Turn Food" will display partway through the cycle. Users should open the door, turn/flip/rotate the food, and close the door. If the door is not opened, cooking will resume after 10 seconds.
- Finish: When the program completes, the air fryer beeps and displays "End." The air fryer will beep again after 5, 30, and 60 minutes as a reminder.
Specific Cooking Programs:
- Air Fry: Ideal for fries, cauliflower bites, wings, nuggets. Uses perforated cooking trays for airflow. Default: 400°F / 205°C, 18 minutes.
- Roast: For beef, lamb, pork, poultry, vegetables, scalloped potatoes. Default: 380°F / 193°C, 40 minutes.
- Bake: Functions as a "mini oven" for breads, cakes, pastries, buns. The drip pan can be used as a flat surface. No need to turn food. Ensure 1 inch / 2.5 cm space around baking dish. Default: 365°F / 185°C, 30 minutes.
- Grill: Uses direct top-down heating for melting cheese on French onion soup, nachos. No need to turn food. Default: 400°F / 205°C, 8 minutes. Temperature is not adjustable for Grill.
- Dehydrate: Uses low heat over a long period for dried fruit, jerky, dried vegetables. No need to turn food. Default: 120°F / 49°C, 7 hours.
- Reheat: Brings crispness back to leftovers like fries, pizza, stale bread. Default: 280°F / 138°C, 10 minutes.
Rotisserie Cooking:
- Accessories: Rotisserie basket for smaller foods (perforated for airflow), rotisserie spit and forks for larger foods (whole chicken, tenderloin).
- Preparation: Spray basket with non-stick spray if desired.
- Loading:
- Basket: Place food in the basket (do not overfill), align the tab with the notch in the lid, and turn clockwise to secure.
- Spit and Forks: Unscrew setting screws, remove forks, push food onto the spit, slide forks onto both ends, ensure prongs are securely inserted, and tighten setting screws.
- Insertion into Air Fryer:
- Open the oven door and slide the rotisserie basket or spit onto the guides in the cooking chamber.
- Move the red rotisserie catch lever to the right and hold it. The catch inside the chamber will withdraw slightly.
- Align the left side of the accessory with the hole in the rotisserie catch, and set the right end in the notch on the right.
- Release the rotisserie catch lever.
- Rotate the accessory to ensure it is securely held and the rotisserie catch "catches" it completely.
- Close the oven door.
- Activation: After starting a program (Air Fry or Roast), touch "Rotate" to begin rotisserie rotation.
- Removal:
- Open the oven door.
- Position the hooks of the rotisserie lift beneath the left and right arms of the accessory.
- Move the rotisserie catch lever to the right and hold it to release the accessory.
- Pull the accessory towards you, then release the catch lever.
- Use the rotisserie lift to carefully remove the accessory and place it on a heat-resistant surface.
Safety Precautions:
- Hot Surfaces: The appliance and accessories become very hot during and after cooking. Always use oven mitts and exercise extreme caution. Place hot accessories on a heat-resistant surface.
- Airflow: Do not block air intake or air vents. Leave at least 5 inches / 13 cm of space around all sides of the appliance for sufficient airflow.
- Placement: Place on a stable, non-combustible, level countertop. Do not place near hot gas/electric burners, heated ovens, water, or flame. Do not use outdoors or in direct sunlight.
- Overfilling: Do not overfill to prevent food from contacting the heating element.
- Oil: Do not pour oil directly into the cooking container. Spray food lightly with non-stick cooking spray if needed.
- Moving: Do not move the appliance while in use.
- Children: Close supervision is necessary when children or persons with reduced capabilities are near the appliance.
- Black Smoke: If black smoke is emitted, press Cancel, unplug immediately, wait for smoking to stop, then clean thoroughly.
Maintenance Features
Cleaning (After Each Use):
Always allow all parts to cool to room temperature before cleaning. Ensure all surfaces are dry before use or storage. Unplug the appliance before cleaning to prevent electric shock. Do not immerse the power cord, plug, or appliance in water or other liquid.
- Drip Pan: Dishwasher safe. Remove for cleaning. Ensure grease and food debris are fully removed to prevent smoking. Has a non-stick coating; avoid metal utensils.
- Cooking Trays: Dishwasher safe. Have a non-stick coating; avoid metal utensils.
- Rotisserie Basket: Dishwasher safe. For best results, use a bristled brush rather than a sponge or cloth.
- Rotisserie Spit, Forks, and Screws: Dishwasher safe. Disassemble before cleaning. If machine washing, place small parts in a washable mesh bag.
- Rotisserie Lift: Dishwasher safe. Clean as needed.
- Removable Door: Clean with a damp cloth and mild dish soap. Allow the door to air dry completely before reinstalling to prevent glass clouding.
- Cooking Chamber: Clean with a damp cloth and mild dish soap. Regularly check and clean the heating coil and chamber walls for oil spatter and food debris. Ensure the heating coil is dry before turning on the air fryer oven. For baked-on grease/residue, spray with a mixture of baking soda and vinegar, wipe with a damp cloth. For stubborn stains, let the mixture sit for several minutes before scrubbing.
- Power Cord: Wipe any particles off the cord with a barely-damp cloth.
Storage:
- Let the appliance cool to room temperature before storage.
- Do not store any materials in the appliance when not in use.
- Do not place combustible materials (paper, cardboard, plastic, Styrofoam, wood) in the appliance.