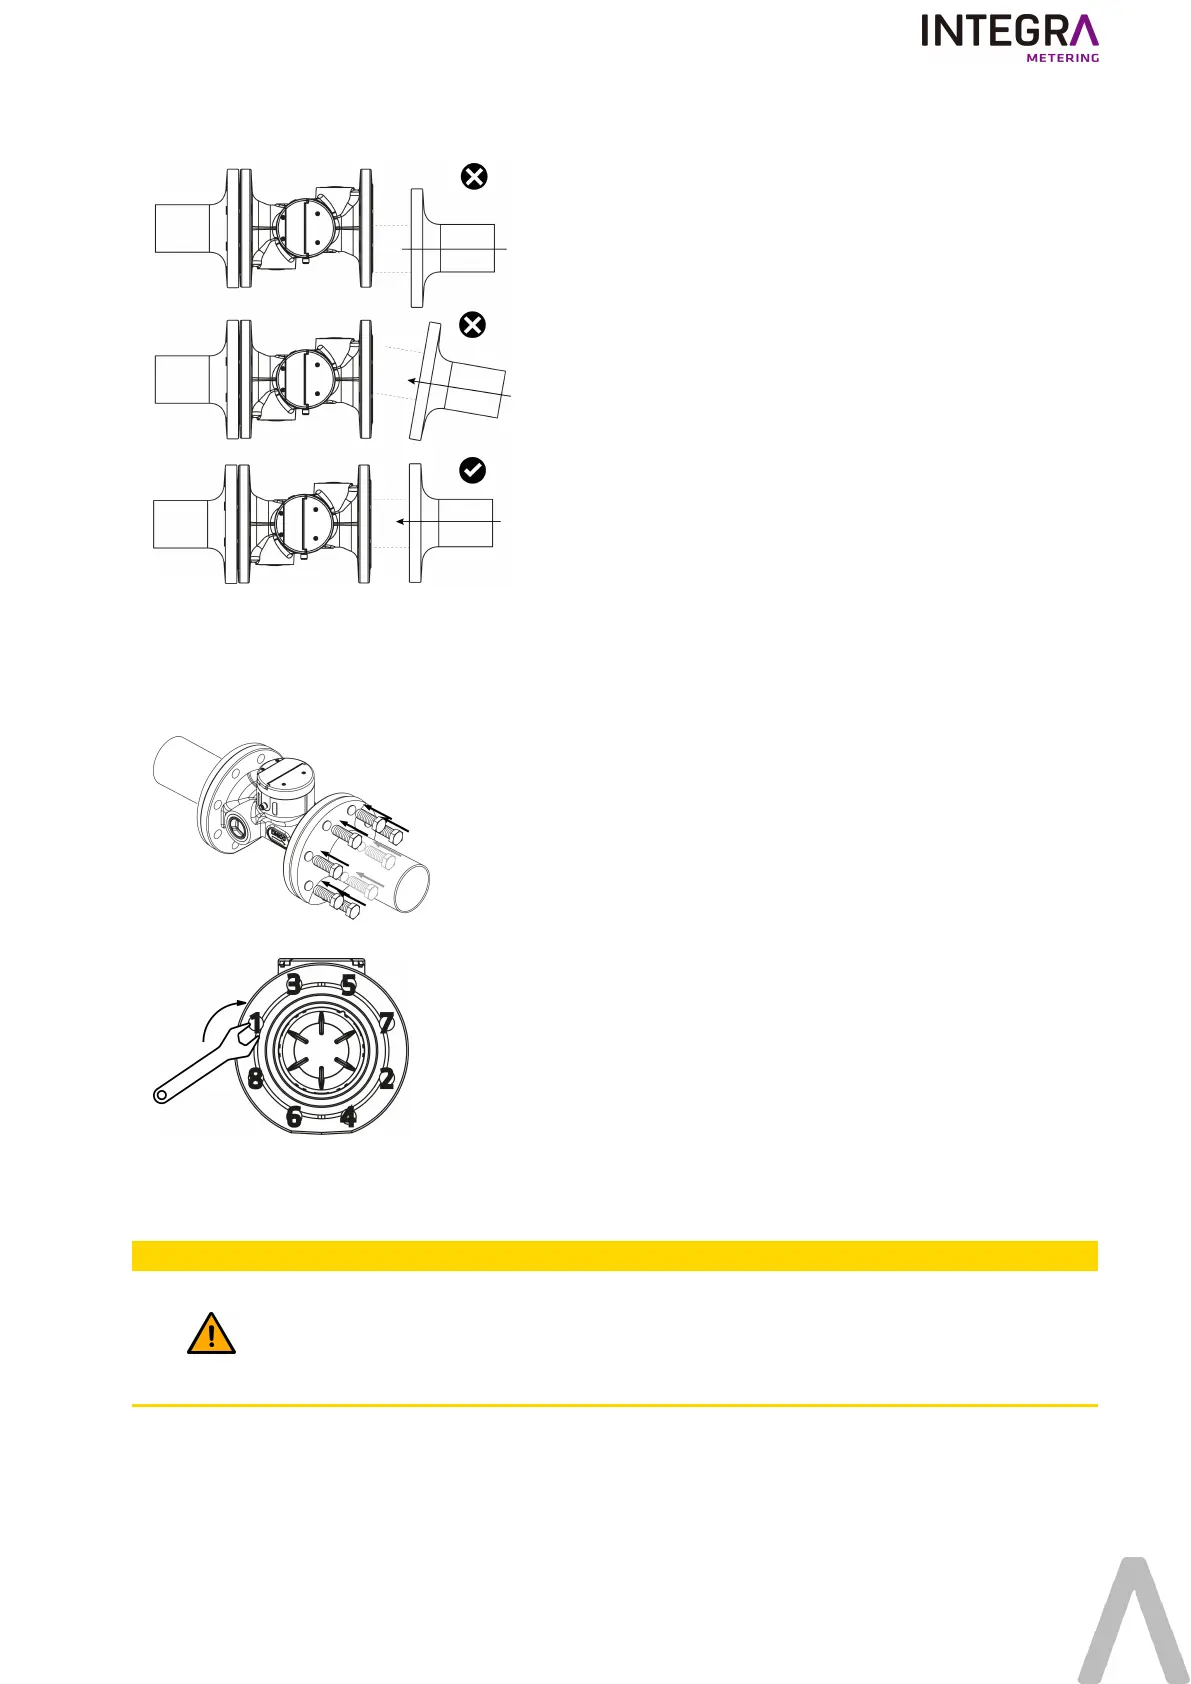
3. The installation of the meter should not be done with force or strain, make sure that the meter is aligned.
4. Remove old seals and clean sealing faces.
5. Site-provided seals must be suitable for the purpose and comply with the local guidelines and directives.
Only fit the new seals (the seals should not intrude into the pipeline).
6. Thinly grease sealing faces (use acid-free, potable-water approved grease).
7. Put the screws and nuts in their places.
8. Tighten in a crosswise fashion (order image below) to a minimum torque of 30 Nm, maximum torque 50 Nm.
9. Slowly fill the pipeline with water on completion of the installation. Avoid the collection of air bubbles in the meter during
the installation process.
10. Check that the screen turns ON after 30 sec to 1 minute (depending on the amount of ain in the network).
CAUTION
Caution
When the connector output is used (Pulse acquisition, M-Bus connection), the following requirements apply:
l
The cable must be unroll.
l
The maximal cable length is 25m. INTEGRA Metering provides adapted cables with various length.
6/13 1-320-UM-EN-03
 Loading...