Integra
®
Luxtec
®
9300XSP 300 Wa Xenon Light Source
6
3
4
5
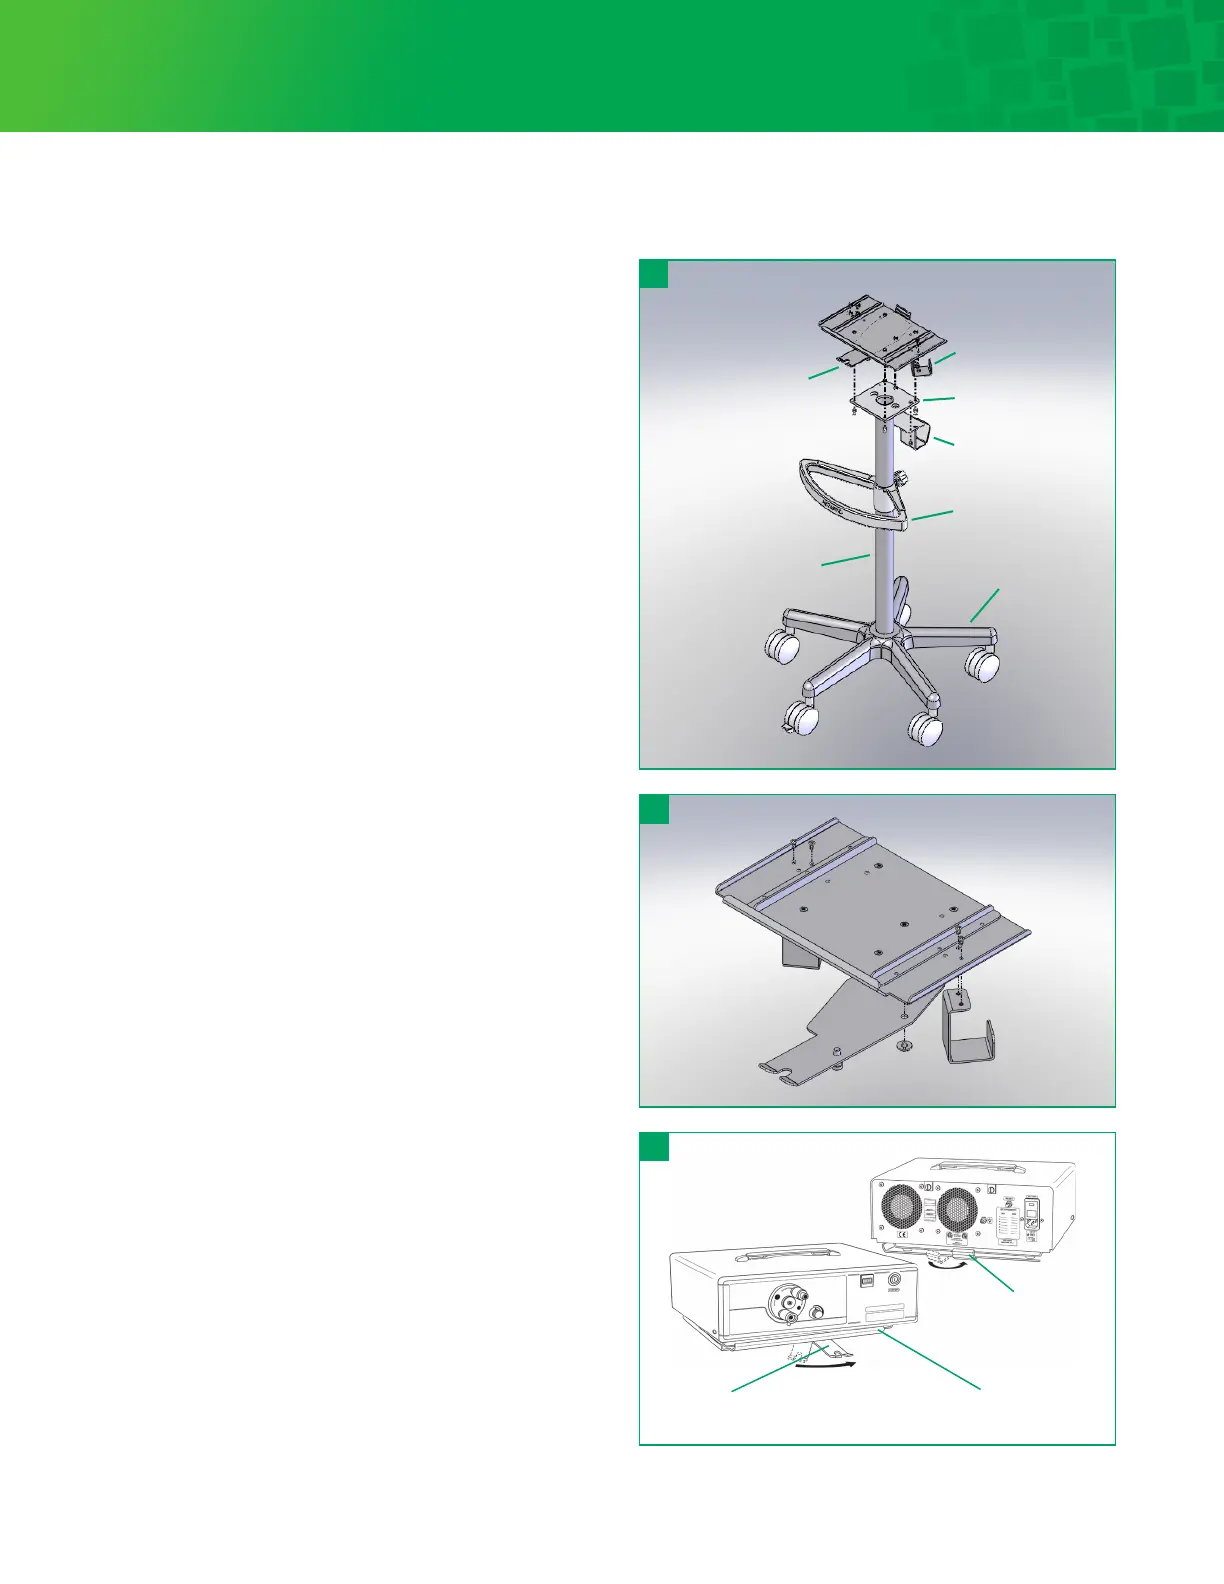
There are four (4) parts to the floor stand assembly:
See Figure 3.
1. Base with five (5) casters (2 locking)
2. One column with light source base plate
3. Handle Adjustable
4. XSP light source Interlocking Adapter Plate
Floor stand assembly instructions:
1. With the handle positioned so that the Interga / Luxtec®
logo is properly aligned, slide the handle onto the column
and center the handle about 5 inches (13cm) below the light
source base plate. Tighten handle screw to hold in place.
2. Insert assembled column into the base. Seat firmly.
3. Aach the XSP light source Interlocking Adapter Plate
onto the base plate with the four (4) screws provided.
4. Open the interlocking adapter Plate by pulling down on
the plunger and sliding the lever to the “open” position as
labeled. The interlocking adapter base is now ready to
receive the Light Source.
Installation of Light Source to Floor Stand
1. Place Light Source on the floor stand base so the front edge
is up to the rim of the base. Verify that all rubber feet of the
Light Source are positioned on the base.
2. Slide the interlocking adapter plate to the lock position.
The plate plunger will snap into the locked position.
Figure 5.
3. Check the rear of the Light Source to be sure the floor stand
plate captures the support plate underneath the Light
Source and is secure. Figure 5.
Seing Up
Before turning power on the Light Source, make sure the
unit is plugged into any standard 100V to 240V 50/60Hz (as
appropriate) three-conductor outlet. Grounding reliability
is guaranteed only when connected to a “hospital grade”
receptacle.
Optional Floor Stand Assembly
Swivel-top base
Interlocking adapter
plate (rear)
Interlocking adapter plate
plunger lever (“locked” position)
Interlocking
adapter plate
One-piece column
Fiber optic
cable holder
Mounting plate
Power cord hanger
Adjustable handle
Casters base
 Loading...